Showing posts with label Bacon. Show all posts

Monday, January 6, 2025

Bacon Tortellini Alfredo

Krystal tried this recipe and really liked it, so she asked me to post it for her. We have also since tried it and love it too!


Bacon Tortellini Alfredo

Ingredients:

  • 2 (9-ounce) packages refrigerated cheese tortellini  
  • 6 strips bacon, cut into small pieces  
  • 1 clove garlic, minced  
  • 1/4 cup chicken broth  
  • 1 cup heavy/whipping cream  
  • 4 ounces cream cheese, softened  
  • 1 cup freshly grated Parmesan cheese  
  • Salt and pepper, to taste  

Directions:

  1. Boil a large pot of salted water for the tortellini. Start cooking the tortellini once the bacon is done, as it will only take a few minutes to cook.  
  2. Cut the bacon into small pieces. Fry it in a skillet over medium-high heat until crispy, which should take about 10 minutes.  
  3. Remove the pan from the heat and transfer the bacon to a paper towel-lined plate. Drain most of the bacon fat from the pan, leaving about 1 tablespoon.  
  4. Stir in the minced garlic, chicken broth, heavy cream, and softened cream cheese. Return the pan to medium heat, stirring until the sauce is smooth and reduced to your liking, approximately 5 minutes.  
  5. Stir in the grated Parmesan cheese and cooked bacon. Remove the pan from heat and toss the sauce with the drained tortellini. If the sauce is too thick, thin it with a few spoonfuls of hot pasta water before draining. Season with salt and pepper to taste. 

Marsha's Notes:
I really prefer crispy bacon, and even pan-frying your bacon in advance and then adding it back to the pan while you are cooking the sauce led to the bacon getting softer, so I might recommend, if you like crispy bacon, waiting until you are just about to plate the dish before adding your bacon back in. Just keep in mind that you will be adding salty bacon at the end when adjusting your seasonings in the sauce.

Tuesday, July 2, 2024

Sauteed Zucchini and Corn with Bacon

Always looking for more ways to get the boys to eat vegetables, so this bacon and zucchini corn recipe seemed like a safe choice, since the boys eat both of those veggies. And it was a hit! I got the original recipe from Belly Full, here: https://bellyfull.net/corn-zucchini-saute/#wprm-recipe-container-24715

To use an entire onion, and because our family of five can currently eat an entire side dish in one sitting, I decided to double the recipe and have leftovers, so my version is just a touch different, but basically the same.


Sauteed Zucchini and Corn with Bacon

Ingredients:

  • 1 pkg sliced raw bacon, diced
  • 2 tablespoon unsalted butter
  • 1 small diced red onion
  • 2 zucchinis, diced
  • 2 small pkg frozen corn
  • 2 cloves garlic, minced
  • 1 teaspoon kosher salt
  • 1/2 teaspoon black pepper
  • pinch of cayenne pepper
  • Parmesan, if desired

Directions:

  1. Sauté bacon in a large nonstick skillet until crispy and the fat has rendered, 5 to 8 minutes. Drain off excess fat if needed.
  2. Add in the butter and onion; sauté for 3 minutes until softened.
  3. Add zucchini and frozen corn and cook, stirring occasionally, until crisp-tender, 4 minutes.
  4. Add in garlic, salt, black pepper, and cayenne. Add Parmesan, if desired. Cook, stirring occasionally, until corn is tender, about 3 minutes more.
  5. Serve immediately and enjoy!

Tuesday, June 25, 2024

Boursin, Bacon and Broccoli Gnocchi

Our family loves some good gnocchi. While some of the boys picked out the broccoli, I think this recipe was a hit. Here is the original recipe: https://www.dontgobaconmyheart.co.uk/boursin-bacon-and-broccoli-gnocchi/


Boursin, Bacon and Broccoli Gnocchi

Ingredients:

  • 250g / 9oz Broccoli, sliced into small bite-sized pieces (weight is of the sliced broccoli)
  • 1 tbsp Olive Oil
  • 1/4 tsp EACH: Salt, Black Pepper, plus more as needed
  • 150g / 5.3oz bacon, diced
  • 2 small Shallots, finely diced
  • 180ml / 3/4 cup low-salt Chicken Stock (see notes)
  • 1x 150g/5.3oz block of Garlic & Herb Boursin Cheese, leave at room temp
  • 60ml / 1/4 cup Single Cream/Half & Half, leave at room temp
  • 20g / 1/4 cup freshly grated Parmesan
  • 500g / 1lb uncooked Gnocchi (see notes)
  • 1 tbsp finely diced Fresh Parsley, to serve (optional)
Directions:
  1. Preheat the oven to 390F. Add the broccoli to a small baking tray and toss with 1 tbsp olive oil and 1/4 tsp salt and pepper. Roast in the oven for 15-18 minutes, or until lightly charred and fork tender (timings will vary so just be vigilant).
  2. Meanwhile, add the bacon to a large pan over medium heat and fry until crispy with the fat rendered down. Remove the bacon and place to one side, leaving the excess fat in the pan. Add the shallots and fry until soft and golden.
  3. Pour in the stock then stir in the Boursin until it melts. Stir in the cream and parmesan, then gently simmer for a couple of minutes until the sauce begins to thicken.
  4. During this time bring a large pot of salted water to a boil. Add the gnocchi and cook for 1 minute, then use a slotted spoon to transfer it into the sauce. Stir to coat the gnocchi in the sauce, then stir in the bacon and broccoli. Turn the heat to low and gently stir for another minute or so until the sauce re-thickens. If it over-thickens at any point just stir in a splash of the leftover gnocchi water.
  5. Check for seasoning and adjust if needed, then serve with fresh parsley and enjoy!

Wednesday, March 20, 2024

Crockpot Chicken Bacon Ranch Pasta

I have really liked a lot of the recipes from Cooking in the Midwest, and this was another good one. The one difference we did was probably use more chicken, plus we added an extra jar of sauce because it was just not saucy enough for us. Otherwise, we followed the directions as listed. Here is a link to the original recipe, and here is our "two jar" version. Enjoy!

https://cookinginthemidwest.com/blog/crockpot-chicken-bacon-ranch-pasta/


Chicken Bacon Ranch Pasta

Ingredients:

  • 2 lbs chicken breast
  • 1/2 tsp each of salt, pepper, paprika, and onion powder
  • 1 TBSP ranch seasoning
  • 1 TBSP minced garlic
  • 2-15 oz jars Alfredo Sauce, divided
  • Cooked/chopped bacon 6 pieces
  • 1-2 cups shredded mozzarella
  • 1 16 oz box of pasta

Directions:

  1. Add chicken breasts to a crockpot.
  2. Season with salt, pepper, paprika, onion powder, and ranch seasoning.
  3. Add 1 TBSP of minced garlic and 1 jar of Alfredo sauce.
  4. Cook on low for 4-6 hours.
  5. Shred or cube up the chicken and add it back to the crockpot.
  6. Cook pasta according to the directions on the box.
  7. While the pasta is cooking on the stove, add about a cup of shredded cheese and the chopped bacon to the crockpot. Stir well.
  8. Add cooked pasta to the crockpot and stir everything together. If needed, add most or all of the other jar of Alfredo sauce.

Wednesday, August 24, 2022

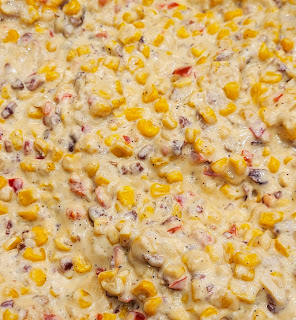
Creamy Confetti Corn with Bacon

Chris has decided that he LOVES this new way to have his favorite veggie... CORN! The original recipe is from Mel's Kitchen Cafe (see here: https://www.melskitchencafe.com/creamy-confetti-corn/) but I tweaked this recipe to suit our family better. Enjoy!

Cream Confetti Corn with Bacon

Ingredients:

  • 1 pkg. pre-cooked bacon strips, chopped
  • 2 packages (12-ounces each) frozen corn kernels, white or yellow
  • ½ cup chopped onion, white, yellow or red
  • ½ cup finely chopped red bell pepper
  • 8-ounce package cream cheese, light or regular, cubed
  • 1-2 tablespoons milk
  • 1 teaspoon sugar
  • ½ teaspoon salt
  • 1 teaspoon pepper
  • A couple handfuls of shredded cheese
Directions:

  1. In a large nonstick skillet, heat a couple tbl of cooking oil.
  2. Add the corn, onion, and red pepper, and cook over medium heat, stirring every so often, until the vegetables are tender and the corn is heated through, 6-8 minutes or whenever things start to brown up in the bottom of the pan. Add the cream cheese and milk, stirring until the cream cheese melts and the mixture is evenly combined.
  3. Stir in the sugar, salt and pepper. Add more salt to taste if needed. I sometimes add a sprinkle of garlic salt over the entire pan.
  4. Top with shredded cheese. Stir to melt and combine. Serve warm.
Note for Krystal:
You can totally leave the onion and pepper out of this recipe and just make a cheesy, creamy corn instead. It just won't be very colorful or "confetti" anymore.

Monday, February 17, 2020

Cheddar Bacon Toasts

I found this recipe years ago and am now copying it here from our family cookbook binder. Enjoy!


Cheddar Bacon Toasts
Ingredients:
  • 2 cups (8 oz.) shredded cheddar cheese
  • ¾ cup mayonnaise
  • 1/3 cup crumbled cooked bacon or (real) bacon bits
  • 1 loaf French bread (1 lb.)
Directions:
  1. In a bowl, combine the cheese, mayonnaise and bacon.  
  2. Cut the bread into 24 slices, each about ½ inch thick.  
  3. Spread the cheese mixture on one side of each slice.  Place on a baking sheet.  
  4. Bake at 425 degrees for 8-10 minutes, or until golden brown.
Marsha's Notes:
I like to use sharp cheddar for these.

Thursday, November 7, 2019

Bacon Wrapped Chicken

Scott requested this for Father's Day 2025, so I took some updated pictures and notes. Enjoy!


Marsha's Bacon Wrapped Chicken
Ingredients:
  • 5 large chicken breasts
  • 1-2 pkg thin/regular sliced bacon
  • 12-16 oz cream cheese
  • 2 cups shredded cheese, approx.
  • Seasoning (we used Maddox, which is not available to everyone, so use your favorite seasoning combos) (in 2025, we didn't have more Maddox seasoning, so I used a garlic parmesan blend from Weber)
Directions:
  1. Start out with your chicken breast on top of a layer of plastic wrap, then another piece of plastic wrap on top. Or, alternatively, place your chicken inside a plastic food storage bag.
  2. Pound the chicken into an even layer with a meat tenderizer. Be careful not to get holes in your chicken.
    • Thinner on the chicken is better than too thick, because then you can wrap the chicken completely around the filling to keep more of it from leaking out during the baking process. So don't be afraid to go thin, but don't go so thin that it makes holes.
  3. Next, lay out some bacon on a plate. 2-4 pieces vertically, and 2 pieces horizontally, if using two packages. If using one package:
    • Marsha's Note: One package of bacon is not enough to wrap five breasts this way, so just divide up your bacon into as many piles as you need for the number of breasts you are using. We still wrapped all of our chicken just fine with one package, but it was more like 3 or 4 strips TOTAL per breast. The bacon does not need to go both vertically and horizontally if you don't want it to because...
    • As you wrap, any bacon that overlaps may not crisp up under the broiler, so if blubbery bacon bothers you, make sure as much of your pieces of bacon is exposed to the broiler as possible. This makes wrapping the bacon in two directions problematic because one layer gets covered and not crisp. Instead, I would wrap my chicken with bacon in one direction only and possibly seal the ends of the chicken with toothpicks to hold the cheese in (rather than sealing the ends of the chicken with wrapped bacon).
  4. Lay your chicken in the center of the bacon. You can season your chicken a bit at this point if you want to, but I put enough seasoning in my cream cheese that I didn't find it necessary. 
  5. Mix together some cream cheese and garlic salt, or use the herb flavored cream cheese. Spread a layer of the mixture on the chicken, then add a little bit of shredded cheddar cheese. You can also add other desired things to your filling, like other chopped up veggies.
  6. Roll the chicken up a little and fold up the horizontal pieces of bacon, making sure the sides are covered. then fold up the vertical pieces and secure with a toothpick if they won't stay. Sprinkle with additional seasoning, if desired.
  7. Lay the chicken seam side down on a greased pan. I just put mine onto some tinfoil on top of the pan and it worked great. You can bake as-is, or sprinkle a little bit of brown sugar on top for some sweetness.
  8. Bake at 400° for about 45 minutes (ours took an hour to 75 minutes for big chicken breasts), turning it over about halfway through.
  9. Then turn the oven up to 500° or broil (watch closely!!) to brown the bacon and make it crispy. *You can turn the chicken over again to make sure all the bacon is cooked.
  10. If you cut open the chicken after all of this and if the chicken still isn't cooked all the way through, you can put it back in the oven (covered) for another 15 minutes or so and it will be perfect!
Marsha's Notes:
This is one of the seasoning blends I have used in this recipe:


For our family of five, I just bought a large package of five boneless skinless chicken breasts from the store and then used two full blocks of cream cheese. I just added probably a couple of tablespoons of this seasoning blend to my softened cream cheese, blended it with a hand mixer, taste-tested, and then added more if needed until I had the filling the way I liked it. I am sure I would use more or less depending on what seasoning blend I was using. 

If you don't have a blend to use, you could just eyeball some salt, pepper, onion powder and garlic powder until you got something that you liked. Maybe start with a teaspoon of each or so, and go from there. You can also just buy the kind of cream cheese that already has herbs in it.

I also really don't like blubbery bacon fat, so I used the broiler to crisp up my bacon on the top of the chicken, and then I flipped the chicken over to crisp up the bottoms as well. Even with all of that, any bacon that was "double wrapped" on the chicken and protected from the broiler still had some "not crispy" bits, so I would probably try really hard to only wrap my chicken with bacon going one direction with as little overlap as possible... at least for my piece.

I foiled-lined a baking sheet with some extra-long tin foil so it would all be in one piece to contain the fat drippings. Then I put the wrapped chicken on a wire rack placed on top of the foil-lined pan. I did spray the wrack, just to make sure the chicken didn't stick, but it seems like there is enough fat from the bacon that you probably don't need to.

Covered and stored in the fridge until I was ready to bake.

Done!

Monday, July 16, 2018

Marsha's Creamy Parmesan Carbonara Chicken

We had this for dinner last night, and in typical Marsha fashion, I took the original recipe, which looked fabulous, but just had to change it up a tiny bit to fit our household. So if you want to see the original recipe, go to Cafe Delites by Karina here: https://cafedelites.com/creamy-parmesan-chicken-carbonara/


But for Marsha's version of this dish, read on below:

Marsha's Cream Parmesan Carbonara Chicken
Ingredients:  
For The Chicken:
  • 4 large boneless and skinless chicken breasts , halved horizontally to make 8 fillets
  • 1/2 to 1 cup of flour or so
  • 3 tablespoons finely grated fresh Parmesan cheese
  • salt
  • pepper
For The Sauce: 
  • 1 tablespoon olive oil
  • 2 Tbl butter (or sub with oil)
  • 12 oz pkg. bacon, cut into bite-sized pieces
  • 1 small onion, chopped
  • 2 tsp. minced garlic
  • 1 pint half and half (or heavy whipping cream)
  • 1/2 cup finely grated fresh Parmesan cheese
Directions:
  1. Season the chicken with salt and pepper (fresh cracked pepper is always best!). In a shallow bowl, combine the flour and Parmesan cheese. (You can add more flour (and cheese) if you need it to have enough to lightly cover all your chicken, depending on size of breasts.) Dredge seasoned chicken in the flour mixture; shake off excess and set aside. (I placed mine on a cookie sheet.)
  2. Heat the oil and butter (or you can use just oil, or just butter) in a large non stick pan or well-seasoned cast iron skillet over medium-high heat until butter has melted and pan is hot. (To cook 4 breasts cut into 8 pieces all at the same time, I had to use two large frying pans at the same time on the stove.)  Fry the chicken until golden on each side, cooked through and no longer pink (about 4-5 minutes per side, depending on the thickness of your chicken). Transfer onto a warm plate. (I put in the oven on "warm and hold".)
  3. Add the bacon to the pan and fry until crispy. Add onion when bacon is about 75% done. Add garlic when bacon is about 90% done. Drain off some excess fat, keeping about 1 teaspoons worth in the pan. Reduce heat to low heat, and add the half and half (or cream). Bring the sauce to a gentle simmer; season with a little salt and pepper to your taste. When reduced to almost your desired thickness, add in the Parmesan cheese, remove from heat and stir to melt. Add the chicken back into the pan to serve, or serve separately according to your guests desires.
Marsha's Notes:
The onion I used was pretty small... about hacky sack size... and it felt like PLENTY of onion to me. If you have a regular sized onion, you might only need half or so... unless you really like onions!

Sunday, March 6, 2016

Chicken Bacon Ranch Casserole

When we go out to eat, if you say "chicken bacon ranch" to my son, he usually orders it. So, when I saw this recipe for a casserole, I thought this could be a big hit at my house. The original recipe is from damndelicious.net, here.


Chicken Bacon Ranch Casserole
Ingredients:
  • 4 slices bacon, diced
  • 2 boneless, skinless chicken breasts, cut into 1-inch chunks
  • 1 tablespoon olive oil
  • 1 tablespoon Ranch Seasoning and Salad Dressing Mix, or more, to taste
  • 8 ounces rotini (about 1/2 a standard package)
  • 1 cup shredded mozzarella cheese
  • 1/2 cup shredded cheddar cheese
  • 2 tablespoons chopped fresh parsley leaves
For the Alfredo Sauce:
  • 2 tablespoons unsalted butter
  • 3 cloves garlic, minced
  • 1 cup heavy cream, or more, to taste
  • 1/4 cup freshly grated Parmesan
  • Kosher salt and freshly ground black pepper, to taste
Directions:
  1. Preheat oven to 375 degrees F. Lightly oil a 9×9 baking dish or coat with nonstick spray.
  2. To make the alfredo sauce, melt butter in a saucepan over medium heat. Add garlic, and cook, stirring frequently, until fragrant, about 1-2 minutes. Gradually whisk in heavy cream. Cook, whisking constantly, until incorporated, about 1-2 minutes. Stir in Parmesan until slightly thickened, about 1-2 minutes. If the mixture is too thick, add more heavy cream as needed; season with salt and pepper, to taste. Set aside.
  3. Heat a large skillet over medium high heat. Add bacon and cook until brown and crispy, about 6-8 minutes. Drain excess fat; reserving 1 tablespoon in the skillet. Transfer bacon to a paper towel-lined plate.
  4. In a gallon size Ziploc bag, add chicken, 1 tablespoon olive oil and Ranch Seasoning, shaking to coat thoroughly. Add chicken to the skillet and cook, flipping once, until cooked through, about 2-3 minutes on each side; set aside.
  5. In a large pot of boiling salted water, cook pasta according to package instructions; drain well.
  6. Add pasta to the prepared baking dish and layer with chicken and alfredo sauce; sprinkle with cheeses and bacon. Place into oven and bake until bubbly and heated through, about 15-20 minutes.
  7. Serve immediately, garnished with parsley, if desired.
Marsha's Notes:
I found that the trick to cooking good bacon is to cook it low and slow, pressing down the fatty ends with a metal spatula during the process to make sure all the fat gets cooked and crispy. I used my griddle and cooked the bacon between 200 and 250 degrees. It required some patience, but it make the best bacon I have ever cooked.

I also think just cooking the raw chicken with some oil, bacon fat, and the ranch seasoning packet might make for some incredible chicken to use later on salad or sandwiches. I am going to try that soon!

If making a double batch for a 9x13, use more heavy cream so it's not dry.