Showing posts with label Peach. Show all posts

Monday, June 26, 2023

Peach Strudel Bites

I was going to make my regular chocolate protein bites, but I wanted to change things up and use my vanilla protein powder instead... but when I opened the container, my powder had gone rancid. What to do?!!! So I did some substitutions and made something really, REALLY tasty! However, since I didn't use protein powder, I felt like I couldn't call these "protein bites" (but you could use protein powder if you wanted to) so instead, these will just be "Peach Strudel Bites." Enjoy!

Peach Strudel Bites

Ingredients:

  • 1 1/2 cups  quick cooking oats
  • ½ cup (+) Cinnamon Toast Crunch creamy cinnamon spread
  • ½ cup Uncle Bob's Butter Country Peaches and Cream syrup
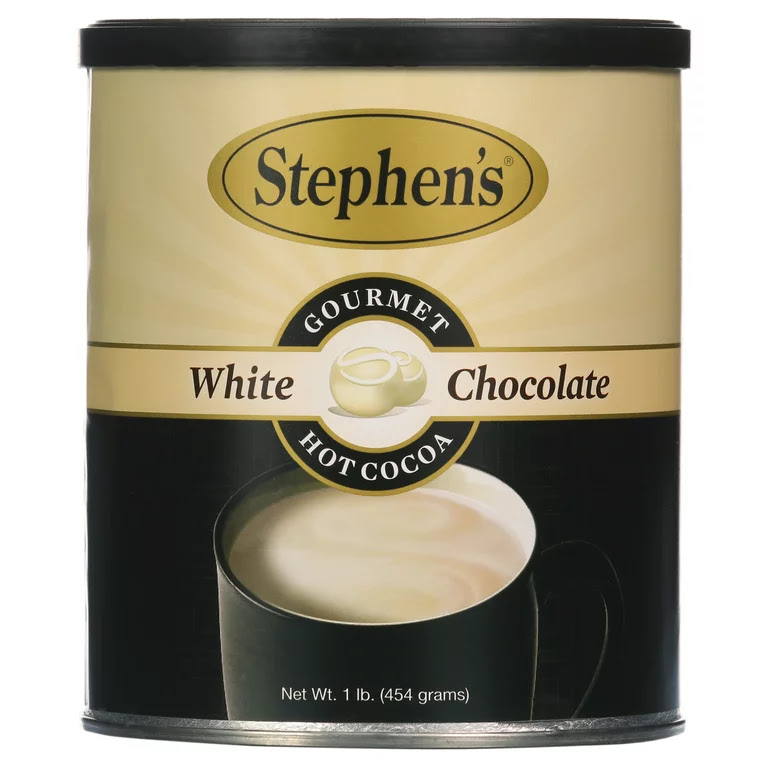
  • ¼ cup Stephen's Gourmet Hot Cocoa powder mix, White Chocolate flavor
  • 1 teaspoon vanilla extract
  • ½ cup white chocolate chips
  • pinch of salt
  • chopped nuts, optional

Directions:

  1. Combine all ingredients in a large bowl until well incorporated.
  2. Roll into 1-inch balls, wearing gloves is handy for this part. If mixture is too dry to hold together, add another spoonful of cinnamon spread. Balls will initially be fragile.
  3. Enjoy immediately, or chill in the fridge for a firmer ball. Balls will set up more when cold and be less crumbly and fragile.
  4. Store in an airtight container or place in a resealable bag in the refrigerator.

Marsha's Notes:

I also added a small handful of slivered almonds to mine. I love these for a quick snack when you just need a little something to get you by or help when you are hungry at bedtime.



Tuesday, September 7, 2021

Marsha's No-Bake Peaches and Cream Sensation

We had this for dessert last night and everyone really liked it. The original recipe is from Mel's Kitchen Cafe, but our store was out of heavy whipping cream for some reason, so I used a premade tub of whipped cream and changed things up a bit. It made this recipe even more simple. Also, this recipe would be really easy to adapt for a different filling if peaches are not your thing. You could use fresh fruit, pie filling, pudding, or even jam and have a yummy treat.

To see the original recipe, go here: https://www.melskitchencafe.com/peaches-and-cream-sensation/


Marsha's No-Bake Peaches and Cream Sensation

Ingredients:

  • 3 cups (280 g) graham cracker crumbs
  • 2-3 tablespoons granulated sugar
  • ¾ cup (170 g) butter, melted
  • 1 ½ cups (171 g) powdered sugar
  • 8 ounces (227 g) cream cheese, softened to room temperature
  • ½ teaspoon vanilla extract
  • 1 large tub whipped cream
  • 3 small cans sliced peaches, or 1 large can (approximately 4-6 cups)

Directions:

  1. In a medium bowl, stir together the graham cracker crumbs and granulated sugar. Stir in the melted butter until the crumbs are evenly moistened. Remove 1/3 cup of the crumbs and set aside for later.
  2. Press the remaining crumb mixture on the bottom of a 9X13-inch pan. Refrigerate the crust while preparing the rest of the dessert.
  3. In a large bowl using an electric handheld mixer or in the bowl of an electric stand mixer, mix the powdered sugar and cream cheese together until light and smooth, 1-2 minutes. Mix in the vanilla. Gently stir in 1/2 the tub of whipped cream into mixture.
  4. Spread the other half of the tub of whipped cream over the chilled crust. Layer the sliced peaches over the top of the cream.
  5. Dollop the cream cheese mixtures over the top of the peaches in large spoonfuls and spread carefully to the edges of the pan cover the peaches completely. Sprinkle the reserved graham cracker mixture over the top. Cover with plastic wrap and chill for at least 2 hours or up to 12 hours before serving.
Marsha's Notes: 
This recipe calls for plain peaches, which is a really fresh tasting option for this filling. If you prefer something a little more decadent, you can use peach pie filling instead to have the extra spices and sugar in the fruit. If peaches aren't your thing, you can also use any kind of fruit, pudding, pie filling, or jam that you like. The other components of this dessert and pretty universal and would work well with just about anything.

Sunday, February 14, 2021

Spiced Peach Bread

I found this recipe and printed if off in the Fall, but I am just now getting around to making it. It sounded like something that Scott would LOVE, so I just had to get to it eventually. And I was right! He said he would be asking for it over and over again. To see the original recipe, go here: https://theviewfromgreatisland.com/spiced-peach-bread-recipe/


Spiced Peach Bread

Ingredients:

  • 1 cup dark brown sugar, packed
  • 1 cup (2 sticks) unsalted butter, at room temperature
  • 3 large eggs, at room temperature (you can also use extra large eggs)
  • 1 3/4 cups cake flour (you can also use all purpose flour)
  • 1 1/2 tsp baking powder
  • 1/2 tsp salt
  • 1 tsp cinnamon
  • 1/2 tsp allspice
  • 1/2 tsp freshly grated nutmeg
  • 1/4 tsp ground cloves
  • 1/2 cup cultured buttermilk
  • 2 cups diced peaches, skin on. For me this was 3 smallish peaches.
  • 1 tsp coarse sparkling sugar
Directions:
  1. Preheat oven to 350F Lightly butter a 9x5 loaf pan and line it with parchment paper with long ends so you can lift the bread out later for glazing and slicing.
  2. Put the brown sugar and butter into a stand mixer and cream until light and fluffy ~ a full 5 minutes. Make sure to get all the lumps out of the sugar.
  3. Beat in each of the eggs, one by one, making sure each egg is fully incorporated before adding the next one. Continue beating for another 2-3 minutes. The batter will be light and fluffy.
  4. Whisk together the flour, baking powder, salt and spices and add to the mixer, alternately with the buttermilk, beginning and ending with dry ingredients. Finish mixing by hand, to make sure everything is thoroughly mixed, but don't over beat. Fold in the peaches.
  5. Turn the batter into your prepared pan. Spread out evenly, and sprinkle the top lightly with sparkling sugar. You can use regular granulated or raw sugar if you like.
  6. Bake on the center rack for 50-55 minutes, or until fully risen and a toothpick inserted near the center comes out without wet batter clinging to it (moist crumbs are fine.)
  7. Let the bread cool in the pan for 10 minutes, then remove, using the parchment paper handles. You can slice while it's still warm, or wait for it to cool.
  8. If you don't have cake flour you can use regular all purpose flour, or make your own cake flour: to make a cup of cake flour take a cup of regular flour and remove 2 tablespoons, replacing it with 2 tablespoons of cornstarch.  Sift everything together twice.


Author's Notes:
They can take a while to cook because the batter is thick and the shape of the pan is deep and narrow. Give it the time it needs to get that all important center cooked through.  I will very often place a loose sheet of foil over the top of the bread towards the end of cooking so the crust doesn’t get too brown before it’s had a chance to completely cook through.

The toothpick test isn’t always accurate…use visual cues, too.  If the center is not fully risen, or is sunk down, keep cooking.  If you see wet batter in the cracks on the top of the bread, let it go a little longer.

Marsha's Notes:
I used peach fruit cups for my fruit and needed about six of them (drained). I also baked mine for about 50-55 minutes but needed to tent the loaf with foil after about 20-30 minutes to prevent over browning. Also, a 1/2 pt. of buttermilk is a cup, so you only need half of the carton. If you want to use the whole thing, then you might try doubling the recipe and making two loaves and freezing the second, except it makes a fairly large amount so that could start to get hard to mix in the mixer. I'll have to report back later if I ever try that. Also, I used my bigger metal loaf pans. This amount of batter would not have fit in my smaller glass pans. 

Monday, February 17, 2020

Peach Torte

I found this recipe years ago and am now copying it here from our family cookbook binder. Enjoy!


Peach Torte
Ingredients:
  • 2 ½ cups graham cracker crumbs
  • 2 cups sugar, divided
  • ¾ cup butter, melted
  • 1 (8 oz.) package cream cheese, softened
  • 1 cup powdered sugar
  • 2 (8 oz.) container thawed whipped topping, div.
  • 2 tsp. vanilla extract
  • *4 cups thinly sliced ripe peaches
  • 1 1/4 cups water
  • 4 Tbl plus 1 tsp all-purpose flour
  • *1 (3 oz.) box peach-flavored gelatin
  • Garnish: sliced peaches
* means see recipe for details or alternatives

Directions:
  1. Blend 1 ¼ cups sugar and flour together (to avoid lumps). In a medium saucepan, combine water and sugar/flour mixture.  Bring to a boil over medium heat, stirring constantly.  Remove from heat and stir in peach gelatin (* if using a 6 oz. box of gelatin, be sure to only use ½); let cool completely.  Do not let set-up completely because you need to pour it later.
  2. Spray a 13x9-inch baking dish with non-stick spray. In a medium bowl, combine graham cracker crumbs, ½ cup sugar and melted butter.  Press into bottom of baking dish; set aside.
  3. In a medium bowl, combine cream cheese and powdered sugar.  Beat at medium speed with an electric mixer until smooth.  Beat in one package whipped topping and vanilla.  Spread evenly over graham cracker layer; set aside.
  4. In a medium bowl, combine peach slices with ¼ cup sugar (*can also use 4 small cans (soup size) of peaches instead of fresh).  Save some peaches for garish, if desired. Place peach slices evenly over the cream cheese layer; set aside.
  5. Spread cooled gelatin over peach layer. Spread second container of whipped topping over gelatin layer.  Garnish with sliced peaches, if desired.

Sunday, February 16, 2020

Peach Cobbler

I found this recipe years ago and am now copying it here from our family cookbook binder. Enjoy!


Peach Cobbler
Ingredients:
  • 1 stick butter 
  • ¾ cup flour 
  • Pinch of salt 
  • 1 cup sugar
  • 2 tsp. baking powder
  • 3/4 cup milk
  • 2 cups fruit, with juice (one lg can peaches)  
Directions:
  1. Heat oven to 300 degrees.  
  2. Melt margarine in square baking dish in oven.  
  3. In a separate bowl, mix flour, salt, sugar, baking powder and milk together until smooth.  
  4. Pour batter over melted butter in square dish, DO NOT STIR.  
  5. Add fruit, DO NOT STIR.  
  6. Bake for 1 hour or until top is golden brown.  Serve warm with vanilla ice cream, if desired.

Thursday, November 7, 2019

Slow Cooker Peach Cobbler

Easy cobbler recipe that my aunt gave me written on a recipe card. We typically do peach, but pictured below was a peach/apple combo cobbler that turned out amazing too!


Slow Cooker Peach Cobbler
Ingredients:
  • 2- 21 oz cans peach pie filling
  • 1 box vanilla cake mix (or any flavor you like)
  • 8 oz. butter
  • 1/3 cup walnuts (opt.)
Directions:
  1. Place pie filling in the bottom of your slow cooker. 
  2. Layer with dry cake mix first, then bits of cold butter, and finally any nuts you wanted. 
  3. Cover and cook on high for 2-2 1/2 hours. 
  4. Serve with ice cream or whipped cream, if desired.
Marsha's Notes:

I think this recipe would also be delicious with a spiced cake mix, or some cinnamon/cinnamon sugar sprinkled on top or mixed into the cake mix or peaches. I also think a cap full of vanilla in the pie filling would be delicious!

Thursday, July 7, 2016

Marsha's Favorite Jam Recipe


(From 2016 with 2025 updates.) I decided to document my current favorite way to make jam because I have tried different ways and had mixed results in the past. Sometimes it's great, sometimes it's runny, sometimes it's bubbly (???!!!), etc. But, I have made three kinds of jam this summer using the same technique and so far they have all turned out fantastic. To the point that Scott even said, "I think you have mastered jam." Yay! So, here goes.

Homemade Jam
(Strawberry, Raspberry, Blackberry) 
Ingredients:
  • 4 pints (or 30-32 oz.) berries (equals 3 1/4 cups crushed berries), washed and debris removed (for strawberries, quarter the berries for easier mashing)
  • 1 box MCP Pectin
  • 1/4 cup lemon juice (fresh or bottled)
  • 4 1/2 cups sugar (added later, see recipe)
  • 1 cup corn syrup (added later, see recipe)
  • For storage of the jam, I use five 16 oz. (2 cup) containers
Directions:
  1. Crush fruit to your desired consistency.
    • I like chunks of fruit in my jam, so I used a potato masher for raspberries and blackberries. Sometimes strawberries are harder to crush with a potato masher, so with larger berries I will quarter them and then use an immersion blender sparingly to blend some of the fruit, while still leaving some bigger pieces. 
  2. Gradually mix crushed fruit with pectin and lemon juice. 
    • One time I messed up at this step and starting adding my corn syrup as well, but in the end, the jam turned out just fine. However, technically, you add the sugar AND the corn syrup later in the process.
  3. Let sit for 30 minutes, stirring every 5 minutes. 
  4. Mix in corn syrup (according to the package, this is supposed to help with crystals forming during freezing). 
  5. Slowly add sugar. 
  6. Pour into containers, cover with lids, and let sit on counter for 24 hours. Freeze or use immediately.
    • The jam should start to thicken within a short period of time (an hour or less) so be sure to put it in your containers and not leave it sitting in the mixing bowl for very long.
Marsha's Tips:
Without knowing for sure, I imagine part of my jam-making success was strictly following the "stir every 5 minutes for 30 minutes" pectin step. It sounds like a pain, but it made GREAT jam.

Fruit Container Measurements-
  • Strawberries: Currently, our store sells strawberries in 16 oz. containers. A flat of strawberries is eight 16 oz. containers, which will need four boxes of pectin, an entire 32 oz. bottle of corn syrup, 18 cups of sugar, and 1 cup of lemon juice (about half of a 15 oz. bottle). It will make about twenty 2 cup containers of jam.
    • If you wanted a single batch of jam using only one box of pectin, then you would only need two of the 16 oz. containers of strawberries and not an entire flat. You would end up with about five 2 cup containers of jam.
16 oz.

This shows what supplies I bought and had on hand for making jam, including the flat of strawberries (one more larger bottle of corn syrup not pictured).
  • Blackberries and Raspberries: Both of these currently come in 6 oz. containers. You need five or six of them to make a batch of jam that uses up one entire box of pectin, plus about 1/2 of a smaller 16 oz. bottle of corn syrup, along with 4.5 cups sugar and 1/4 cup lemon juice.
    • I bought six 6 oz. containers of each kind of berries (see in above picture) and ended up with more like 4 cups of crushed fruit in the end, so five would have been closer to the recommended amount of fruit per package of pectin... but in the end, it seemed to turn out just fine even with a little extra fruit. The blackberry seemed to tighten up nicely, and the raspberry was runnier, but still fine. If it turns out problematic after freezing and then thawing the jam, I will try to remember to come back and report.
6 oz.

6 oz.
Here are some pictures to show my process:

Here are all six containers of blackberries, washed and ready to go.
I set this strainer full of berries inside of one of my biggest mixing bowls and filled the entire thing up with water so I could stir the berries around and get the bits of leaves and things to float to the top of the water so I could pick out any debris. Initially, if any of the berries appeared to have any mold on them, I removed the moldy berries and then added just a touch of white vinegar (2 Tbl to about 1/4 cup) to the water to help sanitize the remaining berries. I would let the berries sit in the vinegar water mixture for just a couple minutes. Then I pulled the strainer with the berries out of the water in the larger bowl and rinsed everything again off with my faucet sprayer and let sit and drain for a minute or so. 

Clean berries crushed with a potato masher.

As you can see, six packages of berries made about 4 cups crushed, so five probably would have been closer to the recommended 3 1/4 cups berries. So in the future, I will use 5 packages.

Raspberries washed and ready to go.

Crushed, these also made about 4 cups, similar to the blackberries, so again, I would only get five containers next time.

Strawberries getting their final rinse before being stemmed and quartered. Because there are so many strawberries, I did them two 16 oz. containers at a time, washing, rinsing, stemming, and mashing in batches.

Some of the berries I started to slice and then realized that I didn't need to go to that much work if I was just going to mash them, so I quartered the rest of the flat instead.

Mashed with a potato masher. There are still lots of big chunks that were hard to mash up very well this way, so I decided to try the immersion blender instead, which worked well. 

You can see here that two containers made about 3 1/4 cups almost perfectly, so that is what you need to use one box of pectin.

Sporadically using the immersion blend to get some of the larger pieces chopped up, without blending the entire thing because I like some pieces of fruit to remain intact in the final product (you could probably also use a regular countertop blender for this, using the pulse feature so you can control how blended up everything gets).
After trying the potato masher with that first batch of strawberries and deciding that was too much work, I just added my quartered strawberries directly to this red bowl and processed them entirely with the immersion blender moving forward.

Here is the entire flat done. But this bowl is too small to hold the strawberries AND all the sugar and other things to make the jam, so I had to transfer it to another REALLY BIG container (but this container is plastic and I would be afraid to use the immersion blender in this blue tub, so I would still use the red bowl for mashing the berries in the future because it's ceramic).

Berries all mashed and ready for pectin and lemon juice. Then comes stirring every 5 minutes for 30 minutes before adding the corn syrup and sugar later. I found that tucking the handle of my whisk into the handle space of the blue tub kept my whisk from falling into the strawberry mixture between stirrings.

After the pectin has processed and all the other ingredients are added, it's time to divide everything into containers. This worked really well with my large canning funnel and a soup ladle. Between the jam being finished and when I put them in the containers, I stopped to eat dinner and was surprised by how much some of the jam had thickened up already, so don't wait too long to get it all divided up in the containers and ready to sit for the night.

All divided! As you can see, I got 5 raspberry, 5 blackberry, and 19 strawberry. If I had divided things more precisely, I probably would have gotten 20 containers of strawberry.

Lids cleaned and marked, ready for the jam to sit out overnight before freezing.

These are the supplies I had leftover:
I had a partial bottle of corn syrup in the house, so I bought both a full 32 oz. and a 16 oz. bottle for this project. I used all of the full 32 oz. bottle (for the strawberries) AND 16 oz. bottle (for the raspberries and blackberries) of corn syrup, leaving me with that partial 32 oz. bottle that I had from before.
I had a partial bottle of lemon juice (about 1/2 full) so I bought a new 15 oz. bottle. I used all of my partial bottle of lemon juice and part of the new bottle I purchased. It should take less than a 15 oz bottle to make 6 boxes of pectin into jam, just for reference.
I had one old box of pectin, plus I bought eight more boxes because I wasn't sure how much I needed. It turns out for all this jam I needed 6 boxes, so I had three leftover.
For sugar, I have a huge storage tub of sugar in the basement that I dip out of to fill my kitchen sugar container, and I had to fill my container twice from my large supply to get all of this jam made. In total it was 27 cups of sugar. My kitchen container probably holds a 4-5 lb bag of sugar, so if I was buying smaller bags of sugar for this project I would get at least two... maybe three.

I also realized that some of the members of my family live alone now and probably won't want an entire larger container of jam, so I bought some of these smaller containers and dipped out of a couple of the bigger ones so I could give out smaller portions to anyone who wanted it. I would have needed 12 total smaller containers to use up all three of those larger containers. The larger containers are 2 cups (16 oz.) and the smaller are 1/2 cup (4 oz.).

Notes from before 2025: The history of figuring out pectin-
  • As I mentioned, I have had mixed results in the past, so this time I even took a picture of the box of pectin I used because not all pectin seems to be the same. They even have different kinds of Sure-Jell pectin, one of which is clearly labeled for lower sugar jam recipes, but two of them have different names with no real indication on the box what the difference is; Sure-Jell vs. MCP. 
  • I Googled it, and it appears I am not the only one confused. Here is what one lady wrote, "I went to the Albertsons, and they had the Surejell right next to MCP pectin, and I got very confused. MCP is made by Surejell. Surejell is 1.75 oz at $2.99 a box. The MCP is 2.0 oz for $2.49 a box. More for less? I called Kraft and asked about the differences, and they said the formulas were different. Sure enough, I checked the back of the boxes, and Surejell lists dextrose, citric acid, then pectin. MCP lists dextrose, pectin and then citric acid. I have my formula for jam dialed in, so I didn't want to "mess with success" and switch now, with just one batch to go, but now I'm wondering what, if any, are the differences in the products?" Even the Kraft website (who makes Sure-Jell) lists the same description for it's Sure-Jell pectin and it's Sure-Jell MCP pectin, with the one difference that says, "MCP is available on the west coast." 
  • Okay? I live on the west coast, and the regular Sure-Jell is available alongside the MCP, so why do our stores carry both? Any who... So here's the one I liked:
  • I made jam successfully, following these steps, with strawberries, raspberries, and blackberries. I imagine you could combine and do a mixed berry with the same success. I am also going to try it with peach in the fall and will try to make a note if peaches worked the same.

Wednesday, December 29, 2010

Marsha's Stuffed Peach French Toast


This is another recipe that my husband has requested that we make every year for Christmas. It was so incredibly yummy, it was like eating dessert. We served our French toast with little smokies and scrambled eggs with cheese.  So delicious!

Marsha's Stuffed Peach French Toast
Ingredients:
  • 1 cup brown sugar
  • ½ cup butter
  • 2 Tbl. water
  • 1 (29 oz) can sliced peaches or two smaller cans
  • 5 eggs
  • 1 ½ cup milk
  • 1 Tbl. vanilla
  • 1 tsp. cinnamon
  • 2 Tbl. sugar
  • 1 loaf French bread, cut into 18 slices
  • 8 oz. cream cheese, softened
  • 1/2 cup peach jam 
  • Whipped topping 
Directions:
  1. Drain peaches.  
  2. In saucepan, heat brown sugar and butter on medium-low heat until melted.  Add water and continue to cook until sauce is thick and foamy.  
  3. Pour into baking dish (9x13), cool 10 minutes.  
  4. Place sliced peaches on top of sauce. 
  5. In a medium bowl, mix cream cheese and jam together.  
  6. Spread cream cheese mixture over 9 slices of bread, and top with remaining 9 slices, making cream cheese sandwiches. Cover peaches with bread slices placed close together.  
  7. Blend eggs, milk, cinnamon and vanilla and pour over bread.  
  8. Cover pan and refrigerate overnight.  
  9. Bake in a 350 degree oven for 40 minutes, or until top is golden brown and toast is cooked all the way through.  Serve with whipped topping, if desired.
Marsha's Notes:
Sometimes my French bread cuts into slices that are so large that I can only fit six sandwiches in my 9x13 pan. So just try to cut your bread into equal sized slices that will use up your entire loaf and still fit into a 9x13 pan.  

If you think your toast isn't all the way cooked yet, but the top is starting to brown, cover the pan with foil for the remainder of the cooking time.

You can also prepare the entire dish early in the day, only do not pour your egg mixture over.  Save the egg mixture in a separate container, and then stir and pour it over your toast just before bedtime.  This worked very well for us because we had a Christmas Eve party to go to, so I made everything in the morning, went to the party, and then came home, poured my eggs and went to bed.  It was so easy!

Sunday, May 23, 2010

Farm Journal's Brown Sugar Peach Pie


Scott LOVES peaches, and so I made him a peach pie and it turned out GREAT! I thought I would share the recipe with you.  The beautiful picture came from the Taste of Home website, but the recipe came out of my Farm Journal's Complete Pie Cookbook.

Brown Sugar Peach Pie
Ingredients:
  • Pastry for 2-crust pie
  • 1/2 cup granulated sugar
  • 1/4 cup brown sugar, firmly packed
  • 3 Tbl. flour
  • 1/4 to 1/2 tsp. cinnamon
  • 1/8 tsp. salt
  • 5 cups sliced peeled fresh peaches
  • 1 Tbl. lemon juice
  • 1/4 tsp. almond extract
  • 2 Tbl. butter or margarine
Directions:
  1. Combine sugars, flour, cinnamon and salt. 
  2. Sprinkle peaches with lemon juice and almond extract. Add sugar-flour mixture to peaches and mix gently. 
  3. Turn into pastry-lined 9" pie pan. Dot with butter. 
  4. Adjust top crust and crimp edges; cut vents. 
  5. Bake in hot oven (425 degrees) about 35-45 minutes, or until juices start to bubble in vents and crust is golden.
Marsha's Notes:
I used a package of ready-made pie crust dough. I also have some spray butter, and I lightly sprayed my crust top, and then sprinkled with a little bit of course sugar to make it pretty. Instead of just using a knife to cut the vents in the top crust, I have some teeny-tiny autumn cookie cutters, and I cut leaf patters out of the crust and placed the cut out pieces back on top over lapping the holes they came from. Very festive! I also cover my crust edge with either some foil, or, now I have a silicone pie crust ring to keep the crimped edges from burning before the pie is done.