Showing posts with label Italian. Show all posts

Tuesday, April 22, 2025

Easy Risotto

I had some really delicious risotto on a date for Valentine's Day, and then I ran across a recipe for it on the Internet and had to try to make some at home. It's basically just a cheesy rice, so what's not to love? Comfort food at it's finest, only this is fancy because it has just a little white wine in it. I made a few tweaks, so here is my recipe. Enjoy!

Risotto

Ingredients:

  • 1 1/2 cups arborio rice
  • 5 cups chicken stock, divided (3 cans (14.5 oz each) worth) and warmed
  • 1/2 cup white wine
  • 5 oz. container shredded parmesan cheese
  • 3 Tbl butter (cut up if cold)
  • 1/2-1 tsp salt
  • 1/2 tsp black pepper

Directions:

  1. Preheat your oven to 350 degrees.
  2. Using a large insulated pot (I use my cast iron pot with a lid), add your rice and 4 cups (out of 5) of chicken stock. Stir and place in the oven for 45 minutes.
  3. Once cooked, add the rest of your stock, wine, butter, salt and pepper. Stir vigorously for 2-3 minutes to bring out the starches in the rice so it will thicken. Serve.
Marsha's Notes:
It was highly recommended that you use arborio rice for this dish because of it's starch content. I found it easily in my rural grocery store, so it doesn't appear to be too hard to find. If you use other kinds of rice, I am not sure how that changes the results, so FYI.

Monday, January 6, 2025

Bacon Tortellini Alfredo

Krystal tried this recipe and really liked it, so she asked me to post it for her. We have also since tried it and love it too!


Bacon Tortellini Alfredo

Ingredients:

  • 2 (9-ounce) packages refrigerated cheese tortellini  
  • 6 strips bacon, cut into small pieces  
  • 1 clove garlic, minced  
  • 1/4 cup chicken broth  
  • 1 cup heavy/whipping cream  
  • 4 ounces cream cheese, softened  
  • 1 cup freshly grated Parmesan cheese  
  • Salt and pepper, to taste  

Directions:

  1. Boil a large pot of salted water for the tortellini. Start cooking the tortellini once the bacon is done, as it will only take a few minutes to cook.  
  2. Cut the bacon into small pieces. Fry it in a skillet over medium-high heat until crispy, which should take about 10 minutes.  
  3. Remove the pan from the heat and transfer the bacon to a paper towel-lined plate. Drain most of the bacon fat from the pan, leaving about 1 tablespoon.  
  4. Stir in the minced garlic, chicken broth, heavy cream, and softened cream cheese. Return the pan to medium heat, stirring until the sauce is smooth and reduced to your liking, approximately 5 minutes.  
  5. Stir in the grated Parmesan cheese and cooked bacon. Remove the pan from heat and toss the sauce with the drained tortellini. If the sauce is too thick, thin it with a few spoonfuls of hot pasta water before draining. Season with salt and pepper to taste. 

Marsha's Notes:
I really prefer crispy bacon, and even pan-frying your bacon in advance and then adding it back to the pan while you are cooking the sauce led to the bacon getting softer, so I might recommend, if you like crispy bacon, waiting until you are just about to plate the dish before adding your bacon back in. Just keep in mind that you will be adding salty bacon at the end when adjusting your seasonings in the sauce.

Saturday, November 23, 2024

Crockpot Creamy Chicken Spaghetti

A super simple, yet yummy spaghetti with some chicken for added protein to feel satisfied. Enjoy!

I found this recipe on TikTok here: https://www.tiktok.com/@cookinginthemidwest/video/7433439317583777066?is_from_webapp=1&sender_device=pc&web_id=7439121840796157486

Crockpot Creamy Chicken Spaghetti

Ingredients:

  • 1 lb chicken breast
  • 1/2 tsp each of salt and pepper
  • 1 tsp onion powder and Italian seasoning
  • 1/4 red pepper flakes
  • 1 tbsp minced garlic
  • 24 oz jar Marinara Sauce
  • 15 oz jar Alfredo Sauce
  • 1 cup shredded mozzarella cheese
  • 16 oz spaghetti, cooked
  • Parmesan cheese
  • Dried parsley

Directions:

  1. Spray a crockpot with cooking spray. 
  2. Add one pound of chicken breasts. Season with salt, pepper, onion powder, and Italian seasoning. 
  3. Add 1 tbsp of minced garlic, marinara sauce, and Alfredo sauce. 
  4. Cook on low for 4 hours. 
  5. Once chicken is cooked, either pull it out of the pot and dice it up then put it back in, or just a hand mixer or a couple of forks to shred it up right in the pot. 
  6. Add your mozzarella cheese and cooked spaghetti to the pot and stir everything up. 
  7. Put the lid back on and leave it for a bit to let the mozzarella cheese melt, otherwise it is ready to serve.

Monday, September 30, 2024

Deconstructed Lasagna

One of my friends told me how she makes an easy, lasagna-type dish, but with a lot less work. We tired it out, and I really enjoyed it. My favorite part about it, besides that it's a bit less work than traditional lasagna, was the delicious cheese-layer that gets sandwiched between the noodles-sauce-meat layer. Enjoy!


Deconstructed Lasagna

Ingredients:

  • 1 lb ground meat (our favorite blend is 1/2 hamburger 1/2 Italian sausage)
  • 48 ounces spaghetti sauce (2 cans Hunt's)
  • 1 pkg (1 lb) bite-sized noodles
  • 1 regular container ricotta (about 15 ounces)
  • 2 eggs
  • 2 cups shredded mozzarella, divided
  • 1/2 cup parmesan, divided
  • 1 Tbl Italian seasoning

Directions:

  1. Preheat oven to 350 degrees.
  2. In a large pan, brown your meat and drain any excess fat. Add your spaghetti sauce and let heat-through to a gentle simmer.
  3. In a large pot, bring water to a boil and cook your pasta about half way done (in the above picture, we did a box of the mini bowtie pasta that usually cooks for about 7 minutes, so we did 4 minutes). Drain and add to your meat/sauce mixture (depending on the size of your pots/pan, you may need to transfer to a larger bowl).
  4. In a large bowl, mix together your container of ricotta, 2 eggs, about a cup of mozzarella, a 1/4 cup parmesan and your Italian seasoning.
  5. In a greased deep-dish casserole, layer 1/2 your meat mixture, then all of the ricotta mixture, followed by the rest of your meat mixture.
  6. Top with remaining cheese and cover with lid or foil.
  7. Bake for 30-45 minutes or until the internal temperature reaches about 160 degrees.
  8. Remove foil/lid and broil for a couple of minutes until the top cheese gets a golden crust.

Marsha's Notes:

All of the ingredients in this recipe are adjustable and approximate. I thought two cans of Hunts sauce was the perfect amount, but you might like more or less or a different kind. I just eye-balled the Italian seasoning so 1 Tbl is my best guess, and I did the same with all the shredded cheeses, just adding about what I thought looked good.

I used my deep-dish blue casserole dish and I think this worked out perfectly because it allowed me to make a nice thick layer with the ricotta. If I had used a 9x13 dish, I think the ricotta would have been too spread out to make much of a layer... and cutting into the lucious ricotta was one of my favorite parts of this dish. 

The amount of time the casserole will be in the oven will also depend on the type of dish you use. If you layers aren't very thick, it will heat everything through much faster. To get it just right, I used a digital thermometer. However, you can also just bake it until the sides are bubbly and the cheese seems melted.

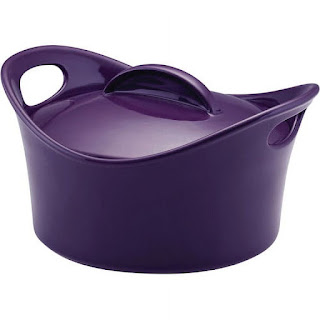
For reference, here is a picture of a Rachel Ray stoneware 2.75 quart casserole dish (mine is blue, but this one is purple). These are discontinued, but you can use any similar dish you have. Just know that your layers might be different than mine and your cooking times will vary.


Saturday, September 14, 2024

Cheesy Pizza Tortellini

This recipe was a hit with my family. The only thing I would do different from the original recipe is next time we would add some extra cheese to the pasta/sauce/noodle portion of the dish, instead of putting all the cheese on the top. So this will be our version of this. The guy who originally posted this on TikTok was doing a "griddle" version of this, but he also does a skillet version. See the original skillet recipe here: https://cookinginthemidwest.com/blog/pizzatortellini/#recipe


Cheesy Pizza Tortellini

Ingredients:

  • 1 lb ground beef or Italian sausage (we like a 1/2 and 1/2 blend)
  • 1 24 oz jar of marinara sauce
  • 19 oz frozen tortellini
  •  mini pepperoni slices
  • regular pepperoni slices
  • Shredded mozzarella cheese
  • parmesan cheese
  • See recipe instructions for additional optional ingredients you may want to add.

Directions:

  1. Bring a large pot of water to a boil and then add your frozen tortellini. Cook as per package directions, drain and set aside.
  2. Brown your mini pepperonis in a large pan/skillet. Once crispy, remove from heat and drain on a paper towel.
  3. In the same pan, brown ground beef/Italian sausage in a skillet over medium high heat and season with salt, pepper, onion powder, and Italian seasoning if desired. Drain any excess grease. If you wanted to, you could also throw in some chopped onion (and/or peppers) to cook and soften along with your ground meat.
  4. If desired, near the end of browning your ground meat, you can throw some extra minced garlic into the pan, like one big spoonful.
  5. Add your browned mini pepperonis back to the pan, along with your jar of marinara sauce. This would also be a great time to add 1/2-1 block of cream cheese. Stir and heat through until combined and bubbly.
  6. Add your cooked tortellini and stir to combine, along with a handful of whatever cheese you would like to be in the middle of your dish (like a handful of mozzarella and a sprinkling of grated parmesan.
  7. Pour everything into a large casserole dish sprayed with nonstick spray.
  8. Cover the entire dish with a nice layer of mozzarella cheese, and then top with your regular sized pepperonis.
  9. Bake in the oven until bubbly and cheese is melted, then broil in the oven until the top layer of cheese and pepperoni is golden and crispy.

Tuesday, October 3, 2023

Pizza Enchiladas

I saw this recipe on Tiktok and had to try it. The guy called it pizza enchiladas, and everyone really liked it!

Pizza Enchiladas
Ingredients:
  • 1 lb hamburger or sausage
  • couple handfuls of pepperonis cut in half
  • 1/4 cup or so of pizza sauce
  • 1/4-1/2 cup ricotta cheese
  • sprinkling of Italian seasoning
  • 1/2 cup shredded mozzarella cheese or so
  • Any other pizza toppings you like
  • Tortillas
  • 1 jar pizza sauce
  • Mozzarella cheese to top
  • Mini pepperonis to top
Directions:
  1. Brown your hamburger or sausage. A few minutes before it is done, add your cup-up pepperonis. Remove from heat. Add about a 1/4 cup of pizza sauce, ricotta, Italian seasoning, about a 1/2 cup mozzarella and any other toppings you like on your pizza. Stir to combine. This is your filling, so if you think it needs more sauce or cheese or whatever, add it now.
  2. Roll up the filling in tortillas and place in a baking dish. Top with more sauce, cheese and mini pepperonis to decorate. Bake at 350 until everything is hot and melty.
  3. I used three JUMBO tortillas that we had leftover from making homemade crunch wraps and it filled the pan perfectly. Everyone got 1/2 an enchilada and it was plenty.

Tuesday, August 1, 2023

Crockpot Garlic Parmesan Chicken Pasta

Everyone really liked this recipe, but I do have to go out of town to Walmart to get the Buffalo Wild Wing's garlic parmesan sauce, so that was just a tiny bit tricky to find... if you don't live near a store that carries it. Otherwise, I plan on making this again and again! Plus, it doesn't use the whole bottle, so I don't even have to go back to Walmart for awhile.


Crockpot Garlic Parmesan Chicken Pasta

Ingredients:

  • 1 lb chicken breast
  • 1/2 tsp each of salt and pepper
  • 1 tsp each of paprika, onion powder, and Italian seasoning
  • 1 TBSP minced garlic
  • Buffalo Wild Wings Garlic Parmesan sauce
  • 1 jar of Alfredo sauce
  • 1 16 oz box of pasta
  • 1/4 cup of Parmesan cheese
  • 1 cup of shredded mozzarella

Directions:

  1. Add the chicken, salt, pepper, paprika, and Italian seasoning to a slow cooker.
  2. Add minced garlic and enough of the garlic parm sauce to fully cover the chicken (couple of TBL or so per chicken breast, spread over the chicken with a spoon until covered).
  3. Cook on low for 4-6 hours.
  4. Shred or chop up chicken.
  5. Boil pasta.
  6. Add Alfredo sauce, Parmesan cheese, and Mozzarella cheese to the chicken in the slow cooker.
  7. Stir everything together well.
  8. Add cooked pasta to the slow cooker and mix everything together.

Marsha's Notes:

For my family, I did more chicken to make sure I had plenty, so I needed to adjust my seasonings for the added chicken.

Monday, July 17, 2023

Cotoletta- Breaded Italian Chicken

Stumbled across this on TikTok. Not a very complicated recipe, but a great reminder of how to made some simple, homemade breaded chicken. All ingredients are going to depend on how much chicken you are cooking, so it's kind of a "just eye-ball it" thing. Enjoy!


Cotoletta- Breaded Italian Chicken

Ingredients:

  • Boneless, skinless chicken breasts
  • Eggs
  • Flour
  • Bread Crumbs
  • Parmesan Cheese

Directions:

  1. Pound your chicken breasts with a meat tenderizer until each piece is equal in thickness. Butterfly larger pieces for easier, faster cooking.
  2. Set up three dipping bowls; one flour, one bread crumbs and parmesan cheese, one with beaten egg(s).
  3. First, dip your chicken in the flour, then the eggs, then the bread crumbs.
  4. Drop in a hot pan that has like a quarter-inch of oil/butter melted in the bottom of the pan.
  5. Cook until chicken is browned and cooked through. Drain on paper towels.

Monday, June 26, 2023

Cottage Cheese Dinner Bowls

Cottage cheese seems to be all the rage right now... but I have always liked it, so I am just excited to discover new and fun ways to enjoy it. Right now, one weight-loss/management tool is to use the protein in cottage cheese to help you feel fuller, so they have been using it as one of the main ingredients in a deconstructed dinner bowl. The one pictured here is my version of a deconstructed taco bowl, but you could do any other kind you can think of, including a pizza/spaghetti version. Maybe southern BBQ with corn and beans? Or breakfast with eggs, bacon, potatoes, etc. 

Enjoy!


 Cottage Cheese Dinner Bowls- Taco

Ingredients:

  • 1 serving warmed taco meat (chicken, beef, pork, etc.) (approx. 100 calories worth)
  • 1 portion cottage cheese (I take a hefty spoonful, maybe 1/4-1/2 cup) (approx. 100 calories worth)
  • 1 serving chips or other crunchy scooping item (approx. 100 calories worth)
  • healthy toppings

Directions:

  1. Place all your parts and pieces in a serving bowl and use your chips to scoop out the food and enjoy. 
  2. Depending on what chips you use will determine how many you can have and stay in your calorie goals. Some people use protein chips or other low-calorie options. I used sea salt Pop-Corners chips for about 140 calories for 16 chips.
  3. Your total calories is going to depend on all of your choices for the bowl. I used a healthy pile of lettuce with just a small sprinkling of cheese, one container of Pearls Olives To Go for another 40 calories, and just a touch of Taco Bells Chipotle sauce for maybe another 50 calories (I didn't use an entire serving). My cottage cheese and taco meat are probably about 100 calories each, making my bowls about 400-500 calories each for my dinner.
Marsha's Notes:
You can switch up any of the ingredients that you want. You can also do this same thing, but make it a pizza/spaghetti bowl with your favorite pizza toppings (for me, that would be pepperoni, olives, shredded cheese, but you can do any kind you like) and maybe some pizza sauce or really meaty spaghetti sauce. Scoop out with crusty bread or bagel chips. You can heat it up and stir it all together, or eat cold, if you like cold pizza.


Saturday, March 18, 2023

Sundried Tomato Gnocchi

I used half a bottle of sundried tomatoes in another recipe and needed to find a way to use up the rest of the bottle. When I came across this recipe, it was perfect and so yummy! Enjoy


Sundried Tomato Gnocchi

Ingredients:

  • 1 small yellow onion (I used a handful of pre-chopped frozen onion)
  • 1 clove garlic
  • 1/2 cup sundried tomatoes
  • 1 cup chicken broth
  • 1 16 oz pkg gnocchi
  • 1/2 cup heavy cream
  • 1 cup cooked chicken (optional)
  • 2 cups spinach (optional)
  • parmesan cheese

Directions:

  1. To your hot pan, add your onion, garlic and sundried tomatoes (you don't need to add oil to the pan for the onions if you are using the oil from the sundried tomatoes. 
  2. Once the onion is softened and browning, add your broth and gnocchi. 
  3. Let it cook for a couple of minutes until the gnocchi is tender (doesn't take long). 
  4. Then add your cream, chicken and spinach. 
  5. Continue cooking until the chicken is heated through and the spinach is wilted and tender. Top with parmesan.

Marsha's Notes:

  • I cooked my onion for several minutes alone and then added the garlic and tomatoes just to make sure the garlic didn't get bitter. 
  • I also wished in hind-sight that I would have chopped up my sundried tomatoes just a bit before adding to the pan because some of the pieces were a little big.
  • Because my sundried tomatoes were packaged in oil and herbs, I didn't feel like this dish needed any extra seasonings (or oil for the pan), but you can certainly add some Italian seasoning, salt or pepper if you think it needs it.
  • For extra protein and veggies, you can add the chicken (or any other meat you like, such as ground Italian sausage or sausage links) and spinach (or any other veggies you like, such as broccoli or maybe peas), but I didn't bother with either and enjoyed the dish very much just the same.
  • Lastly, I didn't want to have extra heavy cream sitting around, so I dumped the entire 1 cup container into my pan and have zero regrets about it. It was maybe a little bit wetter and sauce-ier initially (which was fine), but it made for great leftovers that I didn't think really need any extra liquid added. But you do you.

Pressure Cooker Lasagna Soup

Lately, we have been taking dinner to Scott's mother every Wednesday night, and so I have been on the lookout for lots of recipes that are easy to travel with, like Crock Pot or Instapot. This week's recipe was this lasagna soup, and everyone really liked it, even Lucas, who doesn't like ricotta cheese (he was okay with it because it was a topping so he could put as much or as little on as he liked). Here is the link to the original recipe:

https://www.melskitchencafe.com/pressure-cooker-lasagna-soup/


Pressure Cooker Lasagna Soup

Ingredients:

  • 1 pound ground Italian sausage or ground beef
  • ½ cup finely chopped yellow or white onion
  • ½ cup diced carrots, about 2 medium carrots
  • 2 cloves garlic, finely chopped or pressed through a garlic press
  • 3 cans (15-ounces each) crushed tomatoes
  • 1 teaspoon dried basil
  • 1 teaspoon dried oregano
  • 1 dried bay leaf
  • ½ teaspoon salt, I use coarse, kosher salt
  • Pinch of black pepper, I use coarsely ground
  • 6 to 8 cups chicken broth, I use low-sodium (see note)
  • 8 to 12 ounces (3-4 cups) bowtie or rotini pasta or broken lasagna noodles (see note)

Cheese Topping:

  • 1 cup ricotta cheese or blended cottage cheese
  • 1 cup mozzarella cheese, plus more for serving
  • ½ cup freshly grated Parmesan cheese
  • ½ teaspoon dried basil
  • Pinch of salt and pepper

Directions:

  1. For the cheese topping, stir together all the ingredients until well combined. Refrigerate until ready to serve.
  2. For the soup, select the sauté function on the pressure cooker and cook the sausage or ground beef, onion, carrots, and garlic, for 2-3 minutes, until the meat is no longer pink, breaking the meat into small pieces as it cooks. Drain any excess grease.
  3. Add the crushed tomatoes, basil, oregano, bay leaf, salt and black pepper. Stir well, making sure to scrape up any cooked bits on the bottom of the pot.
  4. Add 6 cups of the chicken broth and the pasta and stir to combine. Give the bottom of the pot another good scrape (otherwise any cooked food on the bottom of the pot may alert the burn warning when the pressure cooker comes to pressure).
  5. Secure the lid and set the pressure cooker to cook on high. Use this formula for the cooking time (and read the note below): take the al dente cooking time on the pasta package, cut the time in half and subtract two more minutes. For instance, for pasta that cooks al dente in 12 minutes, the pressure cooker time will be 4 minutes. Round up for 1/2 minutes.
  6. When the cooking time is finished, let the pressure naturally release for 10-15 minutes (otherwise liquid may spurt out of the valve when releasing pressure). Manually release remaining pressure or let it naturally release all the way (pasta will be a bit softer if doing this since it will continue to cook a little as the pressure naturally releases).
  7. Stir the soup and add additional chicken broth to thin, if needed (I add about 1 to 2 additional cups). Serve the soup in bowls with spoonfuls of the cheese topping and additional mozzarella or Parmesan cheese on top.
Marsha's Notes:
  • I didn't add the garlic to the beef right away, as I have heard over and over again that if you cook garlic too long (or burn it) that it will turn bitter, so I added my garlic to the pot the last couple minutes that the beef was browning. It also took me a lot longer than 2-3 minutes to cook the meat, even with the sauté function on high.
  • Initially, the soup seemed the perfect consistency right after it was done cooking. Then, by the time we took it across town to Scott's Mom's house, and everyone ate what they wanted, and then we brought the leftovers home, the noodles had absorbed so much of the liquid in the soup that we were really just left with pasta and sauce, like spaghetti instead of soup. That's okay. It still tastes delicious, but if you want it to remain "soup" then you might want to add the extra liquid suggested in the recipe, either right away, or just a little bit to each bowl when you reheat it as leftovers.

Thursday, February 23, 2023

Parmesan Pastina

A friend posted this on Facebook and we tried it and really liked it. The super tiny pasta is so fun! The lemon in the original recipe feels like kind of a foodie thing, where it changes up boring pasta and turns it into something definitely more interesting, but none of us really enjoyed the added flavor and opted to leave it out in future batches. I probably liked the lemon the best of everyone, but it was still not entirely my thing. So, feel free to add it or leave it out. Your choice. Enjoy!


Parmesan Pastina
Ingredients:
  • 3 cups chicken broth
  • (1) 12-oz pkg dry pastina or similar (alphabet pasta, acini de pepe, etc.)
  • 1 egg, whisked
  • 4 TBS cold butter
  • 1 cup warm milk, plus 2 TBS
  • 1-½ packed cups freshly grated parmesan cheese (grated from a wedge is tastiest)
  • ¼-½ tsp garlic powder
  • Zest from one small lemon, optional (we opted out)
  • Salt & fresh pepper to taste
Directions:
  1. Bring chicken broth to a boil in a medium sauce pan. Add in pasta and turn heat to a gentle boil. Stir often to prevent pasta from sticking. Boil 5-6 min until pasta is al dente and liquid is mostly absorbed. While pasta is cooking, warm milk in a separate container in microwave. Do not let the boil or get too hot. Once pasta is done, remove pan from heat.
  2. Add in cold butter and stir. Once butter is melted remove a cup of pasta and mix into egg to temper. Pour pasta/egg mixture back into pan and stir well to incorporate. Stir in milk and combine well.
  3. Add in garlic powder, lemon zest (opt), parmesan cheese. Taste. Add salt and freshly ground pepper to taste. You might want to add a small squeeze of fresh lemon juice to round out the flavors (opt).
  4. Serve immediately and garnish with fresh herbs and extra parmesan cheese.

Tuesday, August 31, 2021

Chicken Tuscan Pasta

 I found this recipe originally from the Six Sister's Stuff website, but I made it just a touch different than they describe. To see the original recipe, go here: https://www.sixsistersstuff.com/recipe/20-minute-tuscan-pasta-freezer-meal/

It was quick, easy, and everyone LOVED it! Yay! I actually think the boys thought the sundried tomatoes in the recipe were pieces of bacon. Ha, ha! I won't tell if you won't.


Chicken Tuscan Pasta

Ingredients:

  • 16 ounces bow tie pasta 1 box
  • 4 Tablespoons butter
  • 4 garlic cloves finely minced or pressed through a garlic press
  • ½ Tablespoon dried basil
  • 8 ounces cream cheese softened and cut into small cubes
  • 8 ounces sun dried tomatoes 1 jar, rinsed, drained and chopped
  • 2 cups milk
  • 8 ounces parmesan cheese grated
  • ½ teaspoon ground black pepper
  • ½ teaspoon salt more to taste if needed
  • 1 cup chicken cooked and cubed

Directions:

  1. Cook pasta according to package directions. While it's cooking, prepare the sauce.
  2. In a medium pot or skillet, melt the butter over medium heat. Add the garlic and cook for about 2 minutes, stirring the whole time. Stir in the dried basil. Add the cream cheese, stirring with a whisk until the mixture is smooth. It will look curdled at first, but with constant whisking for 2-3 minutes, it will become a smooth creamy paste. Stir in the sun-dried tomatoes.
  3. Keep cooking over medium heat and add the milk and whisk quickly and constantly until it is blended into the sauce. Stir in the Parmesan cheese, pepper and salt. Cook over medium heat, stirring until the cheese is melted and the sauce is the desired consistency, 5-10 minutes.
  4. Serve over hot, cooked noodles. I put my chicken on top, or you can mix it in. You can also make this as a one-pan dish by adding the noodles and chicken directly to the sauce in the pan, toss, and plate in a large family-style bowl for serving.

Marsha's Notes:

Raw Chicken: I prepped the chicken earlier in the day and then added it to the pan at dinner time. I used two large chicken breasts, cut them into bite-sized pieces, put in my largest frying pan, and then tossed with some oil and my favorite seasoning/rub blend. Cook and then store in the fridge until you are ready to make the pasta and sauce. Otherwise, cook, remove from pan, then make your sauce in the same pan you cooked the chicken in and add the chicken back in later.

Canned Chicken: I used canned chicken in this recipe. To not end up with either leftover sauce and no noodles, or leftover noodles and no sauce, we just mixed the entire dish together, noodles, sauce and all, in the pan that I cooked it all in and then placed everything in TWO 9x9 pans. I topped each pan with extra parmesan cheese. One pan I popped under the broiler in the oven to brown the cheese. The other pan I covered in foil and placed in the freezer. I wrote on the foil, "Thaw and bake for 30 min at 350." 

Using the tiny bowtie pasta, the frozen pan did end up being a bit dry, so I would try another noodle or use more sauce next time.

I have also used regular bowtie pasta and served to our family plus guests and it turned out just fine in the ratio of sauce and noodles without too many leftovers.

Tuesday, August 24, 2021

Creamy Chicken Tortellini Soup Recipe

We tried this soup from The Forked Spoon and everyone ate it right up! Anytime I can get my kids to eat veggies in a soup, it's a hit in my book! And with autumn coming, I am getting in soup-mode! See the original recipe here: https://theforkedspoon.com/creamy-chicken-tortellini-soup/


Creamy Chicken Tortellini Soup

Ingredients: 

  • 1 tbsp olive oil
  • 2 medium onions (diced)
  • 3 large carrots (peeled and chopped)
  • 3 stalks celery (chopped)
  • 6 cloves garlic (minced)
  • 4 tbsp butter
  • ¼ cup all-purpose flour
  • 4 cups low sodium chicken broth (or chicken stock)
  • 1 tsp dried thyme
  • 1 tsp dried oregano
  • 1 tsp Italian seasoning
  • 1 tsp salt (plus more to taste)
  • ½ tsp black pepper
  • 2 cups whole milk
  • 1½ cups heavy cream
  • 3 cups cooked chicken (shredded)
  • 2 cups frozen sweet corn
  • 1 (8 ounce) package cheese tortellini
  • red pepper flakes, fresh thyme, fresh parsley, grated parmesan cheese (to garnish, optional)

Directions:

  1. Bring a large pot of salted water to a boil. Cook the tortellini according to package directions, then drain and set aside.
  2. Heat 1-2 tablespoons of olive oil in a large pot or Dutch oven set over medium heat. Add the chopped onion and sauté for about 5 minutes. As the onion softens, chop the carrots and celery, then add them to the pot with onions. Mix well and cook for an additional 5 minutes. Add the minced garlic and butter. Mix well. 
  3. Once the butter is melted, sprinkle the veggies with ¼ of all-purpose flour. Mix, stirring continuously, for approximately one minute to cook out the flour. 
  4. Slowly add the chicken broth, whisking continuously. 
  5. Add the dried thyme, dried oregano, Italian seasoning, salt, and pepper. 
  6. Add the milk and heavy cream. Increase heat to high. Once the soup almost reaches a boil, immediately reduce heat to medium-low. 
  7. Add the cooked, shredded chicken and frozen corn. Cook until heated and the soup has returned to a simmer. 
  8. Add the precooked tortellini to the simmering pot or add the cooked tortellini to individual soup bowls.
  9. Serve garnished with freshly chopped parsley, thyme, or grated parmesan cheese, if desired.

Marsha's Notes:

I made a big batch of cooked, shredded chicken in the Instant Pot and I kept some in the freezer (see how here:http://1brother2sisters.blogspot.com/2020/01/cooking-frozen-chicken-in-instant-pot.html). It worked perfectly for this recipe. I also had bought celery and onion before that I chopped up more than I needed for another recipe, froze the extra in baggies and pulled them out to use in soup recipes like this one. Makes most of the prep-work so easy! I don't really like a ton of celery or onion, so I'd say I had about 1/2 an onion and maybe 2 or 3 stalks of celery in the baggies in the freezer. This recipe calls for 2 medium onions... there is no way I used that much, I am sure. It's all up to your personal preferences.

Wednesday, April 28, 2021

TikTok Pasta/Squash

I had friends recommend the viral TikTok pasta recipe, so I gave it a try and mixed it up by making it healthier with spaghetti squash instead of pasta. Gotta watch those carbs! While it is good, and I've made it several times for a healthy meal full of veggies, I can honestly say that I am not sure why it went quite so viral. So, keep expectations in check. For sure, it is REALLY EASY!


TikTok Pasta/Squash

Ingredients:

  • 2 pints cherry tomatoes
  • 1 package fetta cheese
  • olive oil
  • seasonings
  • 1 lb cooked pasta (or one cooked spaghetti squash, peel and seeds removed)

Directions: 

  1. In an oven-safe baking dish, place your cheese in the center of the pan. You can use either the fetta brick or the crumbled fetta. 
  2. Surrounding the fetta, dump your cherry tomatoes. 
  3. Drizzle with olive oil and whatever seasonings you like (salt and pepper, Italian seasoning, basil, oregano, etc.). Stir the tomatoes (not the cheese) to coat. 
  4. Bake in a hot oven (350-400 degrees) for about 30 minutes or until all the tomatoes have shriveled and burst. 
  5. Remove from the oven and stir cheese and tomatoes together. 
  6. Add one package cooked pasta (or in my case, one cooked and shredded spaghetti squash) and stir together. For a creamier sauce, it is recommended to add a little of the hot pasta water.

Here is a step by step image- before the oven... after the oven... stirred... pasta/squash added.


Monday, April 19, 2021

Classic Minestrone Soup Crock Pot

We had this for dinner tonight and everyone ate their entire bowls. I did leave out the green beans, but that is just a personal preference. Chris will eat it, even with the white beans. (Chris doesn't typically like to eat beans.) You can also up the protein in this recipe by adding some cooked ground beef. To see the original recipe, go here:

https://www.melskitchencafe.com/classic-minestrone-soup/

Classic Minestrone Soup Crock Pot

Ingredients:
  • 1 tablespoon olive oil 
  • 1/2 cup finely chopped onion 
  • 3/4 cup chopped celery, about 2-3 ribs celery 
  • 3/4 to 1 cup chopped carrots, about 2-3 medium carrots 
  • 3 cloves garlic, finely minced or 1 teaspoon garlic powder 
  • 1 teaspoon dried basil 
  • 1 teaspoon salt 
  • 1/2 teaspoon dried oregano 
  • 1/4 teaspoon black pepper 
  • 28-ounce can crushed tomatoes 
  • 6 cups chicken or vegetable broth (48 oz. boxed broth)
  • 15-ounce can white beans, rinsed and drained (Great Northern white beans are about the same size as pinto beans, FYI)
  • 1 cup small pasta, like shells, ditalini or elbow
  • Sprinkling garlic salt to taste 
  • Parmesan cheese, for serving
Directions:
  1. In a large frying pan, heat the olive oil over medium heat and add the onion, celery and carrots. Cook, stirring occasionally, until everything starts to soften and get a touch of color. Add garlic the last couple of minutes. 
  2. Add the crushed tomatoes and chicken broth to your Crock Pot. Stir in basil, salt, oregano and black pepper. When ready, add your onions, carrots, celery and garlic from the frying pan into the Crock Pot. 
  3. Stir in the beans and cook on low all day. 
  4. About 20 minutes before you want to eat, boil the pasta and add to the soup. Season to taste with garlic salt. Serve with Parmesan cheese, if desired.
Recipe makes 8 servings:
Serving: 1 serving, Calories: 197kcal, Carbohydrates: 35g, Protein: 10g, Fat: 3g, Saturated Fat: 1g, Sodium: 1091mg, Fiber: 7g, Sugar: 7g

Monday, March 1, 2021

Creamy Crockpot Chicken Gnocchi Soup

This soup turned out super yummy, but I think I loved the leftovers even more than when it was fresh. It called for a slurry of cornstarch and water to thicken, but I didn't notice that it helped thicken the soup at all initially... so I even poured the soup out of my cock pot boil it on the stove to try to "activate" the cornstarch to try to make the soup thicken, and that didn't seem to help... but when we pulled out the leftovers and heated them, it was the perfect consistency! So... I wouldn't worry too much about the soup being "thick" initially because then it would probably congeal and get too thick for leftovers. Hope that makes sense. Just put the slurry in... it does what it does... and then let it be.

For the original recipe, click here:

https://www.nourish-and-fete.com/crockpot-chicken-gnocchi-soup/


Creamy Crockpot Chicken Gnocchi Soup

Ingredients:

  • 1 lb. boneless skinless chicken breasts, cut into small bite-sized pieces
  • 1 small onion chopped
  • 3-4 medium carrots peeled and chopped, run through the Salad Shooter
  • 1-2 stalks celery chopped
  • 4 cloves garlic minced
  • 2 teaspoons dried basil
  • 2 teaspoons Italian seasoning
  • 1 teaspoon salt
  • 10-12 cranks freshly-ground black pepper
  • 4 cups chicken broth
  • 2 tablespoons cornstarch
  • 2 tablespoons cold water
  • 2 12 ounce cans evaporated milk
  • 1 1 lb. package potato gnocchi (mini if you can find them)
  • 3 cups fresh baby spinach, opt.
  • 4 slices cooked bacon optional, to serve

Directions:

  1. Place the raw chicken, chopped onion, carrots, celery, minced garlic, basil, Italian seasoning, salt, and pepper in a large crockpot or slow cooker. Pour chicken stock or broth on top. Cover and cook on low for 6-8 hours or on high for 4-5 hours. (You can also add your bacon now if you want more bacon flavor in your soup, or you can have more mild bacon flavor by garnishing at the end.)
  2. In a small bowl or liquid measuring cup, whisk together the cornstarch and cold water to make a thick slurry. Scrape that into the crockpot, along with both cans of evaporated milk and the gnocchi. Stir well to combine, then re-cover the crockpot and cook for another 20-30 minutes or longer. The soup should be slightly thickened (maybe); the gnocchi, tender.
  3. Just before serving, stir in the spinach, if you are using it, and let it wilt for 2-3 minutes. Taste and season with additional salt and pepper or garlic salt, as desired. Serve with crumbled cooked bacon or fresh herbs for garnish. Enjoy!

Focaccia Bread

THIS DOUGH SITS FOR AT LEAST 8 HOURS (SO MAKE THE NIGHT BEFORE).

When I served this bread, Scott told me I had found something special. That's how good it was! I've made it twice now and think it is going to be a regular at our house. Everyone LOVED it! We are also fans of the focaccia bread at Firehouse Pizzeria, which is cheese stuffed, and now I can make a copy cat version of that AT HOME! WOOT! To see the original recipe, click here:

https://lilluna.com/focaccia-bread/


Focaccia Bread

Dough has to sit for 8 hours or overnight.

Ingredients:

  • 2 cups flour
  • 1 teaspoon salt
  • 1 1/4 teaspoons instant yeast
  • 1 cup warm water
  • 1/4 cup olive oil
  • 1 teaspoon oregano
  • 2 teaspoons dried basil
  • 1 teaspoon flaky sea salt

Directions:

  1. In a medium bowl, whisk together the flour, salt, and yeast. (Whisking the flour, salt and yeast helps distribute everything so you don't end up with clumps of salt or yeast in the dough and cuts down on mixing time once you add the water which helps not build up too much gluten.) 
  2. Add the warm water, and stir just enough to form a soft and sticky dough. Cover the bowl with plastic wrap and refrigerate for at least 8 hours, or up to 24 hours. (Making it the night/day before you want to serve it is perfect.)
  3. After the dough has chilled for at least 8 hours, gently shape the dough into a ball with your hands. Pour a tablespoon of olive oil into the bottom of an 8 inch cake pan (no bigger than 8 inches is important) and spread it to cover the interior surfaces of the pan. 
  4. Place the ball of dough in the center of the pan, pat down just a bit, and cover tightly with plastic wrap. Let sit at room temperature for 2 hours, or until the dough has expanded to nearly fill the cake pan.
  5. Toward the end of the rise time, preheat the oven to 450 (400 for convection). Remove the plastic wrap from the pan. Drizzle the remaining olive oil over the dough first, then press your fingers down into the dough, pushing to the bottom of the pan. Repeat until the entire surface of the dough is covered in deep dimples. Press the dough towards the edge of the pan if it didn't quite spread all the way. Sprinkle with the oregano, basil (or Italian Seasoning) and sea salt.
  6. Bake 20-25 minutes, or until golden brown and crisp. (20 minutes at 400 convection in my oven was perfect!)
As you can see, this dough is really shaggy. I just left it like this and then covered it with plastic wrap and put in the fridge overnight. You could also clean out the bowl, grease it with some olive oil and put the dough back in before covering and putting it in the fridge, but it doesn't really need it.

Done!


Monday, February 15, 2021

Ham and Cheese Tortellini

Looking for ways to use leftover ham and get the boys to eat more veggies, I stumbled across this recipe for Ham and Cheese Tortellini, and it was a hit! I'll put my notes at the bottom. To see the original recipe, go here:  https://www.julieseatsandtreats.com/tempting-tortellini-ham/


Ham and Cheese Tortellini

Ingredients:

  • 19 oz cheese tortellini frozen
  • 1 c. peas
  • 1/4 c. butter
  • 1/4 c. all-purpose flour
  • 1 1/4 c. fat-free milk
  • 1/4 c. half and half cream
  • 1 1/2 c. cubed fully cooked lean ham
  • 4 ounces fat free cream cheese cubed
  • 1 tsp dried basil
  • 1/2 tsp garlic powder
  • 1/4 tsp pepper
  • 1/2 c. grated Romano cheese

Directions:

  1. In a large saucepan, cook tortellini according to package directions.
  2. In a large nonstick skillet over medium heat, melt butter. Stir in flour until smooth; gradually add milk and cream. Bring to a boil; cook and stir for 1 minute or until thickened.
  3. Add the ham, peas, basil, garlic powder, and pepper; cook and stir until cream cheese is melted. Mix in grated cheese. Drain tortellini; add to pan and heat through.

Marsha's Notes:

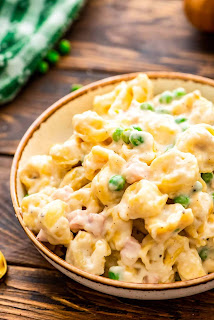
I used my big pan to cook the tortellini in. Then, I used a package of pre-diced ham and frozen peas. I added them to the tortellini just a minute or two before I was ready to drain it, just to heat them both through. Then I dumped the noodles, ham and peas into the strainer, drained everything, and put it all back into the original pan. I then poured the sauce I was making in a second pan over the noodles, peas and ham and stirred the whole thing together.

A pint of half and half is two cups, so I used an entire pint carton instead of the fat-free milk suggested in the recipe. In the end, if the sauce felt too thick, I added some extra milk to thin to the desired consistency. 

The main seasoning in this recipe is the basil, but I might have liked it a little better with less basil and maybe some other Italian spice instead, like oregano. Next time, I might do 1/2 tsp basil and 1/2 tsp oregano. I also finished the dish off with a sprinkling of garlic salt to taste.

Friday, February 12, 2021

Amazing Instant Pot Creamy "Baked" Ziti

When I saw this yummy looking Instant Pot pasta, I just had to try it. The end result was good, but turned out a little dry for us with slightly bloated noodles, so don't be tempted to up the cooking time because it seems too short. Cook exactly as recommended in the recipe (at least the first time you try), and different shapes and kinds of pasta might also make a difference. But that being said, we all liked it and ate it right up. To see the original recipe, go here: https://www.melskitchencafe.com/instant-pot-creamy-baked-ziti/

Update: We make sure to now use a really sturdy noodle and do the timed pressure cook for about 3 minutes, and it seems to work out really well.


Amazing Instant Pot Creamy "Baked" Ziti

Ingredients:

  • 2 cups broth, or 1 can (15 oz)
  •  2 cups cream, or 1 pint (see note for lightened up substitutions)
  •  1/2 teaspoon salt
  •  1/4 teaspoon black pepper
  •  2 cloves garlic, finely minced (or 1/2 teaspoon garlic powder)
  •  16 ounces uncooked ziti pasta or other tube-shaped pasta
  •  15-ounce can crushed tomatoes
  •  1 1/2 teaspoons dried oregano
  •  1 1/2 teaspoons dried basil
  •  1/2 to 1 cup freshly grated Parmesan cheese
  •  Fresh basil, for serving (optional)

Directions:

  1. Lightly spray the bottom and sides of a 6-quart Instant Pot with nonstick cooking spray. Pour in the broth and cream and add the salt, pepper and garlic.
  2. Add the pasta; don't stir, but if it's mounded in the center, arrange into an even layer. Pour the crushed tomatoes evenly over the pasta and sprinkle the oregano and basil over the top. Don't stir. Just push the noodles down into the liquid to get them semi-covered in some kind of sauce as best you can.
  3. Secure the lid of the Instant Pot, set the valve to seal, and select "manual" or "pressure cook" and dial up or down to the minutes needed --> take the cooking time on the pasta package directions, cut it in half and subtract two more minutes. So for pasta that cooks to al dente in 12 minutes, the IP cooking time would be 4 minutes (add an extra minute if you like your pasta super soft). Marsha's note: I do 3 minutes for a typical bite-sized pasta.
  4. Let the pressure release naturally for 10 minutes and then quick release the remaining pressure. Add the Parmesan cheese and stir thoroughly (it's ok if there are some darker, cooked spots on the bottom of the pot/bottom layer of pasta). Serve the ziti immediately with chopped, fresh basil, and additional Parmesan, if desired.
Author's Notes:

Optional: adding a pound of ground beef or Italian sausage is fantastic with this recipe! Cook the meat on the sauté function with a little salt and pepper, drain the grease, and proceed with the recipe (just make sure when you add the broth to scrape the bottom of the pot really well before adding the other ingredients).

Lighten it Up: If you want to lighten up the cream a bit, I've had great success making this with 1 cup milk + 1 tablespoon cornstarch (whisked together) + 1 cup cream. I haven't tried subbing all the cream for a milk + cornstarch mixture, but you could experiment!

For an Extra Saucy Pasta: add 1/4 to 1/2 cup extra broth, cream or crushed tomatoes. Any variety of tube pasta will work great here! When I can't find ziti, I've used penne or rigatoni. Also, I've subbed in a 15-ounce can diced tomatoes blended with 2 tablespoons tomato paste for the crushed tomatoes with great results.