Showing posts with label Instant Pot. Show all posts

Saturday, May 4, 2024

Instant Pot Mexican Restaurant Rice

While I have three other kind-of similar Mexican rice recipes on this blog (click here and here and here), this one is super easy because you make it in the Instant Pot, freeing up space on the stove for other cooking during your meal prep. We have made this rice probably 3 or 4 times already, tweaking it slightly each time to get an end result that we liked. Depending on how flavorful and strong you like your rice, I am including a range for the spices so you can adjust accordingly to your tastes. This makes a big batch (double) to use an entire can of tomato sauce, but we froze half the batch to use another time.


Instant Pot Mexican Restaurant Rice

Ingredients:

  • 1-2 Tbl cooking oil
  • 2 cups rice, rinsed until water runs clear
  • 1 big spoonful minced garlic from jar (1-2 Tbl)
  • 1 can tomato sauce (8 oz)
  • 1/2-1 tsp oregano
  • 1-2 tsp onion powder
  • 1-2 tsp garlic powder
  • 1/2-1 tsp cumin
  • 1-2 Tbl chicken bouillon
  • 2 cans chicken broth (15 oz each)
  • salt to taste

Directions:

  1. Set your Instant Pot to the sauté function on high. Add enough cooking oil to the bottom of the pot to coat. 
  2. Add your rice and cook until slightly brown and fragrant, stirring occasionally. 
  3. Slightly before you think the rice is browned to your liking, add in 1 spoonful of minced garlic (I used a regular spoon, like the kind your eat your meals with, and put a heaping spoonful into the pot, maybe one to two level tablespoons). At this point, you might want to turn down or turn off the sauté function and just use residual heat. 
  4. Stir and cook the garlic for just a minute or so, being careful not to burn it. Then add your tomato sauce and spices, cooking for a minute or so longer before adding in your chicken broth.
  5. Stir and scrape the bottom of the pot to clean off any bits to avoid a burn warning on your pot during cooking, and cover the pot with the lid, turning the valve to "seal" and cook on high pressure for 12 minutes. 
  6. Quick-release the pressure, stir/fluff the rice and serve. Add additional salt, if desired.

Saturday, March 18, 2023

Pressure Cooker Lasagna Soup

Lately, we have been taking dinner to Scott's mother every Wednesday night, and so I have been on the lookout for lots of recipes that are easy to travel with, like Crock Pot or Instapot. This week's recipe was this lasagna soup, and everyone really liked it, even Lucas, who doesn't like ricotta cheese (he was okay with it because it was a topping so he could put as much or as little on as he liked). Here is the link to the original recipe:

https://www.melskitchencafe.com/pressure-cooker-lasagna-soup/


Pressure Cooker Lasagna Soup

Ingredients:

  • 1 pound ground Italian sausage or ground beef
  • ½ cup finely chopped yellow or white onion
  • ½ cup diced carrots, about 2 medium carrots
  • 2 cloves garlic, finely chopped or pressed through a garlic press
  • 3 cans (15-ounces each) crushed tomatoes
  • 1 teaspoon dried basil
  • 1 teaspoon dried oregano
  • 1 dried bay leaf
  • ½ teaspoon salt, I use coarse, kosher salt
  • Pinch of black pepper, I use coarsely ground
  • 6 to 8 cups chicken broth, I use low-sodium (see note)
  • 8 to 12 ounces (3-4 cups) bowtie or rotini pasta or broken lasagna noodles (see note)

Cheese Topping:

  • 1 cup ricotta cheese or blended cottage cheese
  • 1 cup mozzarella cheese, plus more for serving
  • ½ cup freshly grated Parmesan cheese
  • ½ teaspoon dried basil
  • Pinch of salt and pepper

Directions:

  1. For the cheese topping, stir together all the ingredients until well combined. Refrigerate until ready to serve.
  2. For the soup, select the sauté function on the pressure cooker and cook the sausage or ground beef, onion, carrots, and garlic, for 2-3 minutes, until the meat is no longer pink, breaking the meat into small pieces as it cooks. Drain any excess grease.
  3. Add the crushed tomatoes, basil, oregano, bay leaf, salt and black pepper. Stir well, making sure to scrape up any cooked bits on the bottom of the pot.
  4. Add 6 cups of the chicken broth and the pasta and stir to combine. Give the bottom of the pot another good scrape (otherwise any cooked food on the bottom of the pot may alert the burn warning when the pressure cooker comes to pressure).
  5. Secure the lid and set the pressure cooker to cook on high. Use this formula for the cooking time (and read the note below): take the al dente cooking time on the pasta package, cut the time in half and subtract two more minutes. For instance, for pasta that cooks al dente in 12 minutes, the pressure cooker time will be 4 minutes. Round up for 1/2 minutes.
  6. When the cooking time is finished, let the pressure naturally release for 10-15 minutes (otherwise liquid may spurt out of the valve when releasing pressure). Manually release remaining pressure or let it naturally release all the way (pasta will be a bit softer if doing this since it will continue to cook a little as the pressure naturally releases).
  7. Stir the soup and add additional chicken broth to thin, if needed (I add about 1 to 2 additional cups). Serve the soup in bowls with spoonfuls of the cheese topping and additional mozzarella or Parmesan cheese on top.
Marsha's Notes:
  • I didn't add the garlic to the beef right away, as I have heard over and over again that if you cook garlic too long (or burn it) that it will turn bitter, so I added my garlic to the pot the last couple minutes that the beef was browning. It also took me a lot longer than 2-3 minutes to cook the meat, even with the sauté function on high.
  • Initially, the soup seemed the perfect consistency right after it was done cooking. Then, by the time we took it across town to Scott's Mom's house, and everyone ate what they wanted, and then we brought the leftovers home, the noodles had absorbed so much of the liquid in the soup that we were really just left with pasta and sauce, like spaghetti instead of soup. That's okay. It still tastes delicious, but if you want it to remain "soup" then you might want to add the extra liquid suggested in the recipe, either right away, or just a little bit to each bowl when you reheat it as leftovers.

Thursday, March 3, 2022

Six Sister's Stuff Instant Pot Perfect Beef Pot Roast Recipe

 Another winner for the Instant Pot! Just start prepping and cooking your roast after lunch, let it do it's thing all afternoon, and you will be greeted with a perfect roast and yummy veggies for dinner. It does take just a bit of time to pull the gravy together, if you want to make some from the drippings, so be sure to keep your roast and veggies warm in the oven while you do that. Searing the roast might sound like a pain, but it gives the roast that beautiful brown color that it would not otherwise get being cooked in this manner, and it's pretty easy to do and makes it more visually appealing to eat. Just sear each side for 2 minutes as suggested, and it was the perfect amount of time for a nice brown crust using the sauté function (on high, I believe) on the Instant Pot!

See the original recipe here: https://www.sixsistersstuff.com/recipe/instant-pot-perfect-beef-pot-roast-recipe/#wprm-recipe-container-127700


Instant Pot Perfect Beef Roast

Ingredients:

  • 4 pound Beef Pot Roast 3-4 pounds, (I prefer a chuck roast or rump roast, but any kind will work)
  • 2 Tablespoons olive oil
  • 1 teaspoon salt (more to taste – be generous)
  • ½ teaspoon black pepper (more to taste – be generous)
  • ½ teaspoon garlic salt (more or less to taste)
  • 2 cups beef broth divided
  • 1 onion roughly chopped into large pieces
  • 1 pound baby carrots
  • 3 celery stalks roughly chopped into large pieces
  • 3 garlic cloves minced
  • 3 Tablespoons Worcestershire sauce
  • 2 Tablespoons balsamic vinegar
  • 1 Tablespoon soy sauce
  • 1 teaspoon dried thyme (more or less to taste)
  • 1 teaspoon dried rosemary leaves (more or less to taste)
Directions:

  1. Press the SAUTE button on your Instant Pot and allow it to heat up.
  2. Add 2 Tablespoons of olive oil to the bottom of the Instant Pot.
  3. Generously sprinkle salt, pepper, and garlic salt on all sides of the pot roast.
  4. Place roast in hot oil and let it sear on that side for 2 minutes. Flip the roast over and sear the other side for 2 minutes.
  5. Depending on the shape of your pot roast, you can sear the other sides if you choose. Press CANCEL button to turn off the sauté feature.
  6. Remove the roast from the Instant Pot and place on a plate.
  7. Pour 1/2 cup beef broth into the bottom of the Instant Pot and with a wooden spatula, scrape the burnt brown bits off the bottom of the pot (this is called "deglazing" and will keep you from getting the burn notice when it cooks).
  8. Place roast back into Instant Pot. Add onion, carrots, and celery and spread all around the roast.
  9. Add garlic on top of roast and vegetables.
  10. Pour in the beef broth, being sure not to pour it directly on the roast  or vegetables because you just cooked them in delicious flavors. Try to pour the beef broth on the sides as much as possible.
  11. Pour the Worcestershire sauce, balsamic vinegar, and soy sauce directly on the roast. Sprinkle thyme and rosemary evenly around the meat and vegetables.
  12. Place the lid on top of the Instant Pot and move the valve to SEALING. Press the PRESSURE COOK (MANUAL) button and set timer for 80 minutes (or 20 minutes per pound, depending on the size of your roast).
  13. When the timer is done, let the pressure do a NATURAL RELEASE and then let the roast sit on warm for at least 1 hour (I sometimes will let it sit on warm in the Instant Pot for 3-5 hours, just to let it really get tender).
  14. Remove roast from Instant Pot and slice into pieces (it should pretty much fall apart by this point).
  15. Serve with mashed potatoes and the cooked carrots on the side.
Gravy:
  • 4 cups drippings from Instant pot (liquid) from the Instant Pot after roast is done cooking
  • 4 Tablespoons butter
  • 3 Tablespoons flour
Directions:
  1. When the roast is done cooking, use a baster (or whatever method you want) to remove the liquid from the Instant Pot.
  2. To make gravy, you will want to get at least 3 cups of drippings from the Instant Pot. If you don't have quite enough drippings, you can supplement with a can of beef broth or beef stock (I like to use beef stock for gravy because it's a little more flavorful).
  3. Place a small saucepan on the stovetop over medium heat.
  4. Add butter to the saucepan and let it melt.
  5. Add flour and use a whisk to whisk flour and melted butter together until it makes a paste (takes about a minute).
  6. Pour in the drippings, whisking the entire time.
  7. Cook for about 4-5 minutes minutes or until the gravy reaches the thickness you prefer.
  8. Serve roast with gravy on top and on top of mashed potatoes.

Tuesday, February 22, 2022

One-Pan Ranch Chicken

One the hunt for healthy, tasty recipes, I stumbled upon a website called "Hungry Girl." I modified her recipe for one-pan ranch chicken. To see the original recipe, go here: https://www.hungry-girl.com/weekly-recipes/easy-ranch-chicken-skillet


One-Pan Ranch Chicken

Ingredients-

  • boneless, skinless chicken breasts, cooked and either shredded or cubed (Instant Pot chicken recipe)
  • salt
  • black pepper
  • 2 pkg. frozen riced cauliflower
  • 1 bag frozen mixed vegetables of your choice
  • 1/2 cup light sour cream
  • 1/2 brick light/reduced-fat cream cheese
  • 1 envelope ranch dressing/dip seasoning mix
Directions-

  1. Heat frozen cauliflower and mixed veggies in a large non-stick pan with some water in the bottom of the pan to steam (maybe 1/2 cup). Mix well. 
  2. Cover and cook until veggies are tender. 
  3. When veggies are just about done, add in as much of your cooked chicken as desired (maybe 1/3 of an entire bag of frozen chicken cooked in the Instant Pot), sour cream, cream cheese and ranch seasoning. 
  4. Salt and pepper to taste.
  5. Top with additional cheese of your choice, if desired.
Marsha's Notes:
You could easily sub canned chicken, rotisserie chicken, or any other kind of meat you like. The Instant Pot is not required, but I currently like to cook big batches of chicken that way, and this is a good recipe to use it in.

Monday, September 13, 2021

Instant Pot Mac and Cheese

We LOVE this crock pot mac and cheese recipe, but I wanted to see if I could find something equally as yummy for the Instant Pot for those days when you don't have hours to wait on a Crock Pot. The original recipe for this came from here: https://www.melskitchencafe.com/pressure-cooker-mac-and-cheese/

However, we only had good, not great, results (Scott said, "Not as good as the Crock Pot stuff, but still better than Kraft!") but I think there is great potential so I want to document this recipe with my tweaks for next time. I think it all comes down to the type of noodles you use and how long you cook them. By the end of the recommended cooking process with a package of American Beauty elbow macaroni, the noodles were bloated and over cooked with almost all of the liquid in the pot absorbed. I think if I reduced the cook time (pressure-release time) or tried a different noodle brand/shape, we could really come up with something amazing.


Instant Pot Mac and Cheese

Ingredients:

  • 3 ¾ cups water (see note)
  • 2 tablespoons salted butter
  • 1 teaspoon salt
  • 1 pound (454 g) elbow macaroni, about 3 cups
  • 1 cup milk, not skim or evaporated milk
  • ½ cup milk, not skim or evaporated milk
  • 1 teaspoon cornstarch
  • Pinch dry mustard
  • ½ to 1 teaspoon hot sauce, optional but delicious for flavor boost
  • 1 ½ cups (171 g) freshly shredded cheddar cheese (see note)
  • 1 ½ cups (171 g) freshly shredded Monterey Jack cheese

Directions:

  1. Add the water to the insert of a 6-quart electric pressure cooker. Add the butter, salt and macaroni. Stir to even out the noodles.
  2. Pour in the milk. DO NOT STIR.
  3. Set the cook time for 3 minutes. Let the pressure naturally release for 5 minutes and then quick release the remaining pressure. If liquid spurts out of the valve, close it and wait 1-2 minutes and try again. Keep the pressure cooker on the warm/hold setting (don’t hit cancel). Marsha's Note: I just threw a rag over the valve and let the pressure release. It did spurt, but with the rag, it wasn't a huge problem.
  4. Whisk together the sauce ingredients: 1/2 cup milk, cornstarch, dry mustard, and hot sauce. Add the mixture to the cooked noodles, breaking up clumps of noodles as you stir to combine well.
  5. Add the cheese, one handful at a time, and stir until each addition is melted before adding more.
  6. Once all the cheese is melted, season to taste with additional salt, if needed. At this point, you can also drizzle in warm milk, a tablespoon at a time, for extra creamy mac and cheese. Serve immediately.

NOTES FROM MEL'S KITCHEN CAFE
  • Cheese: I like to use medium or sharp cheddar cheese. Note: the sharper the cheddar, the less creamy it will be as it melts. You can sub in other types of cheese, too. White cheddar, havarti, Swiss. This recipe works best if half the cheese is a variety of cheddar and half the cheese is a creamy, good-melting cheese.
  • Adaptation: I adapted this recipe from a skillet recipe using 12 ounces of noodles and 3 cups of cheese. I use 16 ounces for this recipe, but I kept the amount of cheese the same from that original recipe. It’s plenty cheesy for us, but if you want to amp up the cheesiness, increase both types of cheese to 2 cups/8 ounces each.
  • Liquid: The amount of liquid left over in the pot after the noodles have cooked will be variable depending on brand/type of pasta, brand of pressure cooker, how quickly pressure was released, etc. There should be liquid in the bottom of the pot after cooking, but not so much that the noodles are still swimming in it. If there seems to be a ton of extra liquid, drain off all but about 1/2 cup or so.
  • Hot Sauce: the hot sauce may seem unusual; it doesn’t add spiciness. It adds a flavor boost that is super yummy. Just a small drizzle helps, but you can leave it out.

Wednesday, August 25, 2021

Hard Boiled Eggs in the Instant Pot

When my mother gave me my Instant Pot, one of the things she said she loved using it for the most was hard boiled eggs. Well, today I tried it for the first time and it turned out great! I did another post on how to make hard boiled eggs on the stove with some extra tips. You can check that out here:  https://1brother2sisters.blogspot.com/2019/11/hard-boiled-egg.html


Instant Pot Hard Boiled Eggs

Ingredients: 

  • 6 raw eggs
  • 1 cup water 

Directions: 

  1. Place your egg rack in the bottom of your Instant Pot. 
  2. Pour in one cup of water. 
  3. Place eggs in the holder (mine holds seven), replace the lid to the pot, turn the valve to seal, and pressure cook for 5 minutes on high pressure. 
  4. Let the pot sit after cooking for an additional 3 minutes before doing a quick-release for the rest of the pressure. 
  5. Place eggs in cold water/ice bath until cooled and ready to peel.

Marsha's Notes: 
The recipe I referenced to do my eggs said you could use the steam rack that comes with most pots, but I had an actual egg rack, so that is what I used. My egg rack limits me to seven eggs at a time, where with the steam rack, the recipe suggested that you could put as many as a dozen eggs in your post to cook at a time. I imagine that I could "over stack" eggs with my egg rack as well and cook a dozen, but so far, I have only tried doing the seven that would fit.

Update:
I made a batch of 18 eggs to take to Easter for decorating this year (2024) and the eggs ended up with that grey ring around the yolks when cut. I read online that the grey is caused by overcooking the eggs slightly, or not cooling them off fast enough. While I did use an ice bath immediately after taking the eggs out of the cooker, I think next time I will cook them a little less and leave them in the ice for like 30 minutes to make sure they are really cold, and hopefully return and report what happens. I cooked them at high pressure for 5 minutes, then slow release for 5 minutes, then quick release and immediately in the ice bath. Next time, I think will try the slow release for only 3 minutes. I will make the change in the above recipe.

Wednesday, April 28, 2021

Spaghetti Squash in the Instant Pot

 Cooking spaghetti squash in the Instant Pot is so easy!!! Here is how!


Spaghetti Squash In The Instant Pot

Ingredients:

  • 1 spaghetti squash
  • 1(+) cup of water
  • Optional butter, salt, and pepper

Directions:

  1. Cut your squash into quarters and remove the seeds. 
  2. Place the wire rack/trivet into the bottom of the pot. Add enough water to the bottom of the Instant Pot to cover the bottom and fill without touching the squash when it's placed on the rack. 
  3. Add your squash. 
  4. Seal and cook on high pressure for 7-10 minutes. Quick release the pressure and remove from pot.

Marsha's Notes:

If you are going to be eating the squash plain, then you can add pats of butter on top of each quarter of the squash and season with salt and pepper before cooking. If you are going to but putting other things on your squash, then you can just stick it in the Instant Pot by itself.

Lots of recipes online say to cook the squash on high pressure for 7 minutes, but I found that with my pot I am happier with closer to ten minutes. Just play around with it and see what you like best for texture.

Friday, February 19, 2021

Ultimate Beef Stroganoff Instant Pot

Another hit at our house. This would be yummy over baked potatoes, rice, pasta, mashed potatoes or on bread. To see the original recipe, go here: https://www.melskitchencafe.com/the-ultimate-beef-stroganoff/


Ultimate Beef Stroganoff- Instant Pot

Ingredients:

  • 2-3 pounds stew meat (two trays from Kent's Market)
  •  1 teaspoon salt
  •  1/4 teaspoon black pepper
  •  1 medium yellow onion, diced
  •  1-2 cloves garlic, finely minced
  •  1 tablespoon Worcestershire sauce
  •  1 1/2 cups beef broth or stock
  •  1 tablespoon ketchup
  •  1/3 cup flour
  •  1/2 cup beef broth, water or apple juice
  •  1/2 cup light or regular sour cream

Directions:

  1. Place the stew meat, salt, pepper and onion in the insert of the Instant Pot. Stir to distribute the seasonings and onion. In a small bowl, combine the garlic powder (or fresh garlic), Worcestershire sauce, beef broth and ketchup. Pour over the meat.
  2. Secure the lid and valve and cook on high pressure for 35 minutes (press "pressure cook" or "manual" and dial up or down to 35 minutes; the pressure cooker will start on its own). Let the pressure naturally release for 10 minutes and then quick release the remaining pressure. Stir the meat mixture with a wooden spoon to break up any large clumps of meat.
  3. Combine the flour and broth/water/apple juice in a small bowl, whisking vigorously to combine well (a blender works great as well). The roux should be thick but still pourable. Add additional broth or water, if needed.
  4. Select the saute function on the Instant Pot. Pour the roux mixture into the Instant Pot, whisking quickly to avoid lumps, and continue mixing until evenly and well combined. 
  5. Continue cooking on the saute setting, stirring often to prevent sticking, until the stroganoff is thickened. Set the Instant Pot to warm and stir in the sour cream. Serve over pasta, rice or baked potatoes.

Friday, February 12, 2021

Amazing Instant Pot Creamy "Baked" Ziti

When I saw this yummy looking Instant Pot pasta, I just had to try it. The end result was good, but turned out a little dry for us with slightly bloated noodles, so don't be tempted to up the cooking time because it seems too short. Cook exactly as recommended in the recipe (at least the first time you try), and different shapes and kinds of pasta might also make a difference. But that being said, we all liked it and ate it right up. To see the original recipe, go here: https://www.melskitchencafe.com/instant-pot-creamy-baked-ziti/

Update: We make sure to now use a really sturdy noodle and do the timed pressure cook for about 3 minutes, and it seems to work out really well.


Amazing Instant Pot Creamy "Baked" Ziti

Ingredients:

  • 2 cups broth, or 1 can (15 oz)
  •  2 cups cream, or 1 pint (see note for lightened up substitutions)
  •  1/2 teaspoon salt
  •  1/4 teaspoon black pepper
  •  2 cloves garlic, finely minced (or 1/2 teaspoon garlic powder)
  •  16 ounces uncooked ziti pasta or other tube-shaped pasta
  •  15-ounce can crushed tomatoes
  •  1 1/2 teaspoons dried oregano
  •  1 1/2 teaspoons dried basil
  •  1/2 to 1 cup freshly grated Parmesan cheese
  •  Fresh basil, for serving (optional)

Directions:

  1. Lightly spray the bottom and sides of a 6-quart Instant Pot with nonstick cooking spray. Pour in the broth and cream and add the salt, pepper and garlic.
  2. Add the pasta; don't stir, but if it's mounded in the center, arrange into an even layer. Pour the crushed tomatoes evenly over the pasta and sprinkle the oregano and basil over the top. Don't stir. Just push the noodles down into the liquid to get them semi-covered in some kind of sauce as best you can.
  3. Secure the lid of the Instant Pot, set the valve to seal, and select "manual" or "pressure cook" and dial up or down to the minutes needed --> take the cooking time on the pasta package directions, cut it in half and subtract two more minutes. So for pasta that cooks to al dente in 12 minutes, the IP cooking time would be 4 minutes (add an extra minute if you like your pasta super soft). Marsha's note: I do 3 minutes for a typical bite-sized pasta.
  4. Let the pressure release naturally for 10 minutes and then quick release the remaining pressure. Add the Parmesan cheese and stir thoroughly (it's ok if there are some darker, cooked spots on the bottom of the pot/bottom layer of pasta). Serve the ziti immediately with chopped, fresh basil, and additional Parmesan, if desired.
Author's Notes:

Optional: adding a pound of ground beef or Italian sausage is fantastic with this recipe! Cook the meat on the sauté function with a little salt and pepper, drain the grease, and proceed with the recipe (just make sure when you add the broth to scrape the bottom of the pot really well before adding the other ingredients).

Lighten it Up: If you want to lighten up the cream a bit, I've had great success making this with 1 cup milk + 1 tablespoon cornstarch (whisked together) + 1 cup cream. I haven't tried subbing all the cream for a milk + cornstarch mixture, but you could experiment!

For an Extra Saucy Pasta: add 1/4 to 1/2 cup extra broth, cream or crushed tomatoes. Any variety of tube pasta will work great here! When I can't find ziti, I've used penne or rigatoni. Also, I've subbed in a 15-ounce can diced tomatoes blended with 2 tablespoons tomato paste for the crushed tomatoes with great results.

Instant Pot Refried Beans

So, 2020 was the pandemic and I picked up some dried pinto beans and then never really needed them and dreaded the long prep/soak time for beans. When I saw this recipe for making them in the Instant Pot, I just had to try it! Everyone really liked it, but I did leave out the jalapeno that the original recipe called for. To see the original from Mel's Kitchen Cafe, click here: https://www.melskitchencafe.com/pressure-cooker-refried-beans/


Instant Pot Refried Beans

Ingredients:

  •  1 tablespoon olive oil
  •  1 jalapeño, cored, seeded and finely chopped
  •  1 small onion, chopped (about 1/2 cup)
  •  3-4 cloves garlic, finely minced
  •  1 1/2 pounds dry pinto beans, rinsed
  •  8 cups water
  •  4 cups low-sodium chicken or vegetable broth
  •  2 teaspoons salt
  •  2 tablespoons white vinegar
Directions:
  1. In the insert of an electric pressure cooker, heat the oil (using the Sauté function on the Instant Pot) and add the onion, and garlic, and sauté for 1-2 minutes, stirring often.
  2. Add the rinsed and drained beans, water, broth, salt and vinegar.
  3. Secure the lid on the pressure cooker and cook on high pressure for 35 minutes (electric).
  4. Let the pressure naturally release for 30 minutes. Reserve two cups of the liquid in a separate bowl.
  5. Drain the rest of the liquid off the beans. Using an immersion blender, process/mash to the desired consistency, adding reserved cooking water, if needed for a smoother/softer consistency.
  6. Refrigerate for up to a week or freeze for several months.
Marsha's Notes:
I started the onions with the Sauté function on high  and then turned it down to medium once things started to cook. I also used about a cup of the reserve liquid to remoisten our beans. It probably varies from batch to batch depending on the beans, so just taste-test until they are perfect! I also added a sprinkling of garlic powder to taste but you may not need that depending on how strong your garlic is.

2024- We made these again, and I will note that the 1.5 pounds of beans called for in this recipe makes a LOT of refried beans (probably 4-5 cans worth and that was only a portion of the 4 lb bag of dry beans I bought) so we did use some fresh for dinner, then split the remaining beans into two batches and froze one of them.

This recipe fills our Instant Pot all the way to the max fill line. When venting, things do tend to want to spurt starchy bean water around the kitchen, so maybe cover the valve with a rag before opening. 

Also, a half batch is probably more useable for our family, but I am not sure how that might change the cooking process, so I will return and report if I try it.

Lastly, I found that the beans seems the perfect consistency when hot and fresh with about a cup of the reserved bean water added. However, upon sitting and cooling while we ate dinner, the beans seemed to dry out just a touch, so I added maybe another 1/2 cup or more to the batch before putting it in storage containers.


These were the beans right after I blended them, and they seemed perfect, but I did add more liquid to them after they had cooled a bit before storing because they seemed to have dried out some.

Sunday, January 10, 2021

Instant Pot Lemon Curd

I tried this recipe and it turned out wonderful! Just note, the curd will set and thicken more as it becomes cold in the refrigerator, so don't worry too much if it's not super thick initially.

See the original recipe here: https://www.melskitchencafe.com/easy-instant-pot-lemon-curd/

Instant Pot Lemon Curd

Ingredients:

  •  1/4 cup (2 ounces, 4 tablespoons) butter, melted (I use salted)
  •  1/2 cup (3.75 ounces) granulated sugar
  •  1 large egg
  •  1 large egg yolk
  •  1-2 teaspoons fresh lemon zest
  •  1/2 cup fresh lemon juice (from about 3-4 lemons)

Directions:

  1. Blend all ingredients together in a blender until smooth. Transfer to a heatproof liquid measuring cup or bowl and cover tightly with foil.
  2. Place the trivet inside the Instant Pot or other electric pressure cooker. Add 1 1/2 cups water. Set the covered bowl of lemon curd on the trivet.
  3. Secure the lid, set the valve to seal, and set the Instant Pot to pressure cook on high pressure for 10 minutes.
  4. Let the pressure naturally release for 10 minutes (this is important for the curd to fully set up!), then quick release the remaining pressure.
  5. Carefully remove the bowl from the pot. Remove the foil. It should be set like jello or custard. Whisk until creamy and smooth. (At first it will look curdled, but as you whisk, it will come together.) Optional: strain to remove the lemon zest.
  6. Refrigerate until ready to use (it will thicken as it cools). If it splits or looks curdled after sitting, whisk again to recombine.
Author's Notes:

Double: this recipe can easily be doubled; it doesn't expand much while cooking so as long as the heatproof bowl fits in the Instant Pot, it should work. Update: I'd recommend adding 2-3 minutes to the cooking time for a doubled batch.

Thicker Curd: this homemade lemon curd will likely be a bit thinner than storebought brands you are used to (especially since many of them contain thickeners like gelatin and cornstarch), but it will definitely thicken up as it cools in the refrigerator. For thicker curd you can also decrease the lemon juice to 3/4 cup.

Other Flavors: this recipe converts well to lime curd. I haven't tried it with other citrus fruits like orange or grapefruit, but I'm guessing it will work just fine.

Saturday, February 22, 2020

White Rice in the Instant Pot


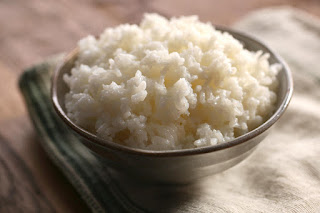
Making some delicious rice, super easy, and with great texture in the Instant Pot is a snap! No fuss. Just great rice that you can then use for anything you want. Here's how I do it.

Instant Pot White Rice
Ingredients:
  • 3 cups white rice
  • 5 cups chicken broth (three 14.5 oz cans)
Directions:
  1. Place these ingredients in your Instant Pot and use the "rice function" to cook (basically high pressure for 12 minutes). 
  2. Quick release the pressure and you are good to go.
Marsha's Notes:
Now, there is a lot of debate on the Internet about the perfect way to cook rice and it all depends on how you like it. Many people recommend the 1-to-1 ratio of water to rice in a pressure cooker. So if using my ratios is coming out to wet or to sticky for your tastes (I like sticky rice), then drop the water closer to the 1-to-1 ratio. Cook times can vary depending on the type of rice being cooked as well. Many also recommend rinsing the rice beforehand to remove powder, debris and have better flavor.

Wednesday, February 12, 2020

Marsha's Instant Pot Spaghetti and Meatballs

My kids love spaghetti and meatballs... at least most of them most of the time... Kids... right?! Ha, ha! So when this came up as something I could cook in the Instant Pot, I had to check it out. I really want to make the most of the new tool I have in the kitchen and find some amazing things to cook in it so it doesn't just sit on the shelf.

The original inspiration for this recipe came from Six Sister's Stuff, but their version burned to the bottom of my pot, so I change it up just a bit and here is how it all works for me. Enjoy!


Marsha's Instant Pot Spaghetti and Meatballs
Ingredients:
  • 1 package frozen meatballs
  • 1 24 oz. jar spaghetti sauce
  • 1/2 pound dry spaghetti noodles
  • water 
Directions:
  1. Spray your Instant Pot liner with non-stick spray and add your frozen meatballs to the bottom. 
  2. Break your spaghetti noodles in half and lay them as neatly as you can over the meatballs, alternating directions of how the noodles lay so they don't cook into a large clump. 
  3. Pour about a cup of water over everything and then pour the jar of sauce over the top last. Try to coat all the noodles as best you can in liquid and try to keep noodles from poking up so everything cooks properly. 
  4. Close the lid, make sure the vent is on seal, and cook under high pressure, normal mode, for about 8 minutes. 
  5. Quick release or natural release the pressure, stir and serve.
Marsha's Notes:
You can watch the Six Sisters Stuff video here:https://www.youtube.com/watch?v=_4QoMHgPrOs She recommends putting the noodles in first (probably to help keep them covered in the liquid for cooking as much as possible) but if you check the comments there are a lot of people who complain about how things burn. While the first time I made this following her recommendations, I did NOT get a burn notice on my pot, I DID have noodles burned and stuck to the bottom and it was difficult clean up.

When I made it again later, sprayed the pot with non-stick spray, and put my meat on the BOTTOM, it turned out beautiful and nothing stuck or burned. It IS more difficult to get your noodles to lay flat and even when they are placed on top of lumpy meatballs instead of the bottom of the pot, but just do your best, be careful about how you pour your water and sauce over the top so you coat everything as best you can, and hopefully you won't have any trouble. It takes a couple minutes more messing with the noodle layering, but you can still seriously have the lid on and the pot cooking in under 5 minutes and end up with delicious spaghetti and meatballs with almost no work.

In my grocery store there are two sizes of bags of frozen meatballs (between 16-24 oz., or 32 oz. bags) and you can use either size depending on how many you want to cook. Usually the smaller bags are the perfect amount for this size pot of spaghetti, but the males in our family like meat and so I've done it before with the larger bag and we just ended up with TONS of meat that some people ate without noodles.

My one son did note that the noodles can soak up a lot of the liquid in the sauce, so if you like your spaghetti saucier or more liquid, you can experiment with adding a bit more water or additional sauce to the pot before cooking, or you can heat up a little extra sauce in a bowl in the microwave to add to the pot once the cooking process is completed.

Thursday, January 16, 2020

Instant Pot Mashed Potatoes

I have made several batches of potatoes in the Instant Pot now, and last night's were by far my favorite. So here are the things I have learned and how I made last night's batch. Unless I figure out a better way, this is my new go-to for Instant Pot Mashed potatoes.


Marsha's Instant Pot Mashed Potatoes
Ingredients:
  • 5 lb bag russets, peeled and cut into 1 inch pieces.
  • 1 can chicken broth 14-15 oz.
  • 1 stick butter, room temperature
  • salt and pepper
  • garlic salt
  • milk
  • sour cream
Directions:
  1. Wash, peel and cut potatoes and place them in the pot. 
  2. Add the chicken broth and cook on high for 9 minutes. Do a quick release for pressure. 
  3. Drain off most of the chicken stock. 
    • I drained everything I could out of the pot by tilting the liner pot over the sink and holding the potatoes back with a wooden spoon up to the point that potatoes were going to fall into the sink. Hard to say how much was left in there, but not much. 
  4. Sprinkle with some salt and pepper and add butter (or the equivalent of garlic butter). Then take a hand-mixer and start smashing the potatoes with the beaters. Then turn on the mixer and mix to the desired consistency. If they are not already creamy enough, you can add milk a little at a time, or sour cream. Taste test and if they need more flavor, add a sprinkling of garlic salt until they are perfect!
Marsha's Notes:
I tried to use small yellow potatoes a couple times and they can be too hard to peel if they are too small. I tried putting them in with some peel but we didn't like that in our mashed potatoes. The yellows also didn't seem to hold up to the pressure as well, so you might have to cook them a little less amount of time.

Russets are bigger and easier to peel and gave us a better overall result.

You can also adjust the flavor by using less chicken stock and more water, and some recipes say to put milk right in the pot before cooking... other sites say that milk goes wacky in a pressure cooker and to add it afterwards. It's up to you. I've done it both ways and never noticed a problem. Depending on the flavor you like, adjust the milk/broth/water/sour cream/butter/garlic butter ratios.

If you don't want to scratch you liner, don't beat the potatoes in the liner. Transfer them to another safe dish. I have already done this so my pot is scratched, but it doesn't seem to be getting worse or impacting anything, so I just keep doing it for convenience. I'll report back later if that was a bad idea. Ha, ha!

Cooking Frozen Chicken in the Instant Pot

I keep trying new things with my Instant Pot, and one of my favorites is taking frozen chicken breasts and turning it into shredded cooked chicken. I'll post my way of doing it below, but I loved the tips I found at this site (where I got the picture from): https://kristineskitchenblog.com/how-to-cook-frozen-chicken-breasts-instant-pot/

She recommends making sure your chicken is not frozen together in a clump for more even cooking. You can run water over the chicken for a few second until you can pull the breasts apart that are stuck together. I had this happen once and didn't bother to separate them, so I DID end up with some raw chicken and had to restart the cooker to finish the job. So, it's a good tip!


Marsha's Instant Pot Frozen-to-Cooked Chicken Breasts
Ingredients:
  • 1 bag frozen chicken (4-5 pounds)
  • 1 can chicken broth (14-15 oz.) 
Directions:
  1. Place chicken in the Instant Pot, making sure pieces are not frozen together to help with more even cooking. 
  2. Add chicken broth and cook on high pressure for 15 minutes. 
  3. Slow release the pressure.
Marsha's Notes:
If everything is done and cooked through, you are good to go. (Chicken is safe at an internal temperature of 165 degrees.) If the chicken needs more time, try another 5 minutes on high pressure.

To shred the chicken, place in a bowl that is safe to use with a hand-mixer and let the hand-mixer do all the work of shredding the chicken. Works great, I promise! You can also just mix the chicken right in the Instant Pot (you may want to pour off some of the broth in the pot so the chicken isn't too wet) but the beaters on the mixer can make small scratches on the pot. They don't seem to rust or hurt the pot, but it does make the pot look "used". Therefore, if you want your pot liner to stay pristine, put the chicken in something else before you shred it with the mixer.

Now, quick release or slow release? Once you've done this a few times you'll get the hang of which one you need to do. If you want to be REALLY SURE the chicken is done, slow release gives everything longer to keep cooking before you remove the lip. If you always use the same size batch and it's always done, maybe slow release will work just fine for you. Not all chicken breasts are the same size.

This chicken is GREAT for taco chicken, Hawaiian haystacks, chicken salad sandwiches, and soup, or anything else you would use shredded, canned chicken for.

That website I mentioned before had this helpful graphic.

Wednesday, January 15, 2020

Six Sister's Stuff Instant Pot Cheesy Penne Pasta

I saw this recipe on Facebook and had to try it out with my Instant Pot. It was yummy! Originally it is from Six Sister's Stuff, but I am going to add a couple things to the recipe that were helpful to me.


Instant Pot Cheesy Penne Pasta
Ingredients:
  • 4 cups chicken broth (2 cans 14-15 oz)
  • 2 cloves garlic (minced) (2 tsp. minced garlic in oil)
  • Salt and pepper (to taste)
  • 16 ounces penne pasta (uncooked)
  • 1 (12 ounce) can evaporated milk
  • 2 cups marinara sauce (1 can or jar)
  • 1 cup shredded Parmesan cheese
  • 1/2 cup shredded mozzarella cheese
  • Fresh basil and shredded Parmesan for garnish (if desired)
Directions:
  1. Pour chicken broth, garlic, salt, pepper, and penne pasta into Instant Pot; stir. Secure the lid, switch the knob to "sealing" and cook on "manual" for 5 minutes.
  2. When it is done cooking, do a fast release of the pressure.
  3. Remove the lid and pour in evaporated milk and marinara sauce. Stir the sauce into the pasta so that all the pasta is covered evenly.
  4. Add in Parmesan cheese and mozzarella cheese and stir until cheese is melted. Turn on "saute" mode on the Instant Pot to heat things back through and melt the cheese. This is a high setting, so keep stirring and don't leave the pot alone or things can stick and burn. Reheating should only take a minute or two.
  5. Serve immediately and top with fresh basil and Parmesan cheese if desired.
Marsha's Notes:
Or the Facebook video tutorial here: https://www.facebook.com/watch/?v=588344928399627

I love her tip about grating your own fresh cheese for a better creamy consistency. I have also found this to be true over pre-shredded options. I have also just bought a small brick of Parmesan and a small block of mozzarella, grated the entire thing and put it all in the pot without measuring. It's probably more cheese that what is listed in the recipe, but it was delicious! I also changed the recipe to a fast release at the end of the cooking process to stop the noodles from cooking too much and getting bloated and soggy.