Showing posts with label Christopher's Favorites. Show all posts

Wednesday, February 26, 2025

Air Fryer Pizza Bagels

When I found these pizza-flavored bagels at our local Ridley's store, I just had to try them. Through some trial and error, I figured out the perfect way to make them and I wanted to document it here for future reference, either for myself (so I don't have to keep "recreating the wheel" or for others who might want to try it). Enjoy!

*Note: If you can't find these specific bagels, this recipe would also work for any plain or savory bagel that you like.


Marsha's Air Fryer Pizza Bagels

Ingredients:

  • 1 bagel, sliced in half
  • pizza sauce
  • toppings
  • cheese

Directions:

  1. Place your sliced bagel on a microwave-safe plate and top each half with sauce, toppings and your cheese.
  2. Microwave for 1 minute to start to slightly melt the cheese. 
    • Placing the cheese over your toppings and melting it slightly in the microwave helps prevent the moving air in the air fryer from blowing all your toppings off your bagel.
  3. Transfer your bagel halves to your air fryer and cook on the air fry setting (400 degrees, no preheat needed) for 4 minutes or until cheese is golden and bubbly.
Marsha's Notes:
You can top your bagel with any toppings or cheese that you like. I used mini-pepperonis because it's what I had on hand, but full-sized would also be fine. I also used provolone cheese slices, but grated cheese would work just as well.

This is what I used.

Before adding the cheese.

After microwaving for 1 minute. See how the cheese is starting to form to the toppings underneath?

All done and delicious!

Thursday, February 6, 2025

Cheeseburger Spring Rolls

This was William's special request for his birthday meal this year. Everyone agreed that it was a hit! Enjoy!

This recipe is listed under "Asian" and "Chinese" simply because you use egg roll wrappers and I wanted to make it easy for me to find in the future, but it is also listed under "hamburger" and "beef."

Also, see my recipe for "Pizza Spring Rolls" to see a picture of the assembly process: https://1brother2sisters.blogspot.com/2024/02/pizza-spring-rolls.html

Cheeseburger Spring Rolls

Ingredients:

  • 1 onion, diced
  • 2 lbs ground beef
  • 2 tsp minced garlic
  • 2 tsp salt
  • 2 tsp pepper
  • 2 Tbl mustard
  • 2 Tbl ketchup
  • Worcestershire sauce
  • hamburger seasoning
  • shredded cheese
  • 20 egg roll wrappers (i.e. one package worth)
  • 1 egg, beaten
  • oil, for frying

Directions:

  1. In a large skillet, add your onion and ground beef and cook until beef and onions are browning. Drain any excess grease from pan. Add salt, pepper and garlic and sauté for the last couple minutes that the meat is cooking, being careful not to burn the garlic. Stir in ketchup, mustard, Worcestershire sauce and hamburger seasoning to taste. Set aside.
  2. In a deep fryer or large heavy-bottomed pan, heat enough oil for it to be about an inch deep in the pan for frying. Line a large plate with paper towels for draining. 
  3. Assemble your spring rolls by laying each sheet of dough out on your counter, add the desired amount of meat and cheese to each roll, brush the edges with your beaten egg, and fold up according to the egg roll package directions. Seems like you can fit about a 1/4 cup or more of filling per rolls.
    • You can prep your rolls earlier in the day and place them on a baking sheet for storage, cover the uncooked rolls with plastic wrap so they don't dry out, and then store them in the fridge until you are ready to fry them.
  4. Place your rolls in the hot oil, being careful not to over crowd the pan (I cooked my rolls in batches of five), until golden brown on all sides. Place on paper towel-lined plate for draining. Serve immediately with any dipping sauce you think goes well with cheeseburgers.
Marsha's Notes:

I currently don't have a thermometer that will tell me the temperature of hot oil on my stove, so here are some notes for me for the future: On my stove, you can fry things in oil with the heat set between 4-6, but if you heat up the oil with the stove set at 6 with nothing else in the pan, it gets way too hot. So I would recommend starting to heat the oil between 3 and 4, but when you actually start to cook, you can turn up the heat to 5 or 6 depending on how fast things are browning. If the stove is set to 2 or 3 for cooking, things brown too slowly and soak up too much oil.

Thursday, January 23, 2025

Brownie Ice Cream Sandwiches

I made homemade ice cream sandwiches for the first time and they turned out really, really good. The sky is the limit on what flavor combinations you can come up with for the filling and the outside, but specifically, I wanted to document how to make the brownie cake for the outside and what tips and tricks I would use for making these in the future. Enjoy!

Note: You can try to make these in a single day, but there is a lot of freezing and cooling time involved, so I would recommend making and prepping the layers one day, letting it all freeze over night, and then assembling them early the next day. You then need to give them more time that same day to freeze again before serving.

Brownie Ice Cream Sandwiches

Ingredients:

  • 1 1/2 qt. ice cream (for filling, any flavor you like)
  • 1 cup salted butter
  • 6-7 oz bittersweet chocolate (chips or chopped bars)
  • 2 Tbl Dutch-process cocoa powder, sifted
  • 2 tsp vanilla
  • 3 eggs, at room temperature
  • 1 1/3 cups granulated sugar (265g)
  • 1 cup flour (125g)

Directions:

  1. For the filling, line a 9x13 baking dish with parchment paper, allowing the ends of the parchment to hang over the sides of the pan to make it easier to lift the ice cream out for cutting. Spread the slightly softened ice cream evenly into the pan and put in the freezer to re-firm. 
    • Freeze for several hours or overnight. Even better if you can put things in the deep freeze.
  2. Preheat oven to 325 degrees.
  3. Line TWO 9x13 pans with parchment paper and spray with nonstick spray. Allow ends of parchment to hang over the sides of the pan to make it easier to lift the brownies out for cutting.
  4. Heat butter in a microwave-safe mixing bowl in the microwave until melted. Immediately stir in chocolate pieces, cocoa powder and vanilla until smooth and shiny. Set aside and let cool for ten minutes.
  5. In the bowl of a stand mixer fitted with the whisk attachment, beat together the eggs and sugar on medium speed for 3 minutes (scraping the bowl if needed) until mixture is light and creamy.
  6. Poor the cooled chocolate mixture into the egg mixture and continue to beat with the mixer for a few more seconds until combined. 
    • You must make sure the chocolate is thoroughly cooled before adding it to the eggs so you don't prematurely cook the eggs.
  7. Remove the mixing bowl from the stand mixer and stir in (by hand) the flour until just combined with even just a few tiny streaks of white flour remaining (do not over mix). 
    • The tiny streaks of flour should get mixed into the batter as you pour it into the baking dish and spread it out, otherwise you left too much flour unincorporated.
  8. Divide and pour the batter evenly into the two prepared baking pans.
  9. Bake for 10-12 minutes, or until the edges are set and the middle no longer looks wet or underdone. 
    • The middle does not need to be (or appear) completely cooked because that can cause the brownies to be overdone, dry, and they won't be as soft or chewy as they should be. They will continue to cook and set up for a bit as they cool in the pan.
  10. Allow to cool completely in the pan before attempting to remove them from the baking dish.
    • For easier cutting and assembling, place your cooled brownies into the freezer to firm up.
  11. Cut your brownies and ice cream into the same sized pieces and assemble as sandwiches. Individually wrap each sandwich in some kind of paper or plastic wrap for storing in the freezer. Refreeze for at least two hours before serving.

Marsha's Notes:

  • You can use binder clips to help hold the parchment paper in place in the baking dish. Once you pour the batter/ice cream onto the paper, it should hold itself and you can remove the clips, but it's okay to freeze or bake with them in place as well.
  • I would recommend using a cookie cutter in the same shape your want your sandwiches. Then, when you cut the brownies and ice cream, everything will be the same size and fit together nicely.  I saw these cutters and thought they would be ideal: https://amzn.to/4jvXrCI

Saturday, November 23, 2024

Meatball Subs (Crock Pot and Oven)

Our family picked up a super yummy meatball sub from Costco and I thought, "I can make that!" So here is my version. Enjoy!


Meatball Subs (Crock Pot and Oven)

Ingredients:

  • small loaf of French bread or desired buns
  • garlic butter
  • 1 pkg frozen meatballs
  • 2 jars spaghetti sauce
  • 1 pkg. provolone cheese slices
  • Parmesan cheese, grated

Directions: 

  1. Spray your Crock Pot with non-stick spray and add your meatballs and ONE jar of the spaghetti sauce. Cook until meatballs are heated all the way through (a couple hours on high, or a little longer on low... probably doesn't really need to cook all day, as the meatballs are precooked).
  2. Near the time you want to eat, pour your second jar of spaghetti sauce in a sauce pan to heat through. Serve each person a portion of the sauce in a small bowl for dipping.
  3. Split your French bread loaf or other desired buns and spread the cut-side with garlic butter. Place on a foil/non-stick mat lined baking sheet and place under the broiler in your oven to toast. 
  4. Once toasted, remove from the oven. 
  5. Change the oven from broil to bake at 350. 
  6. Assemble your sandwich by putting first a layer of provolone, then your meatballs with some of the sauce they cooked in, then a sprinkling of Parmesan, then a final layer of provolone. Top with the top portion of the bread. 
  7. Cover the tray tightly with foil and place back in the oven until the cheese is melted, just a couple of minutes.

Crockpot Creamy Chicken Spaghetti

A super simple, yet yummy spaghetti with some chicken for added protein to feel satisfied. Enjoy!

I found this recipe on TikTok here: https://www.tiktok.com/@cookinginthemidwest/video/7433439317583777066?is_from_webapp=1&sender_device=pc&web_id=7439121840796157486

Crockpot Creamy Chicken Spaghetti

Ingredients:

  • 1 lb chicken breast
  • 1/2 tsp each of salt and pepper
  • 1 tsp onion powder and Italian seasoning
  • 1/4 red pepper flakes
  • 1 tbsp minced garlic
  • 24 oz jar Marinara Sauce
  • 15 oz jar Alfredo Sauce
  • 1 cup shredded mozzarella cheese
  • 16 oz spaghetti, cooked
  • Parmesan cheese
  • Dried parsley

Directions:

  1. Spray a crockpot with cooking spray. 
  2. Add one pound of chicken breasts. Season with salt, pepper, onion powder, and Italian seasoning. 
  3. Add 1 tbsp of minced garlic, marinara sauce, and Alfredo sauce. 
  4. Cook on low for 4 hours. 
  5. Once chicken is cooked, either pull it out of the pot and dice it up then put it back in, or just a hand mixer or a couple of forks to shred it up right in the pot. 
  6. Add your mozzarella cheese and cooked spaghetti to the pot and stir everything up. 
  7. Put the lid back on and leave it for a bit to let the mozzarella cheese melt, otherwise it is ready to serve.

Saturday, September 7, 2024

Homemade Queso

I tried making my own queso this week from a recipe I saw online, and it turned out really good. I will put the original recipe below, along with a couple of changes I will make next time.


Homemade Queso

Ingredients: (Makes a lot, so see recipe and notes for details on a smaller batch.)

  • Velveeta, Mexican style (16 oz.) cubed
  • Pepper Jack Cheese, 8 oz block cubed
  • 2 cans evaporated milk (approximately 15 oz each)
  • 2-4 cups shredded cheese blend, as needed

Directions:

  • Place all of your cubed cheese plus two cans of evaporated milk into a slow cooker and heat until melted. 
  • Once all the cheese in the pot is melted into the milk, if things are too runny, add handfuls of shredded cheese until you reach your desired consistency.

Marsha's Notes:

Update: For a smaller batch, I did use just one can of evaporated milk with the Velveeta and Pepper Jack, and it turned out perfect. Because both cheeses I used were spicy without any extra milk or cheese blend to mellow things out (like in the double/larger batch recipe), it would be worth using just regular (not Mexican) Velveeta next time if you don't want much spice in your queso. That said, no one thought this version was "too spicy."

The original recipe called for the pepper jack cheese and the Velveeta. It also called for two cans of evaporated milk, which, by the time the cheeses were all melted, was simply WAY TO MUCH MILK. So I grabbed my trusty bag of shredded cheese blend that I always have on hand in the house and just added several handfuls, stirring, until I thought it would be a better consistency once the newly added cheese was fully melted. I put the lid back on and let it keep cooking, coming back in about 15-20 minutes to stir it again and check the consistency. It turned out perfect, but if it had still been runny, I would have added more cheese blend, and if it had seized up too much, I would have added some milk to thin.

For cooking, use low or high depending on how much time you have. If you only have a couple hours (1-2) try high. If you have longer, try low. It usually seems to be a bad idea to let cheese boil, as it can do something funky to the proteins in the cheese and turn grainy or split, so be vigilant if you use high or if you are letting it cook for a long time on low.

The cheese can start to stick and burn to the sides of the crock pot, so some people will use a crock pot liner for ease of cleanup. I wasn't sure how I would get the queso out of the liner without having a big mess on my hands because it is super hot... so I didn't bother and just scrubbed the pot. 

I also think you could use this same recipe and just cook everything on the stove until melted and smooth probably in a lot less time... I just used the crock pot for ease and because it was how it was done in the original recipe I was trying.

Next time, because this did make a HUGE pot of cheese, I think I would try using the same amount of pepper jack (one small brick of cheese that I cubed up) and one box of the Mexican Velveeta (which I also cubed up) with just ONE can of evaporated milk and see how it goes. The hope is, with only one can, then maybe I won't have to add any of the shredded cheese blend later in the cooking process.

Lastly, the original recipe also called for diced jalapeno, but our family isn't huge on hot and spicy things, so with the pepper jack cheese and the Mexican-style Velveeta, it felt spicy and queso-y enough for us.

This has been great for burritos, tacos, chips and crackers. Anything you would put cheese on, you can probably also dip into cheese (burgers, sandwiches, nuggets, etc.) so we have been using this queso in all kinds of ways to eat it up.

Wednesday, September 4, 2024

Crock Pot Shredded Beef Sandwiches

This recipe was such a hit that Scott said he might even request it for his birthday! So that's just about all you need to know. The original recipe is from here: https://cookinginthemidwest.com/blog/crockpot-shredded-beef-sandwiches/#recipe


Crock Pot Shredded Beef Sandwiches

Ingredients:

  • 3-4 lb Chuck Roast
  • Salt, pepper, and garlic powder
  • 2 TBSP butter
  • 1 onion sliced
  • 2 TBSP minced garlic
  • 2 TBSP of steak sauce
  • 12 oz of beer
  • 1 heaping tbsp Montreal steak seasoning
  • 1 1/2 cups beef broth
  • Onion buns
  • Mayo
  • Pepper Jack cheese
  • Crispy onions
  • Chipotle aioli

Directions:

  1. Season the chuck roast on all sides with salt, pepper, and garlic.
  2. Melt butter in a skillet over medium high heat and sear chuck roast on all sides.
  3. Put the seared chuck roast in a crock pot.
  4. Add sliced onions, minced garlic, steak sauce, beer, beef broth, and the steak seasoning to the hot skillet stirring and letting it simmer.
  5. Pour the onion/broth mixture over chuck roast in the crock pot and let cook on low for 6-8 hours. Shred the meat and discard any extra fat.
  6. Spread mayo on the buns and toast them in a skillet over medium low heat until they are golden brown.
  7. Build sandwiches with the meat and Pepper Jack cheese. Top sandwiches with crispy onions and Chipotle aioli (I used store bought Kraft brand aioli). Enjoy!

Tuesday, July 2, 2024

Sauteed Zucchini and Corn with Bacon

Always looking for more ways to get the boys to eat vegetables, so this bacon and zucchini corn recipe seemed like a safe choice, since the boys eat both of those veggies. And it was a hit! I got the original recipe from Belly Full, here: https://bellyfull.net/corn-zucchini-saute/#wprm-recipe-container-24715

To use an entire onion, and because our family of five can currently eat an entire side dish in one sitting, I decided to double the recipe and have leftovers, so my version is just a touch different, but basically the same.


Sauteed Zucchini and Corn with Bacon

Ingredients:

  • 1 pkg sliced raw bacon, diced
  • 2 tablespoon unsalted butter
  • 1 small diced red onion
  • 2 zucchinis, diced
  • 2 small pkg frozen corn
  • 2 cloves garlic, minced
  • 1 teaspoon kosher salt
  • 1/2 teaspoon black pepper
  • pinch of cayenne pepper
  • Parmesan, if desired

Directions:

  1. Sauté bacon in a large nonstick skillet until crispy and the fat has rendered, 5 to 8 minutes. Drain off excess fat if needed.
  2. Add in the butter and onion; sauté for 3 minutes until softened.
  3. Add zucchini and frozen corn and cook, stirring occasionally, until crisp-tender, 4 minutes.
  4. Add in garlic, salt, black pepper, and cayenne. Add Parmesan, if desired. Cook, stirring occasionally, until corn is tender, about 3 minutes more.
  5. Serve immediately and enjoy!

Tuesday, February 6, 2024

French Fries with Pulled Pork and Cheese

For William's birthday, he went through my cookbooks and picked some recipes for us to try. One recipe was for French fries with pulled pork and cheese. Everyone really like it, and the pulled pork was delicious!


French Fries with Pulled Pork and Cheese
Ingredients:
  • 2 Tbl vegetable oil, for cooking
  • 1 Tbl brown sugar
  • 2 tsp paprika
  • 2 tsp garlic powder
  • 2 tsp onion powder
  • 1 tsp salt
  • 1 tsp pepper
  • 1/2 tsp cumin
  • 3 lbs boneless pork roast, cut into 2" cubes (or pork chile verde precut from your meat department)
  • 1 1/4 cups beef broth, divided
  • 1/2 cup apple cider vinegar
  • 2 cups barbecue sauce, divided
  • 2 regular bags (or 1 extra large bag) frozen French fries of your choice
  • 1 can nacho cheese sauce
  • extra barbecue sauce
Directions:
  1. In a pressure cooker (Instapot), heat vegetable oil  on the "sauté" function until hot.
  2. In a big bowl, mix together brown sugar, paprika, garlic powder, onion powder, salt, pepper and cumin. Toss in pork cubes and coat.
  3. Add pork to the pressure cooker with hot oil and saute until meat starts to brown on all sides and brown bits start to form on the bottom of the cooker.
  4. Remove pork from cooker and deglaze the pot with 1/4 cup beef broth, scraping all the cooked bit up from the bottom of the pot.
  5. In a large bowl, mix together vinegar, (only) 1 cup of barbecue sauce, and remaining 1 cup beef broth.
  6. Add pork back to the pressure cooker and pour sauce over the top. Cover and set to "pressure cook" on "manual" for 40 minutes. Allow cooker to naturally release pressure for another 10 minutes before doing a quick-release of remaining pressure.
  7. Dain off most of the liquid that might remain from cooking (but all of it), and then shred the pork (I used a hand mixer to shred). (See Image)
  8. Add additional barbecue sauce to pork as desired.
  9. Cook frozen French fries in an air fryer (or by your own desired method of cooking) as per package directions, cooking in batches if necessary.
  10. Heat nacho cheese sauce up on stove or in microwave.
  11. Layer cooked fries with hot pulled pork and hot cheese sauce. Serve.
Cooked pork, but not drained.

Pizza Spring Rolls

For William's birthday, he went through my cookbooks and picked some recipes for us to try. One recipe was for pizza spring rolls, which were everyone's favorite for the night.


Pizza Spring Rolls

Ingredients:

  • 2 cups vegetable oil, for frying
  • 4 cups mozzarella cheese, shredded
  • 1 cup mini pepperoni slices, or regular pepperoni slices quartered
  • 1 cup pizza sauce
  • 20 egg roll wrappers (one package)
  • 1 large egg, beaten
  • 1 tsp water

Directions:

  1. Line a baking sheet for setting prepared spring rolls on.
  2. Mix together cheese, pepperoni and pizza sauce.
  3. Lay out all your egg roll wrappers on the counter with one of the points of the wrapper pointing towards you. 
  4. Divide up the filling evenly between each (about 2 Tbl of filling per roll). Filling should be kind of in a line, off-center, closer to the point of the wrapper closest to you. (See Image)
  5. Mix beaten egg with a small amount of water (1 tsp), and then use the egg wash to brush the edges of each wrapper before rolling.
  6. Roll up like a burrito, making sure all the filling is sealed inside, first by folding up the point of the wrapper closest to you around the filling (trying to make sure things are nice and tight), tuck in the sides slightly around the ends of the filling, then fold up each of the side corners, and finally roll up the rest of the spring roll up towards the top point. (See Image)
  7. Place filled rolls on prepared sheet and cover with plastic wrap and store in a cool place until ready to fry.
  8. In a large, heavy-bottomed pan over medium heat, heat about 1 inch of oil for frying (about 350 degrees).
  9. Place a few rolls in the hot oil, being sure not to over-crowd the pan. Fry until gold brown on one side, flip over and continue frying until the entire roll is golden. Drain on paper towels.
  10. Serve with extra pizza sauce and ranch for dipping.
  11. I placed my cooked rolls on "warm and hold" in the oven while cooking batches, which kept them nice and hot until serving. I also prepped my rolls earlier in the day and cooked them off at dinner time.

Tuesday, August 1, 2023

Crockpot Garlic Parmesan Chicken Pasta

Everyone really liked this recipe, but I do have to go out of town to Walmart to get the Buffalo Wild Wing's garlic parmesan sauce, so that was just a tiny bit tricky to find... if you don't live near a store that carries it. Otherwise, I plan on making this again and again! Plus, it doesn't use the whole bottle, so I don't even have to go back to Walmart for awhile.


Crockpot Garlic Parmesan Chicken Pasta

Ingredients:

  • 1 lb chicken breast
  • 1/2 tsp each of salt and pepper
  • 1 tsp each of paprika, onion powder, and Italian seasoning
  • 1 TBSP minced garlic
  • Buffalo Wild Wings Garlic Parmesan sauce
  • 1 jar of Alfredo sauce
  • 1 16 oz box of pasta
  • 1/4 cup of Parmesan cheese
  • 1 cup of shredded mozzarella

Directions:

  1. Add the chicken, salt, pepper, paprika, and Italian seasoning to a slow cooker.
  2. Add minced garlic and enough of the garlic parm sauce to fully cover the chicken (couple of TBL or so per chicken breast, spread over the chicken with a spoon until covered).
  3. Cook on low for 4-6 hours.
  4. Shred or chop up chicken.
  5. Boil pasta.
  6. Add Alfredo sauce, Parmesan cheese, and Mozzarella cheese to the chicken in the slow cooker.
  7. Stir everything together well.
  8. Add cooked pasta to the slow cooker and mix everything together.

Marsha's Notes:

For my family, I did more chicken to make sure I had plenty, so I needed to adjust my seasonings for the added chicken.

Grilled Pineapple (Air Fryer)

Here is a super easy recipe to get some grilled pineapple straight from your air fryer! And if you are lazy, like I was, you can just use one pre-bought container from the store!


 Grilled Pineapple (Air Fryer)

Ingredients:

  • 1 pineapple
  • 1/4 cup brown sugar
  • 2 Tbl melted butter
  • 1 tsp cinnamon

Directions:

  1. Core and slice your pineapple. 
  2. Mix together your brown sugar, butter and cinnamon. 
  3. Then toss your pineapple in the cinnamon mixture. 
  4. Spread out in an even layer in your air fryer/liner. 
  5. Cook at 380 degrees for 12-15 minutes, flipping your pineapple halfway through cooking. Try serving with ice cream!

Marsha's Notes:

You can use one container (about 1 pineapple's worth) of precut fruit from the store instead of cutting up a fresh pineapple, if you want. About this size:


Monday, March 20, 2023

Avocado Toast

For anyone who wants to jump on the "now trendy" avocado toast bandwagon, here you go! I started making this, not sure if I would like it, and it turned out really good. Then I made it for the rest of the family, CONVINCED that my boys would be too picky to enjoy it, and was completely surprised with everyone... EVERYONE!!!... liked it. So, if you are like I was, and you aren't quite sure how to prepare avocado toast, here is a place to start. Enjoy!


Avocado Toast

Ingredients: (to make toast as pictured)

  • 1 slice toast, any bread you like
  • 1 slice cheese, any kind you like
  • 1 serving breakfast meat (1 used 1-2 slices bacon, but you could totally use sausage or any other meat you like)
  • 1 serving lunch meat (optional), I used sundried tomato turkey
  • 1 fried egg, cooked to your liking
  • 1/2 mashed avocado
  • seasoning of your choice (I used "Everything But the Bagel")
  • hot sauce (optional)

Directions:

  1. Toast your bread. 
  2. Fry your egg. 
  3. Mash and season your avocado. 
  4. Assemble your toast. I like to do toast, then cheese, bacon, avocado, lunch meat, egg, hot sauce, but you can do it anyway you like.

Marsha's Notes:

  • I found that you can just slice your avocado instead of mashing if you prefer that texture, but slices will move around while you are trying to eat your toast and can be messy and make it difficult to eat. 
  • The mashed avocado seems to stay in place better for me, and it makes it easy to mix in your seasonings, like salt and pepper... or in my case, Everything But the Bagel. I used a sprinkling of seasoning, maybe 1/2 tsp. 
  • I also like to use precooked bacon slices, which I just pop in the microwave for about ten seconds to crisp up. 
  • While the toast is hot, I like to put my cheese slice down so it can get warm and a little melty, and then I put the hot bacon on top of the cheese to also help soften and warm the cheese. 
  • You can totally put lunch meat on this for extra protein, but you don't have to. You can also add other toppings like veggies or sprouts. These are just the toppings I like that typically we have in our house.
  • Avocados can vary in size, so you might find that 1/2 an avocado is too much or too little. Just use the amount you like. For me, if I am the only one eating this, I tend to have it two days in a row so I can just use half the avocado one day, and then the other half the next. I don't mash the second half initially. I just leave the avocado cut in half, still in the skin, and put in a baggie in the fridge. Then, the next day, I just carefully scrape away any brown, oxidized parts of the exposed avocado (like what happens to sliced apples) and then scoop it all out and mash it up.
  • Depending on the bread you use, this can be a great low-carb recipe.

Saturday, March 18, 2023

Sundried Tomato Gnocchi

I used half a bottle of sundried tomatoes in another recipe and needed to find a way to use up the rest of the bottle. When I came across this recipe, it was perfect and so yummy! Enjoy


Sundried Tomato Gnocchi

Ingredients:

  • 1 small yellow onion (I used a handful of pre-chopped frozen onion)
  • 1 clove garlic
  • 1/2 cup sundried tomatoes
  • 1 cup chicken broth
  • 1 16 oz pkg gnocchi
  • 1/2 cup heavy cream
  • 1 cup cooked chicken (optional)
  • 2 cups spinach (optional)
  • parmesan cheese

Directions:

  1. To your hot pan, add your onion, garlic and sundried tomatoes (you don't need to add oil to the pan for the onions if you are using the oil from the sundried tomatoes. 
  2. Once the onion is softened and browning, add your broth and gnocchi. 
  3. Let it cook for a couple of minutes until the gnocchi is tender (doesn't take long). 
  4. Then add your cream, chicken and spinach. 
  5. Continue cooking until the chicken is heated through and the spinach is wilted and tender. Top with parmesan.

Marsha's Notes:

  • I cooked my onion for several minutes alone and then added the garlic and tomatoes just to make sure the garlic didn't get bitter. 
  • I also wished in hind-sight that I would have chopped up my sundried tomatoes just a bit before adding to the pan because some of the pieces were a little big.
  • Because my sundried tomatoes were packaged in oil and herbs, I didn't feel like this dish needed any extra seasonings (or oil for the pan), but you can certainly add some Italian seasoning, salt or pepper if you think it needs it.
  • For extra protein and veggies, you can add the chicken (or any other meat you like, such as ground Italian sausage or sausage links) and spinach (or any other veggies you like, such as broccoli or maybe peas), but I didn't bother with either and enjoyed the dish very much just the same.
  • Lastly, I didn't want to have extra heavy cream sitting around, so I dumped the entire 1 cup container into my pan and have zero regrets about it. It was maybe a little bit wetter and sauce-ier initially (which was fine), but it made for great leftovers that I didn't think really need any extra liquid added. But you do you.

Monday, January 23, 2023

Creamy Tomato Basil Soup

The original recipe for this soup was to be made in the Instant Pot, but I just did it on the stove top instead so I could get a real feel for the soup and it worked out well. So I will post a link to the Instant Pot recipe, but then put what I did down below. Enjoy! (PS- everyone in our family really like it except for William (he's not a tomato soup person) and they compared it to the soup you get at Waffle Love. Yum!)

Instant Pot Recipe: https://www.melskitchencafe.com/instant-pot-creamy-tomato-basil-soup/ 


Creamy Tomato Basil Soup

Ingredients-

  • 1 tablespoon olive oil
  • 1 cup diced carrots (I used match-stick)
  • ½ cup diced onions (I used frozen)
  • 3 cans (15-ounces each) diced or whole tomatoes
  • 2 cups broth (chicken or vegetable)
  • 1 ½ teaspoons dried basil
  • 1 teaspoon sugar
  • 1 teaspoon salt
  • ½ teaspoon dried oregano
  • ½ teaspoon baking soda
  • 1 cup milk
  • 1 cup cream (or an additional 1/2 cup milk if you don't have cream)
  • ¼ cup flour
Directions-

  1. In a large soup pot, heat the olive oil. Add the carrots and onions, and cook, stirring often, until the onions and carrots start to get a little color.
  2. Add the tomatoes, broth, basil, sugar, salt, oregano, and baking soda. Give the soup a good stir making sure to scrape the bottom of the pot thoroughly.
  3. Simmer for about 30 minutes, or until everything is tender and the flavors have had a chance to really meld together.
  4. Carefully use an immersion blender (or transfer the soup in batches to a blender) to puree the soup until smooth. Return the soup to the pot if using a blender.
  5. Whisk or blend together the milk, cream and flour until very smooth. Add to the soup while whisking or stirring constantly.
  6. Cook on low until the soup is heated through and thickened. Season to taste with additional salt and pepper, if needed (this is important so you don't end up with bland soup). Serve immediately.

Sunday, January 1, 2023

Stuffler Waffles

My family got me a Stuffler waffle iron and we broke it out today to try and everyone LOVED it! Here is a link to buy your own (you can't make these waffles in an ordinary waffle iron, you need the deeper Stuffler) and the waffle batter recipe and ideas we used. Enjoy!


Basic Waffle Batter for Stuffler
Ingredients: 
  • 2 cups all-purpose flour
  • 1 TBL sugar
  • 1 TBL baking powder
  • 1/4 tsp salt
  • 1 3/4 cups milk
  • 2 eggs
  • 3 TBL vegetable oil
Directions:
  1. Preheat Stuffler with tongs inserted into unit. 
  2. Mix flour, sugar, baking powder and salt in a large bowl. 
  3. Whisk milk, eggs and oil in a medium bowl. 
  4. Whisk milk mixture into dry ingredients just until dry ingredients are thoroughly moistened. 
  5. Pour approximately 1/3 cup batter into Stuffler, coating bottom in a thin layer. 
  6. Place your stuffings next and top with approximately another 1/3 cup batter. 
  7. Cook for 6 minutes. 
  8. Remove with the waffle insert tongs. 
  9. Makes approximately 6 stuffed waffles.
Marsha's Notes:
The recipe says to cook for 7-8 minutes, but six was perfect for us. Be careful not to overstuff your waffle so they don't ooze out during cooking. It is recommended when using a sauce to "sandwich" your sauce between other ingredients so it doesn't just disappear into the batter (such as pizza sauce; sandwich it between a cheese layer and a pepperoni/cheese layer). Also, I preferred most of the waffles with a little extra dipping/topping sauce. We also prefer non-cooked strawberries, so next time we will put our fresh strawberries on top and not put them INSIDE the waffle.

The Stuffler manual had two additional batter recipes that I wanted to record here, but I have not yet tried:
Cornmeal Waffles with Cheese and Chiles
Ingredients:
  • 1 cup all-purpose flour
  • 3/4 cup yellow cornmeal
  • 2 tsp baking powder
  • 1 tsp baking soda
  • 1/8 tsp salt
  • 2 eggs, separated
  • 2 cups buttermilk
  • 2 Tbl vegetable oil
  • 3 Tbl canned green chiles, drained
  • 1 cup shredded sharp cheddar cheese
Directions:
  1. Mix all dry ingredient together.
  2. Stir in egg YOLKS, buttermilk, oil chilies and cheese.
  3. Beat egg whites until stiff in another bowl using an electric mixer.
  4. Fold whites into batter, leaving a few fluffs.
  5. Cook waffles for 6-7 minutes.

Pecan Waffles
Ingredients:
  • 2 cups all-purpose flour
  • 2 Tbl packed brown sugar
  • 2 tsp baking powder
  • 1 tsp baking soda
  • 1/4 tsp salt
  • 1/4 cup chopped pecans
  • 2 cups buttermilk
  • 2 eggs
  • 3 Tbl vegetable oil
  • 1/2 tsp maple extract
Directions:
  1. Mix all dry ingredients together.
  2. Stir in pecans.
  3. Whisk buttermilk, eggs, oil, and maple extract together in a separate bowl.
  4. Mix wet and dry mixtures together just until combined. Do not over mix.
  5. Cook waffles for 6 minutes.
The Stuffler manual also recommends trying cake mixes and muffin mixes. 

Waffles we tried:
S'mores topped with Hot Fudge


Pepperoni Pizza

Ham, Cheese and Chick-fil-A Sauce


Strawberry, Nutella and Whipped Cream


Hawaiian Pizza
(Scott and Chris ate this one, so I only have the ingredients picture)

Ultimate Chocolate w/Peanut Butter
 (Lucas and William just wanted Hershey bar pieces, Nutella, and hot fudge... then they spread peanut butter on top when it was done)

Other Ideas Include: Chicken cordon bleu, chicken parmesan (with breaded chicken), chicken and waffles, trying to make them with chocolate batter, taco waffle, banana chocolate waffle, etc.

Wednesday, August 24, 2022

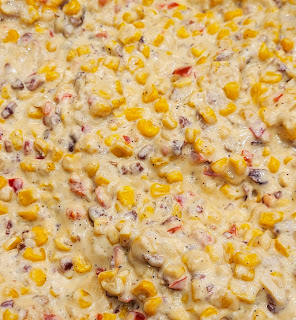
Creamy Confetti Corn with Bacon

Chris has decided that he LOVES this new way to have his favorite veggie... CORN! The original recipe is from Mel's Kitchen Cafe (see here: https://www.melskitchencafe.com/creamy-confetti-corn/) but I tweaked this recipe to suit our family better. Enjoy!

Cream Confetti Corn with Bacon

Ingredients:

  • 1 pkg. pre-cooked bacon strips, chopped
  • 2 packages (12-ounces each) frozen corn kernels, white or yellow
  • ½ cup chopped onion, white, yellow or red
  • ½ cup finely chopped red bell pepper
  • 8-ounce package cream cheese, light or regular, cubed
  • 1-2 tablespoons milk
  • 1 teaspoon sugar
  • ½ teaspoon salt
  • 1 teaspoon pepper
  • A couple handfuls of shredded cheese
Directions:

  1. In a large nonstick skillet, heat a couple tbl of cooking oil.
  2. Add the corn, onion, and red pepper, and cook over medium heat, stirring every so often, until the vegetables are tender and the corn is heated through, 6-8 minutes or whenever things start to brown up in the bottom of the pan. Add the cream cheese and milk, stirring until the cream cheese melts and the mixture is evenly combined.
  3. Stir in the sugar, salt and pepper. Add more salt to taste if needed. I sometimes add a sprinkle of garlic salt over the entire pan.
  4. Top with shredded cheese. Stir to melt and combine. Serve warm.
Note for Krystal:
You can totally leave the onion and pepper out of this recipe and just make a cheesy, creamy corn instead. It just won't be very colorful or "confetti" anymore.

Tuesday, January 18, 2022

Marsha's Low Carb Taco Chicken Zucchini Boats

The original recipe calls for buffalo wing sauce and blue cheese, but I wasn't sure my kiddos would eat that, so we did more of a taco chicken recipe instead and everyone liked it. I'm always excited to have a new way to get my kids to eat some veggies!


Marsha's Low Carb Taco Chicken Zucchini Boats

Ingredients:

  • 4 medium zucchini
  • 1 lb ground chicken, or two large cans
  • 1/2 pkt ranch seasoning (about 2 Tbl)
  • 1/2 pkt taco seasoning
  • 2 cups shredded cheese or enough to cover the zucchini halves, whatever flavor you like

Directions:

  1. Wash zucchini and then cut length-wise. Find a baking dish large enough to hold all the halves placed side by side, flat-side up. Spray the dish with non-stick spray. Scoop out the middle of each half for filling and place in sprayed dish. For a milder flavor and more tender finish, peel zucchini, but don't peel until after you have scooped out the center because the peel helps make the halves more stable so they don't break while you scoop. Go slow and gentle.
  2. Raw Chicken: In a frying pan, cook the ground chicken. Our chicken gave off it's own liquid, which I took advantage of to help distribute the seasonings around. If you cook off all of the liquid before you add the seasoning, then you may need to add a little water back into the pan to get things stirred up evenly.
  3. Canned Chicken: If using precooked canned chicken, if the meat is moist enough once drained from the can, you can just toss with your seasonings to coat and then distribute among the zucchini.
  4. Evenly distribute the filling between all the boats. Top with cheese. Cover with foil (sprayed with non-stick spray if you think the foil will touch the tops of the boats) to help steam the boats. Bake at 350 convection (400 standard) for 30 minutes. Remove foil and continuing cooking or broiling until cheese is golden and bubbly. Serve.
  5. If desired, serve with a drizzle of ranch or blue cheese dressing. For a richer filling, add 4 oz of cream cheese to the chicken mixture.