Showing posts with label Ground Beef. Show all posts

Wednesday, April 8, 2026

Taco Rice Bake

 This was really good as either taco filling or nacho toppings. Enjoy!


Taco Rice Bake
Ingredients:
  • 1 lb. ground beef
  • 1 pkt. taco seasoning and water per packet directions
  • 2 packets of Knorr's Taco Rice
  • 1 cup chicken broth
  • 1 jar salsa plus one jar's worth of water
  • shredded cheese
  • 1 container queso
Directions:
  1. Brown and drain your ground beef, then add your taco seasoning packet and cook per package directions. Set aside.
  2. Add your taco rice packets to a 9x13 pan.
  3. To the rice, add your chicken broth, salsa, and water. Stir.
  4. Sprinkle your cooked taco meat over the rice mixture. Top with cheese, cover with foil and bake at 350 degrees for 45 minutes.
  5. Remove the foil, pour over the container of queso and put back in the oven for 5 minutes.
Marsha's Notes:
You can eat this like a casserole, but it is also really good wrapped in tortillas or over nachos. These are the rice packets you need.

Thursday, February 6, 2025

Cheeseburger Spring Rolls

This was William's special request for his birthday meal this year. Everyone agreed that it was a hit! Enjoy!

This recipe is listed under "Asian" and "Chinese" simply because you use egg roll wrappers and I wanted to make it easy for me to find in the future, but it is also listed under "hamburger" and "beef."

Also, see my recipe for "Pizza Spring Rolls" to see a picture of the assembly process: https://1brother2sisters.blogspot.com/2024/02/pizza-spring-rolls.html

Cheeseburger Spring Rolls

Ingredients:

  • 1 onion, diced
  • 2 lbs ground beef
  • 2 tsp minced garlic
  • 2 tsp salt
  • 2 tsp pepper
  • 2 Tbl mustard
  • 2 Tbl ketchup
  • Worcestershire sauce
  • hamburger seasoning
  • shredded cheese
  • 20 egg roll wrappers (i.e. one package worth)
  • 1 egg, beaten
  • oil, for frying

Directions:

  1. In a large skillet, add your onion and ground beef and cook until beef and onions are browning. Drain any excess grease from pan. Add salt, pepper and garlic and sauté for the last couple minutes that the meat is cooking, being careful not to burn the garlic. Stir in ketchup, mustard, Worcestershire sauce and hamburger seasoning to taste. Set aside.
  2. In a deep fryer or large heavy-bottomed pan, heat enough oil for it to be about an inch deep in the pan for frying. Line a large plate with paper towels for draining. 
  3. Assemble your spring rolls by laying each sheet of dough out on your counter, add the desired amount of meat and cheese to each roll, brush the edges with your beaten egg, and fold up according to the egg roll package directions. Seems like you can fit about a 1/4 cup or more of filling per rolls.
    • You can prep your rolls earlier in the day and place them on a baking sheet for storage, cover the uncooked rolls with plastic wrap so they don't dry out, and then store them in the fridge until you are ready to fry them.
  4. Place your rolls in the hot oil, being careful not to over crowd the pan (I cooked my rolls in batches of five), until golden brown on all sides. Place on paper towel-lined plate for draining. Serve immediately with any dipping sauce you think goes well with cheeseburgers.
Marsha's Notes:

I currently don't have a thermometer that will tell me the temperature of hot oil on my stove, so here are some notes for me for the future: On my stove, you can fry things in oil with the heat set between 4-6, but if you heat up the oil with the stove set at 6 with nothing else in the pan, it gets way too hot. So I would recommend starting to heat the oil between 3 and 4, but when you actually start to cook, you can turn up the heat to 5 or 6 depending on how fast things are browning. If the stove is set to 2 or 3 for cooking, things brown too slowly and soak up too much oil.

Friday, January 3, 2025

One Pan Chili Mac

We had this for dinner tonight and it was a hit. It made a nice full pan, so we have plenty of leftovers. For the original recipe, go here: https://cookinginthemidwest.com/blog/one-pan-chili-mac/


One Pan Chili Mac
Ingredients:
  • 1 lb of ground beef
  • 1 chopped onion
  • 1/2 tsp each of salt, pepper, ground cumin
  • 1 tsp each of onion powder and paprika
  • 2 tsp chili powder
  • 1 tbsp minced garlic
  • 14.5 oz can of diced tomatoes (not drained)
  • 15.5 oz can of chili beans (not drained)
  • 8 oz can of tomato sauce
  • 1 1/2 cups of beef broth
  • 2 cups of elbow noodles
  • 2 cups of shredded cheddar cheese
Directions:
  1. Heat a large skillet over medium-high heat and brown 1 lb of ground beef with chopped onion. Season with salt, pepper, cumin, paprika, chili powder, and onion powder. Once the beef is fully cooked, drain any extra grease from the skillet.
  2. Add 1 tbsp of minced garlic and stir well. Add the diced tomatoes, chili beans, tomato sauce, beef broth, and elbow noodles to the skillet. Stir everything together well.
  3. Bring the skillet to a quick boil and then turn the heat down to low. Cover with a lid and cook for about 12 minutes stirring once or twice to keep the elbow noodles from sticking.
  4. Once the pasta is cooked add 2 cups of shredded cheddar cheese, stir, and serve. Enjoy!
Marsha's Notes:
Chris doesn't like beans, so one time we substituted a can of corn for the beans, and it turned out good. But for those of us that like beans, we will certainly have it that way from time to time as well. I did drain the corn.
Also, if the noodles soak up all the liquid before the cooking is done, just add a little water to the pan.

Monday, December 9, 2024

Easy Beef Stroganoff

Saw this recipe on TikTok and decided to try it out as an easier version of beef stroganoff with ground beef instead of stew meat. Everyone liked it just fine, but also agreed that my Instant Pot recipe is a bit better. But it's nice to have options for the different meats you may or may not have on hand. 

Here is the link to my Instant Pot recipe: https://1brother2sisters.blogspot.com/2021/02/ultimate-beef-stroganoff-instant-pot.html

Here is the link to the original "Easy Beef Stroganoff" by Cooking in the Midwest: https://cookinginthemidwest.com/blog/beef-stroganoff-recipe/#recipe


Easy Beef Stroganoff

Ingredients:

  • 1 lb ground beef
  • 1 chopped onion
  • 1/2 tsp each of salt and pepper
  • 1 tsp each of Italian seasoning and onion powder
  • 1 TBSP minced garlic
  • 2 TBSP Worcestershire sauce
  • 3 tbsp butter
  • 3 tbsp flour
  • 2 cups beef broth
  • 1 cup sour cream
  • 10 oz medium egg noodles
  • Fresh or dried parsley

Directions:

  1. Heat a large pot of water on the stove and cook egg noodles according to the directions on the package.
  2. Heat a large skillet over medium high heat. Add one pound of ground beef and a chopped onion. Season with salt, pepper, Italian seasoning, and onion powder. Once beef is cooked drain any extra grease.
  3. Turn the heat down to medium. Add 1 tbsp of minced garlic and 2 tbsp of Worcestershire sauce. Stir everything together well. Add 3 tbsp of butter to the skillet. Once the butter is melted add 3 tbsp of flour. Stir together and let cook for at least one minute.
  4. Next, add 2 cups of beef broth and stir well. Let this continue cooking until it thickens. Once the mixture has thickened remove the skillet from the heat and stir in 1 cup of sour cream. Add the cooked egg noodles and stir everything together well. Top with some fresh or dried parsley and serve!

Monday, September 30, 2024

Deconstructed Lasagna

One of my friends told me how she makes an easy, lasagna-type dish, but with a lot less work. We tired it out, and I really enjoyed it. My favorite part about it, besides that it's a bit less work than traditional lasagna, was the delicious cheese-layer that gets sandwiched between the noodles-sauce-meat layer. Enjoy!


Deconstructed Lasagna

Ingredients:

  • 1 lb ground meat (our favorite blend is 1/2 hamburger 1/2 Italian sausage)
  • 48 ounces spaghetti sauce (2 cans Hunt's)
  • 1 pkg (1 lb) bite-sized noodles
  • 1 regular container ricotta (about 15 ounces)
  • 2 eggs
  • 2 cups shredded mozzarella, divided
  • 1/2 cup parmesan, divided
  • 1 Tbl Italian seasoning

Directions:

  1. Preheat oven to 350 degrees.
  2. In a large pan, brown your meat and drain any excess fat. Add your spaghetti sauce and let heat-through to a gentle simmer.
  3. In a large pot, bring water to a boil and cook your pasta about half way done (in the above picture, we did a box of the mini bowtie pasta that usually cooks for about 7 minutes, so we did 4 minutes). Drain and add to your meat/sauce mixture (depending on the size of your pots/pan, you may need to transfer to a larger bowl).
  4. In a large bowl, mix together your container of ricotta, 2 eggs, about a cup of mozzarella, a 1/4 cup parmesan and your Italian seasoning.
  5. In a greased deep-dish casserole, layer 1/2 your meat mixture, then all of the ricotta mixture, followed by the rest of your meat mixture.
  6. Top with remaining cheese and cover with lid or foil.
  7. Bake for 30-45 minutes or until the internal temperature reaches about 160 degrees.
  8. Remove foil/lid and broil for a couple of minutes until the top cheese gets a golden crust.

Marsha's Notes:

All of the ingredients in this recipe are adjustable and approximate. I thought two cans of Hunts sauce was the perfect amount, but you might like more or less or a different kind. I just eye-balled the Italian seasoning so 1 Tbl is my best guess, and I did the same with all the shredded cheeses, just adding about what I thought looked good.

I used my deep-dish blue casserole dish and I think this worked out perfectly because it allowed me to make a nice thick layer with the ricotta. If I had used a 9x13 dish, I think the ricotta would have been too spread out to make much of a layer... and cutting into the luscious ricotta was one of my favorite parts of this dish. 

The amount of time the casserole will be in the oven will also depend on the type of dish you use. If you layers aren't very thick, it will heat everything through much faster. To get it just right, I used a digital thermometer. However, you can also just bake it until the sides are bubbly and the cheese seems melted.

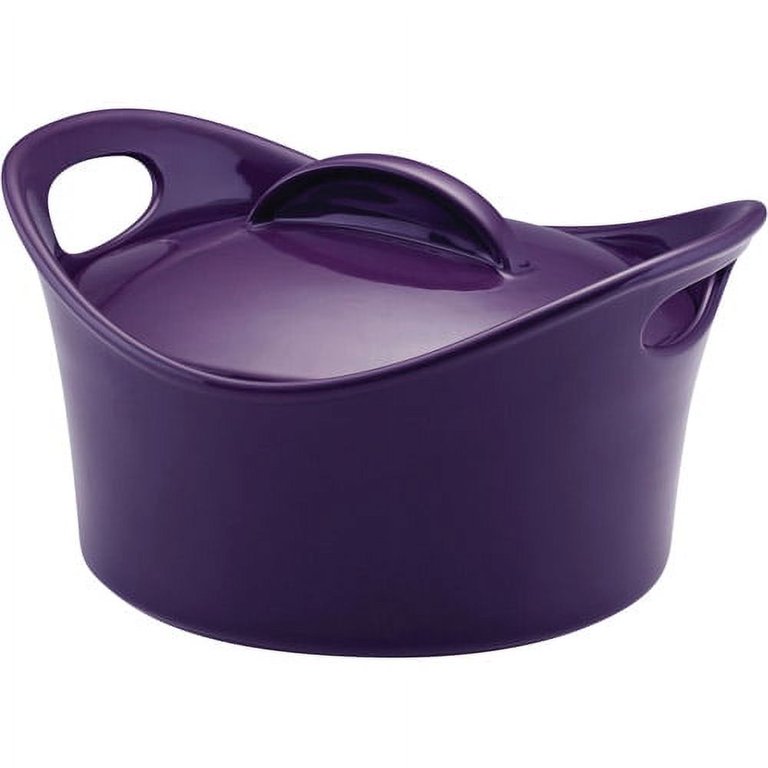
For reference, here is a picture of a Rachel Ray stoneware 2.75 quart casserole dish (mine is blue, but this one is purple). These are discontinued, but you can use any similar dish you have. Just know that your layers might be different than mine and your cooking times will vary.


I have used this recipe as a Souper Cubes recipe, layering everything in the individual freezing trays and then freezing it instead of baking it... but I do think it requires extra sauce to keep things saucy during the eventual thawing and baking.

Wednesday, September 25, 2024

Taco Tater Tot Casserole

So, I actually really kind of liked this dish, even though I am not a huge tater tot fan. Sometimes, you just need something different in your typical ingredient rotation, so I gave this a try. You can eat it as is, or Chris liked wrapping it up in a tortilla like a burrito, and William put it on chips. Scott really liked the Southwest Ranch sauce. 

Find the original recipe here: https://cookinginthemidwest.com/blog/taco-tater-tot-casserole/#recipe

I wasn't sure if this recipe would fit in my cast iron skillet, so I just used a casserole dish. 

Taco Tater Tot Casserole

Ingredients:

  • 1 lb ground beef or turkey
  • 1 chopped onion
  • 1/2 tsp each salt and pepper
  • 1 tsp each of cumin dried cilantro,
  • 2 tsp chili powder
  • 1/4 tsp cayenne
  • 1 can corn drained
  • 1 can Rotel Diced Tomatoes & Green Chiles not drained
  • 1 cup sour cream
  • 2 cups shredded Colby Jack Cheese
  • Tater Tots or Crispy Crowns
  • Buffalo Wild Wing’s Southwest Ranch

Directions:

  1. Brown one lb of ground beef with a chopped onion in a skillet over medium high heat. Once browned drain grease and season with salt, pepper, cumin, dried cilantro, chili powder, and cayenne. You could use a taco seasoning packet instead of these seasoning if you would rather do that.
  2. Add one can of drained corn, one can of Rotel (not drained), 1 cup sour cream, and about 1 cup of shredded Colby Jack cheese. 
    • Optionally, you can add a can of drained and rinsed beans to this as well, or any other taco ingredients you like.
  3. Stir everything together well. Top with one more cup of shredded cheese.
  4. Top with tater tots or the crispy crowns. I didn’t use the whole bag. Bake at 400 degrees for about 30-35 minutes or until the tater tots are cooked to your liking.
  5. Top with Buffalo Wild Wing’s Southwest Ranch. Enjoy!
Marsha's Notes:
This worked well as a Souper Cubes recipe.

Made and ready to freeze.

Out of the oven.

I added some sour cream and crushed taco chips to mine. It would also have been good with any other taco toppings you enjoy, like shredded lettuce, olives, salsa, etc.

Saturday, September 14, 2024

Cheesy Pizza Tortellini

This recipe was a hit with my family. The only thing I would do different from the original recipe is next time we would add some extra cheese to the pasta/sauce/noodle portion of the dish, instead of putting all the cheese on the top. So this will be our version of this. The guy who originally posted this on TikTok was doing a "griddle" version of this, but he also does a skillet version. See the original skillet recipe here: https://cookinginthemidwest.com/blog/pizzatortellini/#recipe


Cheesy Pizza Tortellini

Ingredients:

  • 1 lb ground beef or Italian sausage (we like a 1/2 and 1/2 blend)
  • 1 24 oz jar of marinara sauce
  • 19 oz frozen tortellini
  •  mini pepperoni slices
  • regular pepperoni slices
  • Shredded mozzarella cheese
  • parmesan cheese
  • See recipe instructions for additional optional ingredients you may want to add.

Directions:

  1. Bring a large pot of water to a boil and then add your frozen tortellini. Cook as per package directions, drain and set aside.
  2. Brown your mini pepperonis in a large pan/skillet. Once crispy, remove from heat and drain on a paper towel.
  3. In the same pan, brown ground beef/Italian sausage in a skillet over medium high heat and season with salt, pepper, onion powder, and Italian seasoning if desired. Drain any excess grease. If you wanted to, you could also throw in some chopped onion (and/or peppers) to cook and soften along with your ground meat.
  4. If desired, near the end of browning your ground meat, you can throw some extra minced garlic into the pan, like one big spoonful.
  5. Add your browned mini pepperonis back to the pan, along with your jar of marinara sauce. This would also be a great time to add 1/2-1 block of cream cheese. Stir and heat through until combined and bubbly.
  6. Add your cooked tortellini and stir to combine, along with a handful of whatever cheese you would like to be in the middle of your dish (like a handful of mozzarella and a sprinkling of grated parmesan.
  7. Pour everything into a large casserole dish sprayed with nonstick spray.
  8. Cover the entire dish with a nice layer of mozzarella cheese, and then top with your regular sized pepperonis.
  9. Bake in the oven until bubbly and cheese is melted, then broil in the oven until the top layer of cheese and pepperoni is golden and crispy.

Wednesday, September 4, 2024

Garlic Bread Sloppy Joe's

We had this for dinner last night, and we really enjoyed it. The original recipe is from here: https://cookinginthemidwest.com/blog/sloppy-joe-garlic-bread/#recipe but I think the next time I make these, I will probably do less Worcestershire sauce (maybe none at all) and instead bump up the BBQ sauce. I also did enough chopped onion that I didn't feel the need to put the full recommended amount of onion powder. Just notes for next time. 

Garlic Bread Sloppy Joe's

Ingredients:

  • 1 lb ground beef
  • 1 chopped onion
  • 1/2 tsp each of salt pepper,
  • 1 tsp onion powder and paprika
  • 1 TBSP minced garlic
  • 1-2 TBSP Worcestershire
  • 1 8 oz can of tomato sauce
  • 1/4 cup of ketchup
  • 1 TBSP of mustard
  • 2 TBSP of BBQ sauce
  • Shredded cheddar cheese
  • 1 8 count box of garlic bread toast

Directions:

  1. Bake garlic bread in the oven following the directions on the package. I use a box that has an 8 count.
  2. Brown ground beef and onion in a skillet and add all seasonings.
  3. Add minced garlic, Worcestershire, tomato sauce, ketchup, mustard, and BBQ sauce.
  4. Let simmer on low for about 5 minutes.
  5. Add sloppy joe mix on top of the baked garlic bread.
  6. Add shredded cheddar cheese on top and put them back in the oven to melt the cheese.

Tuesday, October 3, 2023

Crunch Wrap Casserole

 I saw this recipe and had to try it! Our family loves crunch wraps, so the convenience of making one giant pan to share was just too good to pass up. While everyone agreed that getting your own personal crunch wrap is still better, this option is still a hundred times better than no crunch wrap at all. We also ended up probably eating fewer calories taking a pieces of the casserole rather than eating one giant tortilla all by ourselves, so there's that.


First layer (beans) topped with tostadas.

Second layer (meat) topped with cheese

Folded up and ready to bake!

Crunch Wrap Casserole

Ingredients:

  • jumbo tortillas
  • taco mean
  • refried beans
  • nacho cheese
  • shredded cheese
  • taco toppings

Directions:

Butter a 9x13 pan. Then place an even layer of tortillas into the pan, allowing about half or so to flop out of the dish (make sure bottom is completely covered, even if tortillas overlap some). Spread tortillas with an even layer of the desired amount of refried beans and nacho cheese. You could also add some canned black beans or pinto beans here for texture. Top with an even layer of tostadas, broken up to fill the gaps. Top your tostadas with your taco meat mixture and a layer of cheese. You can also add any other filling ingredients that you want that can withstand going in the oven. Fold over your tortillas to encase the filled, using additional parts of tortillas if necessary. Brush with melted butter. Bake until golden brown, 350 for about 30 minutes. Cut into large pieces and stop with desired taco toppings (lettuce, tomato, olive, salsa, hot sauce, sour cream, etc.).

Pizza Enchiladas

I saw this recipe on Tiktok and had to try it. The guy called it pizza enchiladas, and everyone really liked it!

Pizza Enchiladas
Ingredients:
  • 1 lb hamburger or sausage
  • couple handfuls of pepperonis cut in half
  • 1/4 cup or so of pizza sauce
  • 1/4-1/2 cup ricotta cheese
  • sprinkling of Italian seasoning
  • 1/2 cup shredded mozzarella cheese or so
  • Any other pizza toppings you like
  • Tortillas
  • 1 jar pizza sauce
  • Mozzarella cheese to top
  • Mini pepperonis to top
Directions:
  1. Brown your hamburger or sausage. A few minutes before it is done, add your cup-up pepperonis. Remove from heat. Add about a 1/4 cup of pizza sauce, ricotta, Italian seasoning, about a 1/2 cup mozzarella and any other toppings you like on your pizza. Stir to combine. This is your filling, so if you think it needs more sauce or cheese or whatever, add it now.
  2. Roll up the filling in tortillas and place in a baking dish. Top with more sauce, cheese and mini pepperonis to decorate. Bake at 350 until everything is hot and melty.
  3. I used three JUMBO tortillas that we had leftover from making homemade crunch wraps and it filled the pan perfectly. Everyone got 1/2 an enchilada and it was plenty.

Cheeseburger Soup (Optionally Spicy)

My friend told me how she was making cheeseburger soup for dinner and I was like, "Do share!" Her family likes things spicy, but we did a much less spicy version. Either way, it's a great, easy recipe.

See the original here: https://www.tasteofhome.com/recipes/spicy-cheeseburger-soup/?fbclid=IwAR2Hevxdn6QEhnFtTQYEVhYf9NwuHROEjoPaOxqpsaponex53g2VxiuyZK0


Cheeseburger Soup
Ingredients:

  • 1-1/2 cups water
  • 2 cups cubed peeled potatoes
  • 2 small carrots, grated
  • 1 small onion, chopped
  • 1 garlic clove, minced
  • 1 tablespoon beef bouillon granules
  • 1/2 teaspoon salt
  • 1 pound ground beef, cooked and drained
  • 3-1/2 cups 2% milk, divided
  • 3 tablespoons all-purpose flour
  • 16 ounces cubed Velveeta
  • 1/4 teaspoon cayenne pepper, optional
  • 1/2 pound sliced bacon, cooked and crumbled
Directions:
  1. In a large saucepan, combine the first 7 ingredients; bring to a boil. Reduce heat; cover and simmer for 15-20 minutes or until potatoes are tender.
  2. Stir in beef and 2 cups milk; heat through. Combine flour and 1/2 cup milk until smooth; gradually stir into soup. Bring to a boil; cook and stir for 2 minutes or until thickened and bubbly. Reduce heat; stir in cheese until melted. Add remaining milk if needed to get the right consistency.
  3. Add cayenne pepper if desired. Top with additional bacon and shredded cheese when serving, if desired.
Marsha's Notes:
I cooked my onion along with my ground beef until done. Just before it was done, I added in my chopped, precooked bacon (1 package of the precooked stuff) and my minced garlic, just to heat through and crisp up the bacon and cook the garlic for just a minute. Then I took that off the heat and put it in a different bowl. Returning the pan to the heat, I then followed the directions pretty much as stated, using frozen cubed potato hashbrowns and pre-shredded carrots. Be careful with your cayenne! We opened a new bottle for this recipe, and just a small sprinkling into the pot brought a lot of heat. If you want it spicier, the original recipe calls for 1 chopped jalapeno and 1/4 cup chopped green pepper.

Saturday, March 18, 2023

Pressure Cooker Lasagna Soup

Lately, we have been taking dinner to Scott's mother every Wednesday night, and so I have been on the lookout for lots of recipes that are easy to travel with, like Crock Pot or Instapot. This week's recipe was this lasagna soup, and everyone really liked it, even Lucas, who doesn't like ricotta cheese (he was okay with it because it was a topping so he could put as much or as little on as he liked). Here is the link to the original recipe:

https://www.melskitchencafe.com/pressure-cooker-lasagna-soup/


Pressure Cooker Lasagna Soup

Ingredients:

  • 1 pound ground Italian sausage or ground beef
  • ½ cup finely chopped yellow or white onion
  • ½ cup diced carrots, about 2 medium carrots
  • 2 cloves garlic, finely chopped or pressed through a garlic press
  • 3 cans (15-ounces each) crushed tomatoes
  • 1 teaspoon dried basil
  • 1 teaspoon dried oregano
  • 1 dried bay leaf
  • ½ teaspoon salt, I use coarse, kosher salt
  • Pinch of black pepper, I use coarsely ground
  • 6 to 8 cups chicken broth, I use low-sodium (see note)
  • 8 to 12 ounces (3-4 cups) bowtie or rotini pasta or broken lasagna noodles (see note)

Cheese Topping:

  • 1 cup ricotta cheese or blended cottage cheese
  • 1 cup mozzarella cheese, plus more for serving
  • ½ cup freshly grated Parmesan cheese
  • ½ teaspoon dried basil
  • Pinch of salt and pepper

Directions:

  1. For the cheese topping, stir together all the ingredients until well combined. Refrigerate until ready to serve.
  2. For the soup, select the sauté function on the pressure cooker and cook the sausage or ground beef, onion, carrots, and garlic, for 2-3 minutes, until the meat is no longer pink, breaking the meat into small pieces as it cooks. Drain any excess grease.
  3. Add the crushed tomatoes, basil, oregano, bay leaf, salt and black pepper. Stir well, making sure to scrape up any cooked bits on the bottom of the pot.
  4. Add 6 cups of the chicken broth and the pasta and stir to combine. Give the bottom of the pot another good scrape (otherwise any cooked food on the bottom of the pot may alert the burn warning when the pressure cooker comes to pressure).
  5. Secure the lid and set the pressure cooker to cook on high. Use this formula for the cooking time (and read the note below): take the al dente cooking time on the pasta package, cut the time in half and subtract two more minutes. For instance, for pasta that cooks al dente in 12 minutes, the pressure cooker time will be 4 minutes. Round up for 1/2 minutes.
  6. When the cooking time is finished, let the pressure naturally release for 10-15 minutes (otherwise liquid may spurt out of the valve when releasing pressure). Manually release remaining pressure or let it naturally release all the way (pasta will be a bit softer if doing this since it will continue to cook a little as the pressure naturally releases).
  7. Stir the soup and add additional chicken broth to thin, if needed (I add about 1 to 2 additional cups). Serve the soup in bowls with spoonfuls of the cheese topping and additional mozzarella or Parmesan cheese on top.
Marsha's Notes:
  • I didn't add the garlic to the beef right away, as I have heard over and over again that if you cook garlic too long (or burn it) that it will turn bitter, so I added my garlic to the pot the last couple minutes that the beef was browning. It also took me a lot longer than 2-3 minutes to cook the meat, even with the sauté function on high.
  • Initially, the soup seemed the perfect consistency right after it was done cooking. Then, by the time we took it across town to Scott's Mom's house, and everyone ate what they wanted, and then we brought the leftovers home, the noodles had absorbed so much of the liquid in the soup that we were really just left with pasta and sauce, like spaghetti instead of soup. That's okay. It still tastes delicious, but if you want it to remain "soup" then you might want to add the extra liquid suggested in the recipe, either right away, or just a little bit to each bowl when you reheat it as leftovers.

Tuesday, January 31, 2023

Taco Hamburger Skillet

 I saw this recipe for basically homemade Hamburger Helper, only this is like the taco version with pasta instead of rice. You could easily use rice if you preferred, but our family enjoyed the pasta just fine. I also thought that if I wanted to sneak more veggies or filler into my kids, some corn or beans might be a good addition to this dish. See the original recipe here:

https://www.sixsistersstuff.com/recipe/cheeseburger-macaroni-my-kids-favorite/


Taco Hamburger Skillet

Ingredients:

  • 1 lb ground beef
  • 1 packet taco seasoning or about 1 ounce
  • 1 can diced tomatoes with green chilis such as a 10 ounce can of Rotel
  • 2 cups beef broth
  • 1 cup elbow macaroni
  • Optional- canned corn or beans
  • Toppings- lettuce, tomato, sour cream, cheese, taco chips, or any of your favorite taco-type toppings.
Cheese Sauce:

  • 2 Tbsp butter
  • 2 Tbsp flour
  • 3/4 cup milk
  • 1 cup shredded cheddar cheese
  • 1/2 tsp salt
  • 1/4 tsp ground pepper

Directions:

  1. Brown ground beef and drain grease.
  2. Stir in taco seasoning, tomatoes, beef broth, and macaroni and bring to a boil. Reduce heat and cover pan. Simmer 12-14 minutes until macaroni is tender.
  3. Melt the butter in a small saucepan.
  4. Whisk in the flour and cook, whisking for 2-3 minutes until it becomes fragrant and starts to turn a light brown color.
  5. Whisk in the milk and bring to a boil. Whisk until smooth and mixture starts to thicken. Remove mixture from heat and stir in the shredded cheddar cheese until melted. Add the salt and pepper to the cheese sauce.
  6. Pour the cheese sauce over the hamburger mixture. Stir gently to combine.
Marsha's Notes:
It would be really easy to add just about anything to this that you thought would be good, like onion  or peppers when browning the meat, any kind of beans you like, corn or maybe peas and carrots. You can eat it as is, or top with any additional taco toppings once served. You can also swap the pasta for rice for a more authentic Taco Hamburger Helper feel, but it may require an adjustment to the liquids in the recipe.

Friday, October 22, 2021

Marsha's Salisbury Steak and Gravy

I got this recipe originally from Six Sister's Stuff, but with an entire fresh packet of French Onion Soup, it was a little too onion-y for William and I. A few days later, I made it again omitting the soup and it was much blander. So I think the sweet spot for our family is going to be 1/2 a packet. We also tried it with homemade gravy and jarred gravy and it was fine either way. So if all you have is the jar stuff, or if you want to whip up a dry packet mix of beef gravy, if you usually like that kind of gravy you will be just fine. See the original recipe here: 

https://www.sixsistersstuff.com/recipe/salisbury-steak


Marsha's Salisbury Steak and Gravy

Ingredients:

  • 1 pound ground beef
  • 1/4 cup Italian bread crumbs
  • 1/2 of 1.4 ounce dry French onion soup mix
  • 1 egg beaten
  • 2 Tablespoons water
  • 1 12 ounce jar beef gravy, or one packet dry gravy mix prepared according to package directions

Directions:

  1. Mix together the ground beef, bread crumbs, french onion mix, egg and water.
  2. Shape the mixture into 4 oval-shaped patties, about 1/2 inch thick.
  3. Spray a large skillet with cooking spray and warm up over medium heat.
  4. Add the patties to the skillet and cook for 10 minutes on each side or until no longer pink in the middle (unless you like pink...).
  5. Drain the grease from the skillet, and then add in the jar of gravy.
  6. Continue to cook in the gravy, covered, for 10 more minutes or until hot and bubbly, flipping halfway through.

Monday, April 19, 2021

Classic Minestrone Soup Crock Pot

We had this for dinner tonight and everyone ate their entire bowls. I did leave out the green beans, but that is just a personal preference. Chris will eat it, even with the white beans. (Chris doesn't typically like to eat beans.) You can also up the protein in this recipe by adding some cooked ground beef. To see the original recipe, go here:

https://www.melskitchencafe.com/classic-minestrone-soup/

Classic Minestrone Soup Crock Pot

Ingredients:
  • 1 tablespoon olive oil 
  • 1/2 cup finely chopped onion 
  • 3/4 cup chopped celery, about 2-3 ribs celery 
  • 3/4 to 1 cup chopped carrots, about 2-3 medium carrots 
  • 3 cloves garlic, finely minced or 1 teaspoon garlic powder 
  • 1 teaspoon dried basil 
  • 1 teaspoon salt 
  • 1/2 teaspoon dried oregano 
  • 1/4 teaspoon black pepper 
  • 28-ounce can crushed tomatoes 
  • 6 cups chicken or vegetable broth (48 oz. boxed broth)
  • 15-ounce can white beans, rinsed and drained (Great Northern white beans are about the same size as pinto beans, FYI)
  • 1 cup small pasta, like shells, ditalini or elbow
  • Sprinkling garlic salt to taste 
  • Parmesan cheese, for serving
Directions:
  1. In a large frying pan, heat the olive oil over medium heat and add the onion, celery and carrots. Cook, stirring occasionally, until everything starts to soften and get a touch of color. Add garlic the last couple of minutes. 
  2. Add the crushed tomatoes and chicken broth to your Crock Pot. Stir in basil, salt, oregano and black pepper. When ready, add your onions, carrots, celery and garlic from the frying pan into the Crock Pot. 
  3. Stir in the beans and cook on low all day. 
  4. About 20 minutes before you want to eat, boil the pasta and add to the soup. Season to taste with garlic salt. Serve with Parmesan cheese, if desired.
Recipe makes 8 servings:
Serving: 1 serving, Calories: 197kcal, Carbohydrates: 35g, Protein: 10g, Fat: 3g, Saturated Fat: 1g, Sodium: 1091mg, Fiber: 7g, Sugar: 7g

Friday, February 12, 2021

Amazing Instant Pot Creamy "Baked" Ziti

When I saw this yummy looking Instant Pot pasta, I just had to try it. The end result was good, but turned out a little dry for us with slightly bloated noodles, so don't be tempted to up the cooking time because it seems too short. Cook exactly as recommended in the recipe (at least the first time you try), and different shapes and kinds of pasta might also make a difference. But that being said, we all liked it and ate it right up. To see the original recipe, go here: https://www.melskitchencafe.com/instant-pot-creamy-baked-ziti/

Update: We make sure to now use a really sturdy noodle and do the timed pressure cook for about 3 minutes, and it seems to work out really well.


Amazing Instant Pot Creamy "Baked" Ziti

Ingredients:

  • 2 cups broth, or 1 can (15 oz)
  •  2 cups cream, or 1 pint (see note for lightened up substitutions)
  •  1/2 teaspoon salt
  •  1/4 teaspoon black pepper
  •  2 cloves garlic, finely minced (or 1/2 teaspoon garlic powder)
  •  16 ounces uncooked ziti pasta or other tube-shaped pasta
  •  15-ounce can crushed tomatoes
  •  1 1/2 teaspoons dried oregano
  •  1 1/2 teaspoons dried basil
  •  1/2 to 1 cup freshly grated Parmesan cheese
  •  Fresh basil, for serving (optional)

Directions:

  1. Lightly spray the bottom and sides of a 6-quart Instant Pot with nonstick cooking spray. Pour in the broth and cream and add the salt, pepper and garlic.
  2. Add the pasta; don't stir, but if it's mounded in the center, arrange into an even layer. Pour the crushed tomatoes evenly over the pasta and sprinkle the oregano and basil over the top. Don't stir. Just push the noodles down into the liquid to get them semi-covered in some kind of sauce as best you can.
  3. Secure the lid of the Instant Pot, set the valve to seal, and select "manual" or "pressure cook" and dial up or down to the minutes needed --> take the cooking time on the pasta package directions, cut it in half and subtract two more minutes. So for pasta that cooks to al dente in 12 minutes, the IP cooking time would be 4 minutes (add an extra minute if you like your pasta super soft). Marsha's note: I do 3 minutes for a typical bite-sized pasta.
  4. Let the pressure release naturally for 10 minutes and then quick release the remaining pressure. Add the Parmesan cheese and stir thoroughly (it's ok if there are some darker, cooked spots on the bottom of the pot/bottom layer of pasta). Serve the ziti immediately with chopped, fresh basil, and additional Parmesan, if desired.
Author's Notes:

Optional: adding a pound of ground beef or Italian sausage is fantastic with this recipe! Cook the meat on the sauté function with a little salt and pepper, drain the grease, and proceed with the recipe (just make sure when you add the broth to scrape the bottom of the pot really well before adding the other ingredients).

Lighten it Up: If you want to lighten up the cream a bit, I've had great success making this with 1 cup milk + 1 tablespoon cornstarch (whisked together) + 1 cup cream. I haven't tried subbing all the cream for a milk + cornstarch mixture, but you could experiment!

For an Extra Saucy Pasta: add 1/4 to 1/2 cup extra broth, cream or crushed tomatoes. Any variety of tube pasta will work great here! When I can't find ziti, I've used penne or rigatoni. Also, I've subbed in a 15-ounce can diced tomatoes blended with 2 tablespoons tomato paste for the crushed tomatoes with great results.

Saturday, July 18, 2020

Marsha's Stuffed Hamburgers

*This is a low carb option if you don't use a bun.

We had our biggest success this 4th of July with making stuffed hamburgers, so I wanted to document my process for next time so I can recreated and even improve my recipe. So here goes!


Marsha's Stuffed Hamburgers
Ingredients:
  • hamburger patties (and buns and desired toppings)
  • salt
  • pepper
  • Worcestershire sauce
  • 1 egg, beaten for a wash
  • filling (we used bacon bit, shredded cheese and blue cheese)
Directions:
  1. I thawed two pre-made hamburger patties for each burger that I was going to serve. 
  2. Then, I seasoned the underside of the bottom patty with a sprinkling of salt and pepper then flipped them over for stuffing. 
  3. I sprinkled the top of each patty with a little Worcestershire sauce and then brushed the top with a light coating of egg wash to help the burgers seal. 
  4. I put a small pile of topping/stuffing in the center of each patty (not too much, so it will seal... maybe a 1/4 cup on each). 
    1. Our "toppings" were a mixture of cooked chopped bacon with either shredded cheddar or blue cheese crumbles. 
    2. For a creamier finish, Krystal suggested we use small cubes of Velveeta or chunks of American cheese slices instead.
  5. Then I topped each burger with the other thawed patty, pinched the sides and sealed the burgers as best I could and sprinkled the top with more salt and pepper. Brush the edges with extra egg wash if you have it to help them seal.
  6. Cook on the grill until done, being careful not to press down on the burgers, which could force all the stuffing to squeeze out.
These made HUGE, VERY MEATY burgers, but nothing leaked out, which has always been a problem in the past. I think the light egg wash really helped to keep the stuffing in place and I personally think that the pre-made factory patties hold together and keep their shape better than a hand-pressed home-made patty.

Yum, yum!!!! Certainly a 4th of July splurge.

Season burgers with seasoning and Worcestershire sauce.

Brush with egg wash.

Add filling.

Place top patty over the filling and pinch to seal the edges.

Monday, May 11, 2020

Old Fashioned Goulash

I wanted to try this as a homemade alternative for Hamburger Helper! It turned out pretty good and I think it would be easy to modify for other versions.


Old Fashioned Goulash

Ingredients:
  • 2 lbs ground beef or turkey
  • 3 tsp minced garlic
  • 1 large Yellow onion, diced
  • 2 1/2 cups water
  • 1/2 cup beef broth
  • 1/3 cup olive oil
  • 2 (15-ounce) cans tomato sauce
  • 2 (15-ounce) cans diced tomatoes
  • 1 T Italian seasoning
  • 1 T Adobo Seasoning (see recipe here)
  • 3 bay leaves
  • 1/2 T seasoned salt
  • 1/2 T black pepper
  • 2 cups elbow macaroni, uncooked
  • 1 cup shredded Mozzarella Cheese
  • 1/2 Cup Shredded Cheddar Cheese
Directions:
  1. In a large pan, saute your ground meat in skillet over medium-high heat until HALF cooked, remove from heat.
  2. Add garlic, onions, olive oil & until meat is fully cooked.
  3. Add water and broth, tomato sauce, diced tomatoes, italian seasoning, bay leaves, and seasoned salt, pepper and adobo seasoning. Mix well.
  4. Lower heat and cover - allow to cook for about 20 minutes, stirring occasionally.
  5. Add in the uncooked elbow macaroni to the skillet, stir well until everything is combined
  6. Cover once again and allow to simmer for about 30 minutes
  7. Once cooked, remove the bay leaves
  8. Add only the cheddar cheese and mix until combined
  9. Add mozzarella right before serving
  10. ENJOY!

Wednesday, April 22, 2020

Tin Foil Dinners

*This recipe is low-carb if you omit or sub the potatoes.

One of our favorite things to do in the fire pit is make tin foil dinners and s'mores, but we don't always remember exactly how we do it every time, so I wanted to make some notes here for the perfect foil dinner.


Marsha's Tin Foil Dinner

Ingredients:
  • hamburger
  • potatoes
  • carrots
  • cream of chicken soup
  • salt
  • pepper
  • garlic salt
  • BBQ sauce
  • heavy duty tin foil
Directions:
  1. Put a serving of hamburger on a large piece of tin foil sprayed with non-stick spray. 
  2. Depending on that flavor you are going for, season with salt, pepper, and garlic salt and top with BBQ sauce. 
  3. Pile your diced carrots and potatoes over the top of your meat. 
  4. Season again and top with several spoonfuls of cream of chicken soup. 
  5. Wrap the entire thing up in the foil, then foil again with two more pieces. 
  6. Place over hot coals and cook for about 45 minutes, depending on the size of the dinners.
We have also added cheese, corn, onions to ours. But you can add anything you like. I love to add sour cream and more cheese to the top after it is done cooking. The cooking time can vary depending on the size of the dinner, the thickness of the foil packet, and how small you diced the veggies.

Things to try: I want to remember to try this with chicken some time.

Krystal has also made this recipe in a Crock Pot by putting in the raw beef, veggies, soup, etc. and letting it cook for 4 hours on High (approximate) or 6 hours on low. She used about a pound of beef (raw but broken up in the pots) and two cans of soup and her desired amount of everything else. 

Monday, February 17, 2020

Empanadas (Paraguay)

Another recipe from Scott's mission.


Beef Empanadas (Paraguay)
Ingredients:
  • ½ lb. ground beef     
  • ¼- ½ lg. onion (1/2 cup), chopped 
  • ¼- ½ lg. bell pepper (1/2 cup), chopped
  • 1 hard boiled egg, chopped
  • garlic, parsley, salt and pepper to taste
  • *12 empanada discs
Directions:
  1. Begin by boiling the egg and preheating the oven to 400 degrees. The egg will take about 15 minutes to be hard-boiled.  Cover the meat with water.  Cook the meat until tender.  Stir it well and break it up into fine bits.  Once cooked, drain the meat and save the stock. 
  2. Fry the vegetables in a very small amount of oil.  Add ½ cup of meat stock.  Boil for 2 minutes.  Add the vegetable/stock mixture to the meat, and boil the whole mixture for 5 more minutes.  Stir in the chopped boiled eggs. 
  3. Put about 1-2 Tbl. of filling into the center of each empanada disc.  Pinch the edges of the disc with a fork.  Spray a cookie sheet with non-stick spray, and bake empanadas for 8-10 minutes, or until they are golden brown.
  4. You can find premade empanada discs in the refrigerated/freezer section of your local Mexican food market.  It is much easier than making them from scratch.  To make from scratch, see the Ham and Cheese Empanada recipe.
Ham and Cheese Empanadas (Paraguay)
Ingredients:
  • 2 cups flour                                                              
  • ¼ cup shortening                                                      
  • ½+ cups water                                                          
  • 8 oz. Velveeta cheese, cubed
  • 1 slice deli ham, 1/2” thick, cubed
  • 6 cups (approx.) oil, for frying
Directions:
  1. Mix flour, shortening and water together until a nice dough forms that you can roll out thinly and cut into discs about 3-4 inches diameter.  
  2. In a saucepan or microwave bowl, melt cheese and ham together and stir until combined.  Place a spoonful of ham and cheese in the middle of disc, wet and crimp the edges.  
  3. Heat oil to 350 degrees, add empanadas, cook for about 4 minutes or until golden brown.  Makes about 20 empanadas.  
Marsha's Notes:
Dampen and crimp the edges well and don’t overfill to prevent empanadas from coming open in the fryer.  Thinner dough for shells makes them crispier, but if it’s too thin then they come apart easily. It is easier to buy premade empanada discs from your local Mexican market, and you can either bake or fry the empanadas.  Cheese tends to expand when hot, so if baking, try poking a set of holes in the top of the empanada to vent and keep it from breaking open.